How to Change a Drive Name on Windows 11

By changing a drive name on Windows 11, you can make it easier to describe and identify the purpose of different drives connected to your PC. Here’s how.
If you’re adding a new drive to your Windows 11 system, Windows will automatically assign a default name and drive letter for you to begin using it immediately (in most cases). The drive letter is just a letter, while the name typically defaults to the device’s model or manufacturer.
Changing a drive letter on Windows is easy, but you may also want to change a drive name. You can switch the drive name to make it easier to describe and identify different drives. You can assign a custom name for each drive that appears in File Explorer.
In this guide, we’ll show you how to change drive names on Windows 11 to make it easier to manage multiple drives on your PC.
How to Change a Drive Name on Windows 11 Using File Explorer
One of the more straightforward ways to change a drive’s name is by using the capabilities of File Explorer. Once you rename the drive, it will retain that label on any other device that you connect it to.
To change a drive name using File Explorer on Windows 11:
- Press Windows key + E to open File Explorer.
- Select This PC in the left column. You can also open This PC from the desktop if you have legacy desktop icons enabled on Windows 11.

- Expand the Devices and drives section (if it isn’t already).

- Right-click the drive you want to change the name of and select the Rename button from the menu.
- Alternatively, you can press F2 to rename the drive.

- Type in a new name for your drive that allows you to identify it more efficiently and press Enter. You can name it whatever you want, provided it doesn’t exceed 32 characters on NTFS formatted drives.


How to Rename a Drive on Windows 11 Using the Properties Menu
In addition to using the File Explorer rename feature, you can use the Properties settings menu to change a drive’s label.
To rename a drive using the Properties menu on Windows 11:
- Press Windows key + E to launch File Explorer.
- Select This PC in the left column.

- Right-click the drive you want to rename and select Properties from the context menu.

- Select the General tab at the top and type in a new name in the top field.

- Click Apply and OK to verify the name change of the drive.

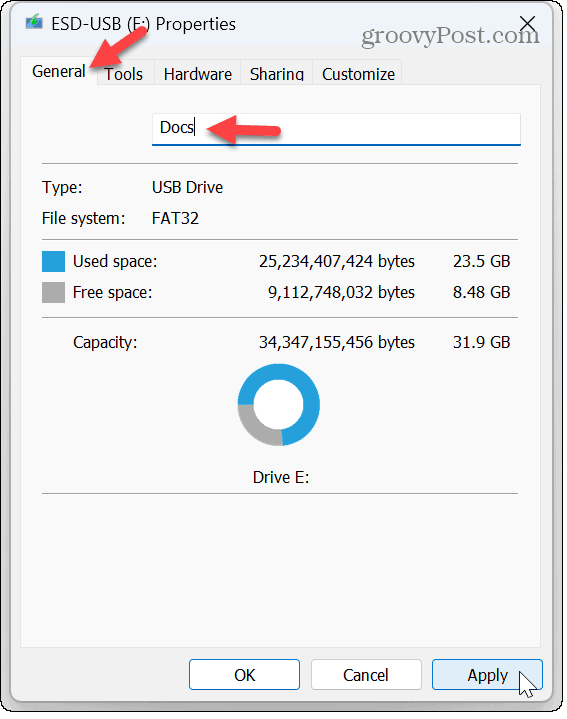
Note: It’s important to mention that there’s a character limit of 11 characters on FAT32 formatted drives.
How to Change a Drive Name on Windows 11 Using Disk Management
You can also use the Disk Management utility to rename multiple drives or partitions on your PC.
To use Disk Management to change a drive name on Windows 11:
- Press Windows key + R to open the Run dialog window.
- Type diskmgmt.msc and click OK or press Enter.

- In Disk Management, right-click on the drive you want to rename and click Properties from the menu.

- Select the General tab at the top of the window and type in the name in the top field.
- Click Apply and OK to complete the name change.


Managing Drives on Windows 11
If you want to change the name of a drive on Windows 11 to make managing them easier, you can get it done using the steps above. Renaming a drive is especially helpful when it has a generic name and you need something that makes it more identifiable.
There are other ways you can manage your drive on Windows 11. For example, to keep your data secure, you can enable system protection for drives or stop access to a drive without removing it by learning to remove a drive letter on Windows 11.
If something goes awry on your Windows system, you will want to create a USB recovery drive to boot from and recover your system. And if your system is slow and there’s too much disk use, check out how to fix 100 percent disk usage on Windows 11.


