How to Block and Unblock Websites on iPhone

If you hand your iPhone to your kid, you might want to manage the sites they visit. So here’s how to block and unblock websites on iPhone.
If you’re a parent and allow your kid to have an iPhone, you might not want to allow access to a specific website or group of sites. In a case like that or something similar, you can block and unblock websites on your iPhone.
It might be an adult-themed website or something else you want to block for other reasons. The ability to block and unblock sites on your iPhone is straightforward and only takes a few taps.
In our example, we’re using an iPhone running iOS 16.1 and using the Screen Time feature.
How to Block and Unblock Websites on iPhone
Screen Time on an iPhone allows you to block specific websites you don’t want someone to access when you hand your phone to them. After blocking a site, the user will get a notification stating that it’s unavailable.
To block a site on your iPhone using Screen Time:
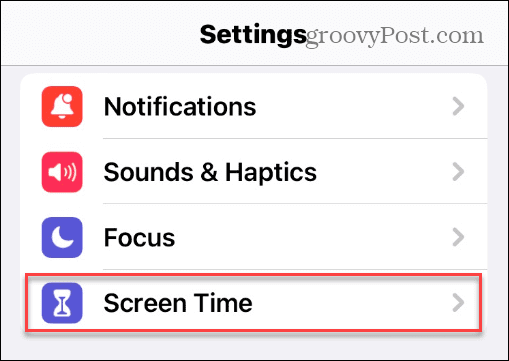
- Open Settings and tap the Screen Time option.

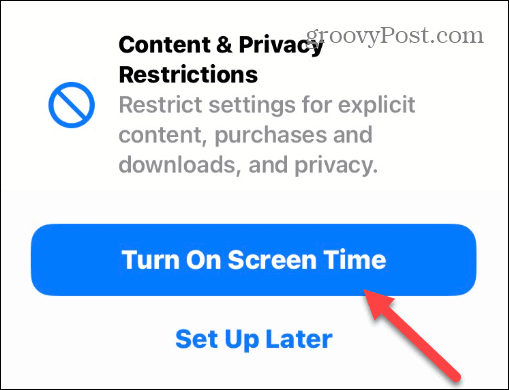
- Tap the Turn on Screen Time button.

- Tap the Turn on Screen Time button when the notification appears.

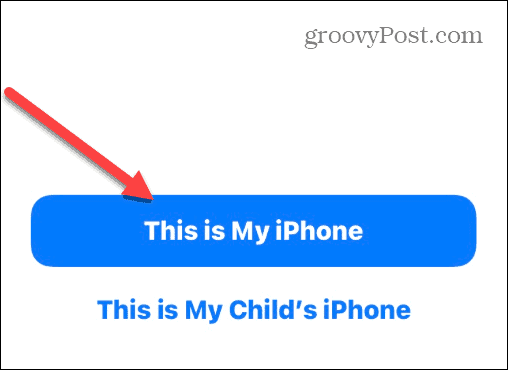
- Choose the This is My iPhone button.

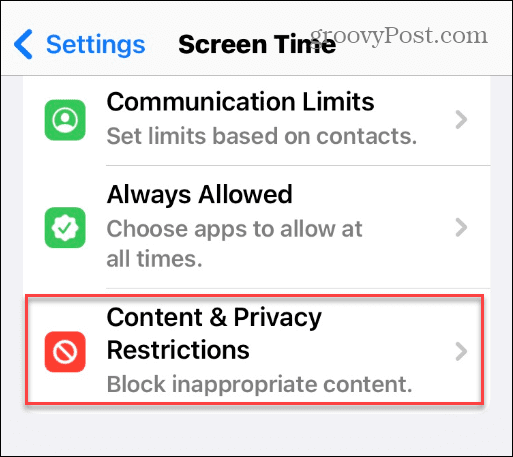
- Select the Content & Privacy Restrictions option.

- Toggle the Content & Privacy Restrictions switch to the On position.

- Tap the Content Restriction option from the menu.

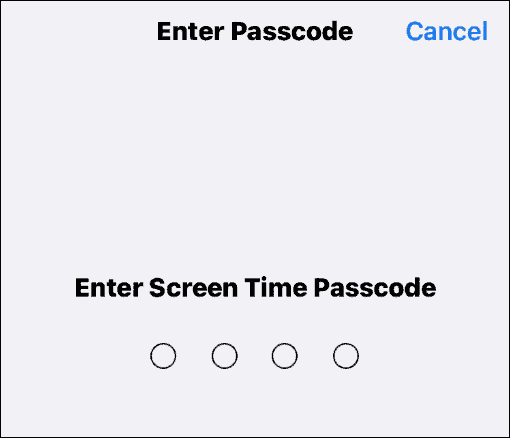
- Type in your Screen Time Passcode.

- Swipe down to the Web Content section and tap the Web Content button. By default, this should say Unrestricted.

- Type in your Screen Time passcode to continue.
- Now, choose the Limit Adult Websites option, allowing you to block a site or allow some through.

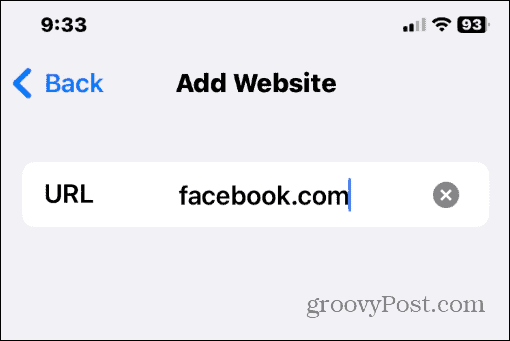
- While this option limits the adult content that appears in browsers installed on your iPhone, you might want to block specific sites or allow some through. Under the Never Allow section, tap Add Website.

- Type in the URL of the website you to block and tap Done on the keyboard.


Configuring Your Screen Time Blocklist
If you want to add more sites to the block list, go to the same spot and add them in. If you want to allow a site later, you can go in and delete it from the Never Allow list.
For example, in the screenshot below, we are permanently blocking Facebook and Twitter and always allowing PBS Kids through.

Also, if you always want to allow a site through, choose the Add Website under the Always Allow section and plug in the URL.
When the person tries to go to the website you block, the page won’t launch. Instead, a splash page telling the person that the page is restricted will display.

It’s also important to note that Safari (and other browsers) will also display an Allow Website link; however, if they tap that link, it will bring up a screen that requires entering your Screen Time passcode. So, you’ll want to make sure the code is private and not easy to guess.
Your kid or other people will need to hand you the phone, so you can decide to unblock the site or keep it restricted.
Using the Screen Time Feature
In addition to blocking websites on iPhone, you can also block access to specific games and apps, Store purchases, explicit language, and more with the Screen Time feature.
Also, it’s important to note that after you enter a site to block using Screen Time, it ends up being blocked across all browsers installed on your iPhone. So, a user can’t bypass a blocked site by using a different browser like Google Chrome or Firefox, for example. The only way to allow a blocked site through is by using your passcode to temporarily allow it through or delete the URL from the blocked content section of Screen Time.
Websites aren’t the only thing you can block on your iPhone. For example, you can block unknown callers to save yourself from spam and other unwanted calls. In addition, you might want to block a contact on your iPhone if you don’t want to hear from someone.
If you do end up getting unwanted calls, you may want to learn how to record calls on an iPhone for potential evidence if needed.


