How to Batch Edit Photos with Photoshop Actions Feature
If you’re a designer or work with a lot of photos, today I’ll show you how to batch edit them with Photoshop with the help of Actions.
Digital imaging has revolutionized photography. Photoshop and Lightroom allow you to achieve results that were just unimaginable a few years back. But it’s no longer about what you can do with the computer for your photography; it’s also about what your computer can do instead of you. Today I’ll show you how to batch edit photos with Photoshop with the help of Actions.
Why this Technique is Useful
While Lightroom is perfect for a simple batch edit like exposure, contrast, white balance, etc., it won’t have you covered when you need something a bit more stylized. That’s where Photoshop comes in. If you need a batch of stylized images to fit a company’s overall vision, this is the perfect solution.

All you have to do is apply your edits to one photo, then let Photoshop repeat the same steps for the rest.

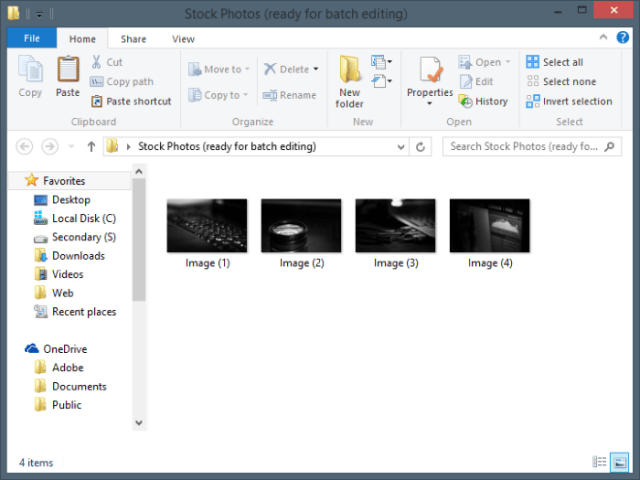
Step 1: Preparing your Photos
Make sure to have all your photos ready and saved in the same folder.
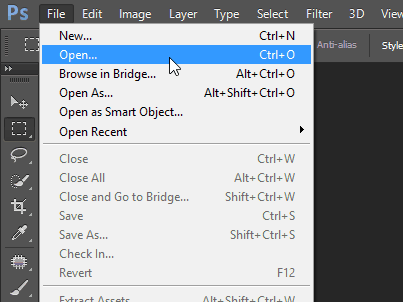
Step 2: Recording your action
Start by opening your photo.
Then navigate to the actions panel. It should look like a large play button. If you can’t see it, you can enable it from the Windows menu in Photoshop.
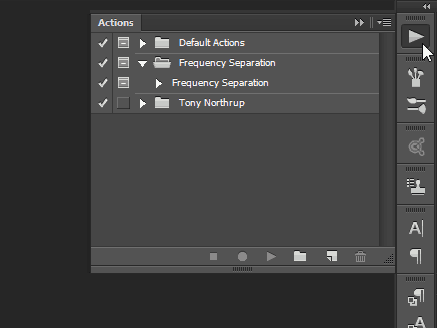
Please create a new set for your action (or folder as most people call it) to keep things nice and tidy.
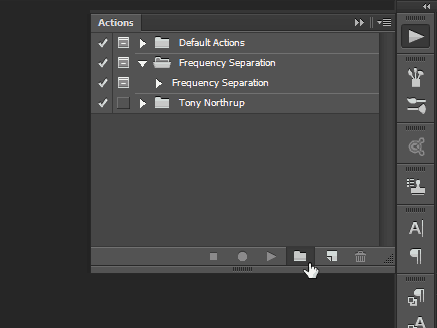

Then create your action with the small button that looks like the “New Layer” icon. Please give it a proper name, optionally assign a function key and color. Once done, press “Record” to begin creating the action.


From now on, anything that you do will be applied to the image. All commands, including saving and open, will be recorded and stored as part of the action. Here’s a quick time-lapse video of the changes I committed:
Here’s a quick time-lapse video of the changes I committed:
Remember to go back to the action panel and press the “Stop” button when ready.
Step 3: Using the Action to Batch-Edit your Photos
Once you’re done creating your action, you can immediately put it to good use. Start by selecting File > Automate > Batch.

Once in the Batch Edit dialog, choose the settings appropriate for you. since my Save and Close steps were part of the action, I essentially just had to pick my folder and press OK.

Once you do this, Photoshop will give you a short epileptic experience, and you will come to the sudden realization that no matter how fast you become at a software program, the computer will always be faster than you. All of your desired steps will are executed to each image in the blink of an eye.
But hey – look on the bright side – your clients have no idea whether it was you who did all that work or if Photoshop did it for you! Nice and easy way to dramatically speed up your workflow. And here are the final images:

While I only used three images for this example, you can use this process to let Photoshop batch edit thousands, even millions of photos, if you wanted to (assuming you have that many in the first place). Aside from the example, I’ve shown you, this will also work for batch sharpening, resizing, rotating, and much more.


Peter
May 15, 2017 at 12:34 pm
Hi Stefan
This is about the best and cleanest how to tutorial I have read. So clear concise the detail is excellent, presentation is excellent
Peter