
Windows Live SkyDrive has 25 GB of free online storage space. To make great use of that space, you need an easy way to access it. Using a free application called Gladinet, you can easily map SkyDrive to a drive letter on your computer to allow you to browse it as if it was physically attached.
The free utility is available for both 32-bit and 64-bit Windows 7, XP, and Vista. As usual, with any new software, the first thing I look up is the Terms of Service and Privacy Policy. I’m happy to report that both look pretty standard with “no funny stuff.” Gladinet will mount more than just Windows Live Skydrive, but we’ll be sticking to the How-To for Skydrive in this step by step tutorial.
How To Add Skydrive To a Drive Letter IN Windows 7 Explorer
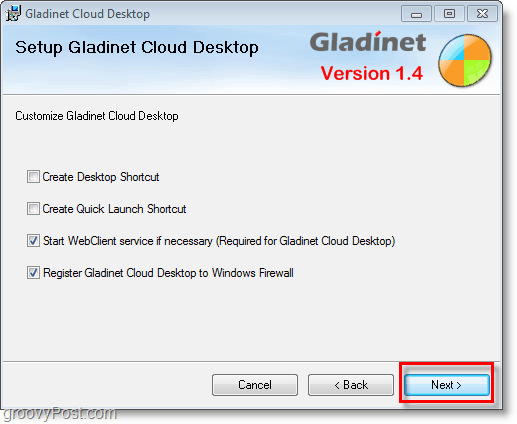
1. Download and Install Gladinet. The installation process is simple and should only take a few minutes to run through so we’ll skip covering that and jump straight into setup/use.
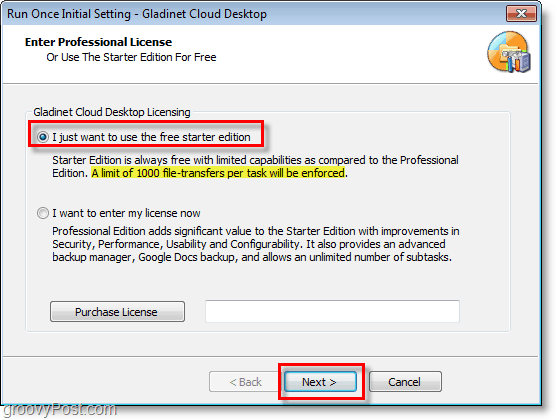
2. When the installation finishes you get a prompt for license information, Click the I just want to use the free starter edition option and then Click Next. Keep in mind the limit is not enforcing a total of 1000 file transfers, but rather you will not be allowed to transfer 1000 files simultaneously.
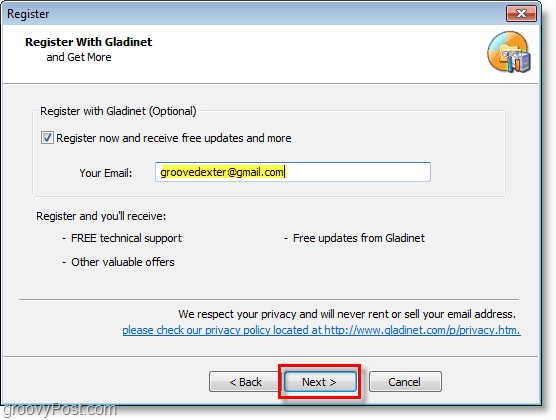
3. Register with Gladinet, this step is optional, but it doesn’t hurt. Enter your email address and then Click Next.
4. Next, Select which online storage services you would like to add to your mapped virtual drive. To keep things simple let’s just stick with Skydrive as it’s easy to add others later. After choosing your storage selection Click Next.

5. You’ll go to the General Settings page, and from here you change nearly everything around. A must-do is to Edit the Label for Gladinet Drive and name it something appropriate. This label will show up next as your Z: drive when you View My Computer. To increase security Click Change for Profile Encryption.

6. Click the Encrypt Profile checkbox, then Type in a New Password for your local virtual drive profile. Click OK to save and return to the General Settings page, then Click Finish.

7. Now that Gladinet is setup, it’ll run. You’ll be prompted for the Profile password you just created. Enter your Profile Password and Click Login.

8. Your Z: drive should now be available with the label you created earlier. From the Z: drive Open the File called Windows Live SkyDrive.gvm. You then Enter your Windows Live credentials. Click Next once you’ve entered them.

9. On the next page, Click Finish and Gladinet will mount SkyDrive to Z:. A plugin is required for the file to operate, Click Yes when the dialog appears to install it and continue.

10. After the drive is mounted, you’ll be prompted with the option to Backup your Files. If you would like automatically scan and backup all of the documents, pictures, music, or videos on your computer, this tool is handy. If you’re not interested, just Click Cancel.

Voila! Now Skydrive is mounted to your Z: drive using the Gladinet software. From this point, you can easily drag and drop files into SkyDrive just like it was part of your physical computer. When you do drag and drop a file, it uploads instantly, and an upload status box will appear to let you know how it’s doing.

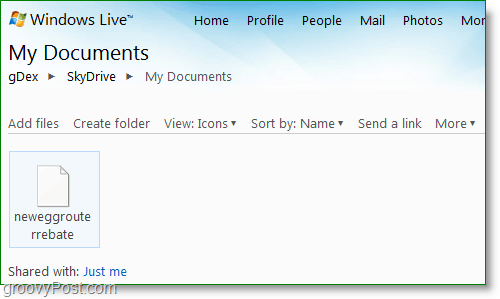
Just to be sure, you can log in to your Windows Live account and look at your Skydrive from the official site. Your uploaded documents/files should be there just like you uploaded them.
A few more tools are available to mount Skydrive as a drive letter in Windows such as Skydrive Explorer however I’m hoping Microsoft will just stop the madness and integrate Windows Live Skydrive right into Windows with no 3rd party tools.


infocyde
February 14, 2010 at 7:11 pm
I was unaware of Skydrive supporting 25 gigs and of Gladnet. Thanks for posting!
Robert
May 5, 2010 at 3:30 pm
This is exactly what I was searching for! But I have a question. On the gladinet site, it clearly states : “Manage and use cloud storage with Windows® Explorer”. But I dont use IE. I use Firefox, for all well known reasons. Can I still use Gladinet with Firefox?
Greetings
Robert.
MrGroove
May 5, 2010 at 3:39 pm
@Robert – Good question. Windows Explorer is not the same thing as Internet Explorer. In other words, you don’t access the drive from IE, you access it form your computer file system.
To open Windows Explorer, Right Click the Windows Start Button and Click Explorer. This will open up Windows Explorer and give you access to all your Drives including both LOCAL drivers and NETWORK drives. In this case, your Gladinet drive mapped to Live Skydrive.
Robert
May 5, 2010 at 3:41 pm
Omg….. ok…. that was a stupid question then :D stupid me :D
Lets try to believe no one ever read that. :D
Nothing happend. Move allong :-)
MrGroove
May 5, 2010 at 5:23 pm
It’s almost Friday! gonna make it…. gonna make it!!!!
Trust me, it wasn’t a stupid question AND, i’m sure there’s about 200 ppl out there who will read this article with questions about this however since the question was asked and answered, they will appreciate it!
So thanks for asking AND, welcome to the groovy community!
Robert
May 9, 2010 at 6:12 am
Maybe fun to know, is that i made a few docs. And i stored them in skydrive. Using OpenOffice, its wasnt any trouble to open the docs, edit them, and then press the “safe” button and automatticly safe them to skydrive again. This weekend i was at my gf’s house. Over there, i opend a few docs in skydrive, in OpenOffice, and same story all over again. So in OpenOffice, there is no need for linking skydrive to anything.
Or am i happy about nothing?
MrGroove
May 9, 2010 at 11:16 am
@Robert – Awesome! I’ve not tested Skydrive with OpenOffice so thanks for the great tip! I’ll have to install it and play around with it!
Nice find!
Damian Solomen
August 27, 2010 at 1:07 am
I have a picture of my fiance and my puppy! My two loves… I just need one with our new additions to the family… Our new pup and kitten… Then it would be perfect! Just makes me smile to see my pup and babe all the time!
Robert
August 27, 2010 at 2:25 am
Huh? What has that got to do with the subject?
construtora
December 16, 2011 at 2:27 pm
Somebody essentially help to make critically posts I might state. This is the very first time I frequented your web page and thus far? I amazed with the research you made to create this actual post incredible. Wonderful task!
Ivan
May 23, 2012 at 10:31 pm
Yes, Gladinet assign drive letter to cloud storage. But you still have no way to use this drive letter in batch files or backup task from MS SQL agent… So, drive letter is useless feature… Oops…