How To Stay Organized With Windows 7 Libraries

With Windows 7 Libraries, the wait is over! No longer will you need to fumble through Windows Explorer looking for your various files and folders you’re storing on different parts of your hard drive because Windows 7 Libraries works a lot like a built-in Google topic search for your computer. You can set it up with just a few simple clicks.
What are Windows 7 Libraries exactly?
By default Windows 7 provides four different libraries: Music, Videos, Documents, and Pictures. These are an excellent primer for the new feature; however, for me, this was just the start. Each library doesn’t actually contain any data. Rather they allow you to access all your data from one folder which you pre-configure based on category or using metadata (date and author information) found in the files themselves. This arrangement is perfect for grouping pictures from a vacation from a specified date, or for gathering music from the same artist.
Another example would be a budget folder I created at work. I have various budgets spread out between years and teams on a bunch of different locations on my hard drive and network shares. By creating a “Budget Library,” all my budget folders and files are now in one single place. The same would be true for home files like receipts.
How To Build a Custom Library In Windows 7
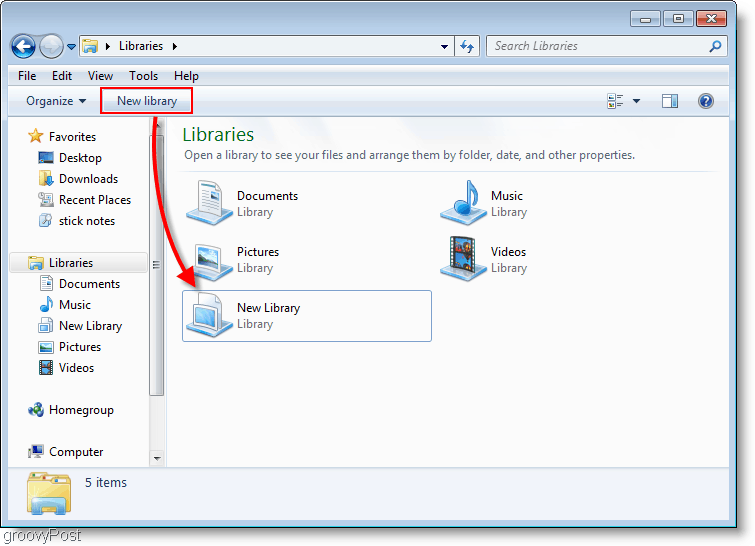
1. Open your Start Menu, and then Type libraries into the search bar. Click the Libraries link that appears.

2. In the Libraries window, Click the New Library button below the toolbar. Next Double-Click the New Library that is displayed.
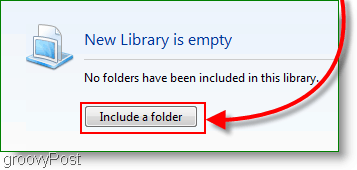
3. The library will alert you that it is empty because there are no folders associated with it. Click the Include a folder button and let’s add some folders!
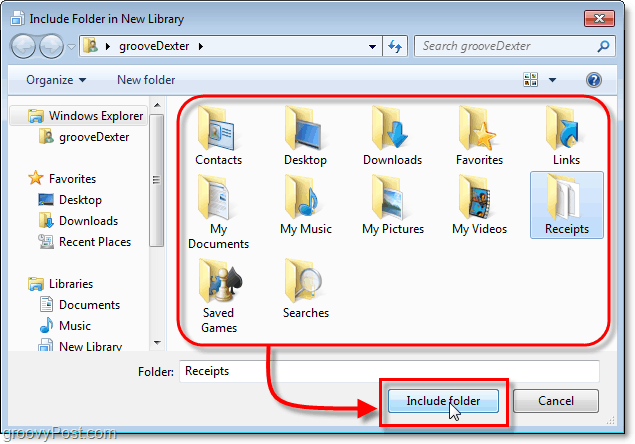
4. Choose which Folder you would like to include in the library initially; you can change this later.
5. Now that you have your new library set up, to add more folders Click the 1 location link.

6. In this Window, you can Click Add to manually insert more folders; you can also Right-Click a folder and Set as default save location. Your default save location means anything saved to the library stores in that folder. Click OK to continue.

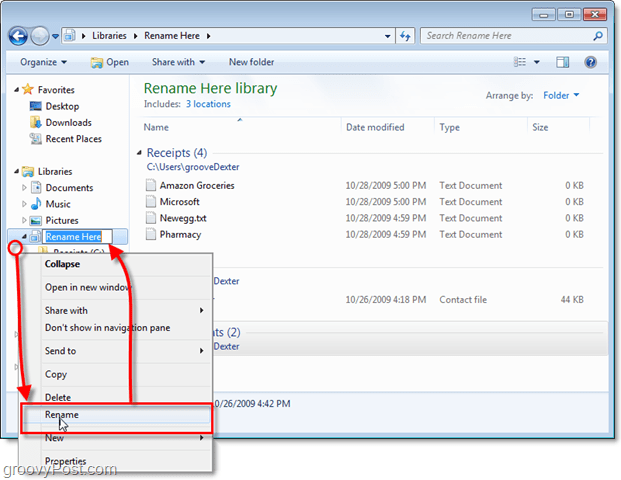
7. At this point, you probably want to re-name your Library. To do this Right-Click your Library on the Libraries list at the left side of the window.
8. Now let’s give the library the feel of a folder. Click the Arrange by option and then Set it to Name. This action will make the library appear as one fluid folder.

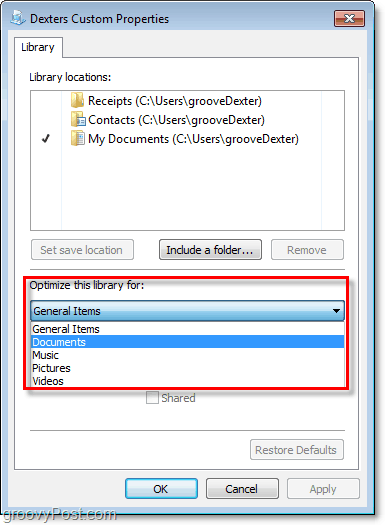
9. There are a few more features that can be adjusted by Right-Clicking your Library, and then Selecting Properties (like we did earlier when renaming it.) Depending on what you are organizing you can set it to optimize the appropriate file type.
Your Windows 7 Library
You now have your very own custom Windows Library. You can now store all of your specific data, and link this library to it using metadata, or the include folder option. It might be a little tricky at first, but after reading this groovy How-To, I’m sure you’ll be a groovy “Windows 7 Librarian” in no time.


