How to Add a Watermark to Documents in Microsoft Word

Adding a Watermark to a document is a simple way to add a level of professionalism and instantly update your peers on the status of the document.
Adding a watermark sends a not-so-subtle message to anyone reading or editing the document. For some lines of work, stamping documents with CONFIDENTIAL or DRAFT is either a requirement or a best practice. Microsoft Word 2016 allows you to quickly add such watermarks to your document using the built-in defaults. But you can also customize your watermark using your own text or logo. We’ll show you how.
Plus, as a bonus, we’ll also show you how to apply watermarks to just one section or just one page. Read on to learn more.
Add a Watermark to a Document in Microsoft Word
Note: This article was written using Word 2016; however, the process continues to work exactly the same for later versions, including Microsoft Word for Microsoft 365.
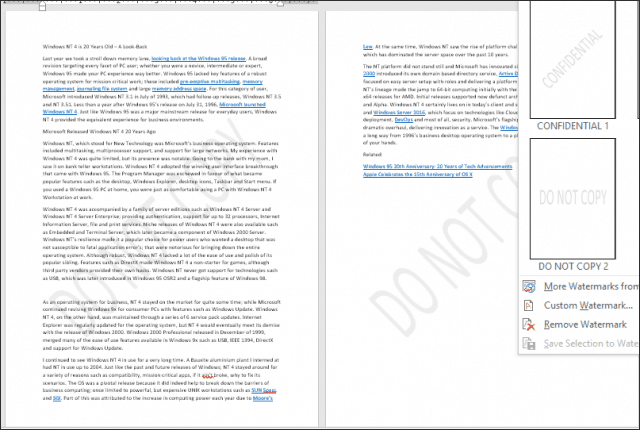
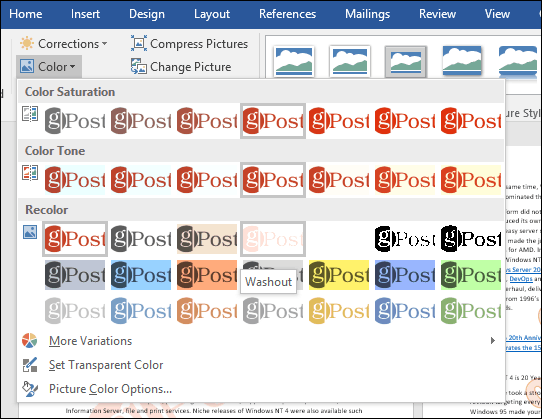
Typically, you’ll want to add a watermark to an entire document. You can do this for a new or existing document. First, let’s start with adding the watermark to an existing document. Open the file, select the Design tab, and then click the Watermark button within the Page Background group. Word 2016 offers several styles and formats for inserting a watermark.

A gallery will list all the default choices for watermarks, such as Do Not Copy, Confidential, Draft, and Urgent. You can even customize the watermark with your own text or an image, such as a company logo.
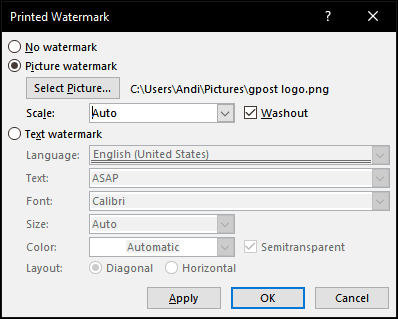
Choosing the Add Custom Watermark option lets you add a customized text message or image. You can type in any text you want and format it by customizing the font, size, color, layout, and whether or not it’s semitransparent.

If you prefer to add a company logo using an image, it’s just as easy; select the Picture Watermark radio box, click Select Picture, browse to where the picture is located on your hard drive then click Open.

Click on the scale list box to choose an appropriate size. You can also enable or disable the “Washout” option. I recommend keeping the logo washed out to keep the content visible.
Add a Watermark to a Single Section of a Word Document
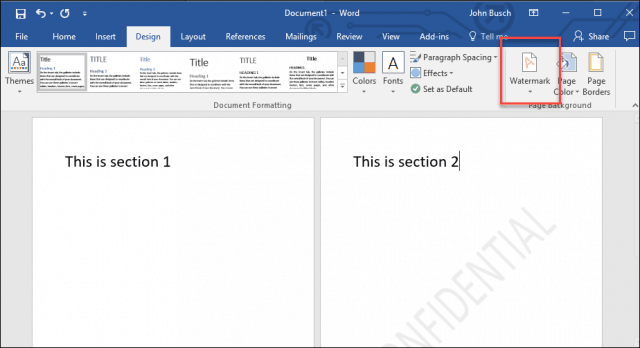
The watermark feature in Word 2016 appears to be an all-or-nothing option. But there is a workaround that lets you apply a watermark to only certain pages. You can do this by creating sections in your Word document and then adding the watermark to the header.
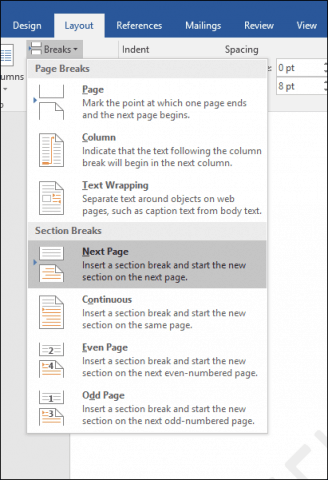
Start by inserting a new section into your document if you haven’t already done so. To do this, go to the Layout ribbon, choose Breaks, and choose from one of the section breaks.
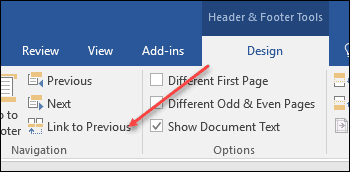
Now, go to the section where you want to apply a watermark. Double-click the header. You’ll see that you are now looking at two different sections.
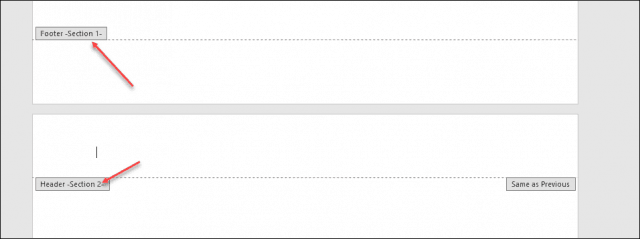
Select the Design ribbon under Header & Footer Tools. Deselect Link to Previous.
With your cursor still in the header, go to the Design ribbon (the main one) and insert your watermark.
Add a Watermark to a Single Page of a Word Document
Adding a watermark to a specific page in your document is a little trickier, but it can be done. You will need to use the WordArt and Insert Picture tools. You can then use the formatting tools to enable the inline effect on the WordArt or image and then apply the washout effect. Here is how you do it.
Add a Watermark to a Single Page Using WordArt Text
Select Insert, click the WordArt menu, then choose the desired style.
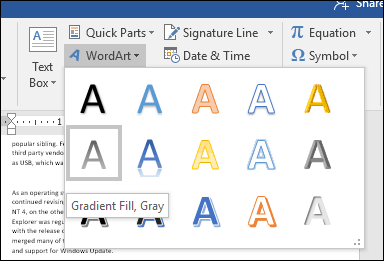
Replace the WordArt sample text with your custom text.

Click the floating Layout menu, then choose Behind Text.
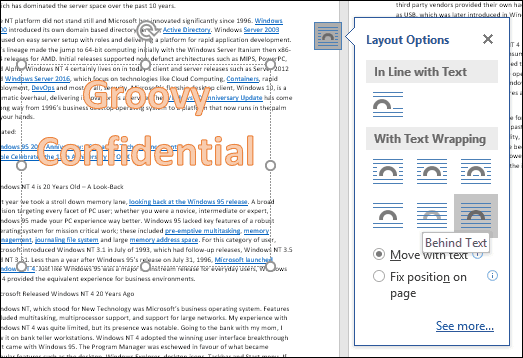
Use the anchor to position and rotate the text.

To achieve a washed-out appearance, right-click the WordArt text, then click Format Shape. Click the Text Options tab, select the Text and Fill tab, then expand the Text Fill and Outline menus. Use the Transparency slider to adjust the opacity of the WordArt.

Adding a Watermark to a Single Page Using an Image
If you want to use an image instead, select the Insert tab, click Pictures, select your picture, then click Open. Select the image, click the floating layout options menu, then click Behind Text.

Position the image where you want it in the document, then rotate it using the anchors if necessary. Select the contextual Format tab, click the Color menu within the Adjust group, then choose the Washout option under Recolor.
Your custom watermark should look like the following.


Alaina Wilson
March 11, 2017 at 12:51 pm
Thanks mate for sharing this wonderful guide. You made my work really easy.
Thanks Again!
Rick Landini
April 10, 2017 at 1:40 pm
your instructions work very well. i am trying to do something different. i am trying to add an image as a watermark to all pages in an effort to redact private info. the image has a transparent background with 4 vertical black bars that will block large portions of the document. when i follow your instructions, the 4 vertical black bars become shaded, not opaque. i need the vertical bars to be opaque. is there a way to accomplish what i am trying to do? thank you in advance for your help
Kim
April 18, 2017 at 2:50 pm
I’m using Word 2016 and followed the instructions to the letter, but it didn’t work. I created the sections as instructed, and added a picture watermark as indicated. However, the picture watermark is on every page of my document. What do I do now?
Joanne Metz-Laberge
March 18, 2019 at 3:23 pm
I have followed the instructions with a photo. It shows up as a shaded watermark, what I want in Word and if I print it. But when it is added to an email, it shows up so dark that it can not be read, blacking out everything on the document.
What do i do to fix this????