Ultimate Guide to Manage Contacts on Your iPhone

One of the most critical apps on your iPhone is also one of the oldest. The native Contacts app, not surprisingly, launched alongside the first iPhone way back in 2007.
One of the most critical apps on your iPhone is also one of the oldest. Not surprisingly, the native Contacts app launched alongside the first iPhone way back in 2007. Since then, the app has received an occasional update, although little has changed since that time, which, in many respects, is a good thing. In this article, you’ll learn all about the Contacts app for iPhone and iPad.
Setting Up the Contacts App
The information contained in the Contacts app comes directly from your email account. For most iPhone users, this is iCloud, although it could also be Gmail, Microsoft Exchange, or many others.
To add your email account to iPhone:
- Tap on the Settings app on your device’s Home screen.
- Scroll down and select Passwords & Accounts.
- Tap Add Account.
- Tap your email account and toggle Contacts. Or tap Other to set up a contacts account, like an LDAP or CardDAV account.
- Enter your user information and password.
- Tap Next to finish the setup.
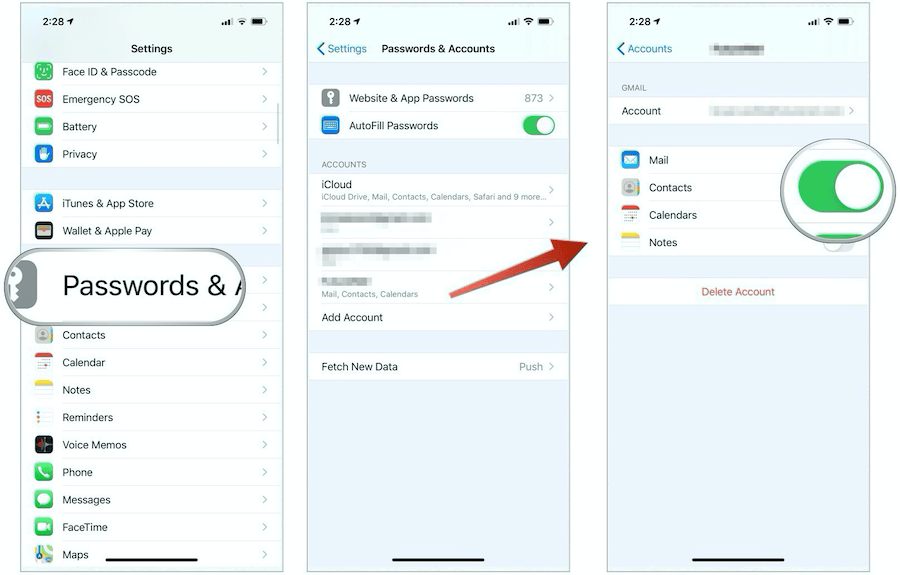
Turn on Contacts
You must now confirm the activation of contacts for your email account on the iPhone.
- Tap on the Settings app on your device’s Home screen.
- Scroll down and select Passwords & Accounts.
- Tap on your account.
- Toggle Contacts.
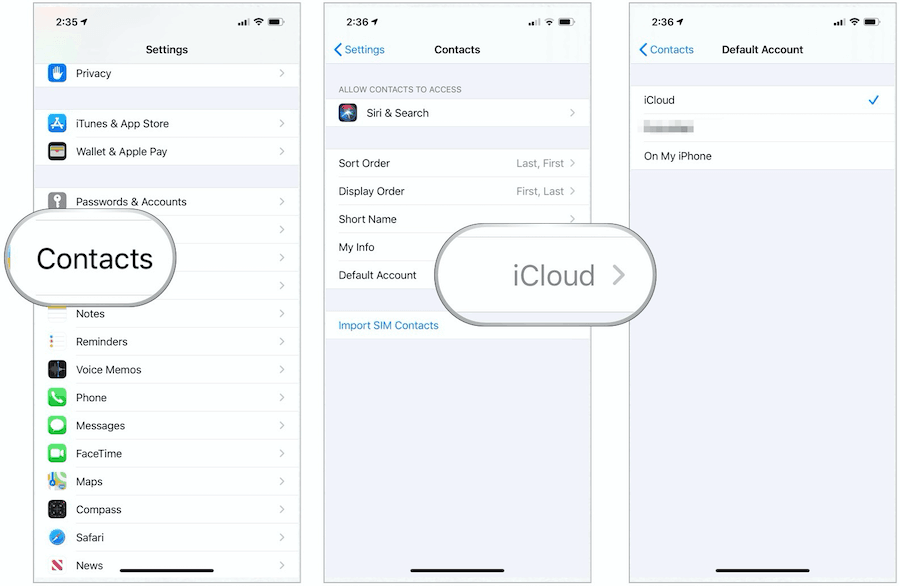
Set Up Default Account
It would help if you kept your contacts centrally located, regardless of how many email accounts you have. Ideally, your iCloud account should be the default account. To set your default contact account:
- Tap on the Settings app on your device’s Home screen.
- Scroll down and select Contacts.
- Choose the Default Account.
- Select your default account from those listed.
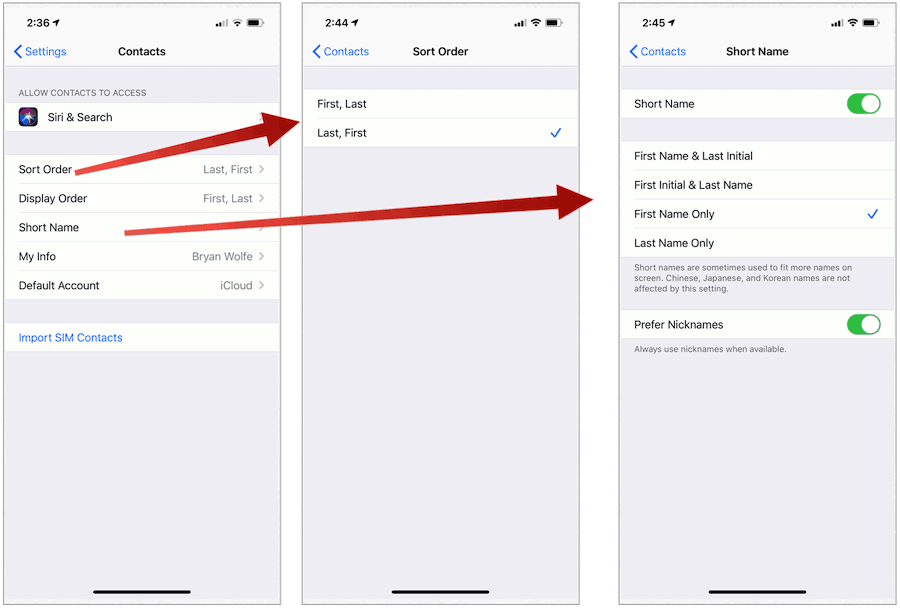
Customizing Your Contacts
Before you add contacts to the official app, you should decide on the sort order, display order, and short name.
- The sort order can be First, Last or Last, First
- Display order can be First, Last or Last, First
- The short name can be the First Name and Last Initial, First Name and Last Name, First Name Only, or Last Name Only. You can also set whether to use nicknames when applicable.
You can find each of these options by:
- Tap on the Settings app on your device’s Home screen.
- Scroll down and select Contacts.
- Change Sort Order, Display Order, and Short Name based on your preferences.
- Toggle Nickname if you plan on using nicknames in the Contacts app.
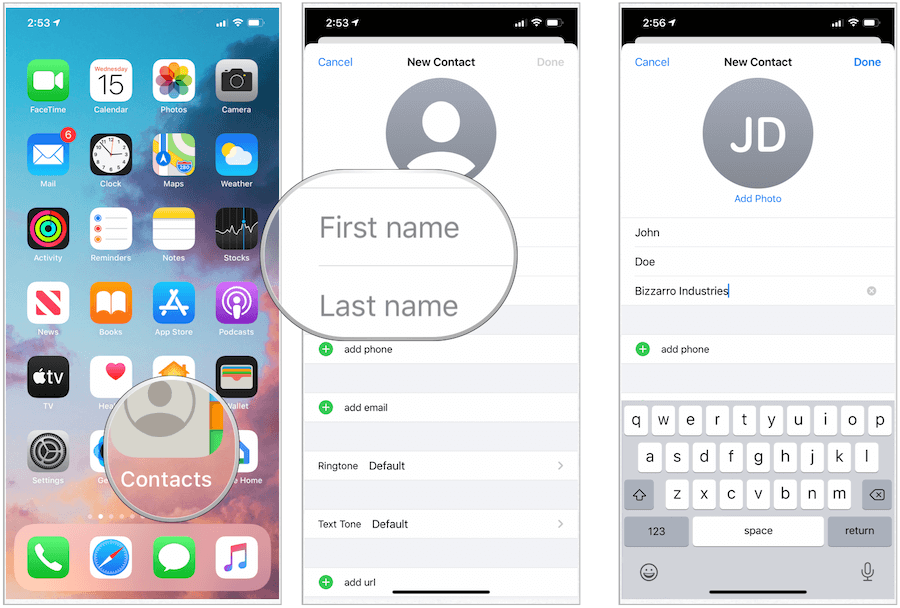
Adding New Contacts
To add a new person to your Contacts app:
- Tap on the Contacts app on your device’s Home screen.
- Choose the + at the top right.
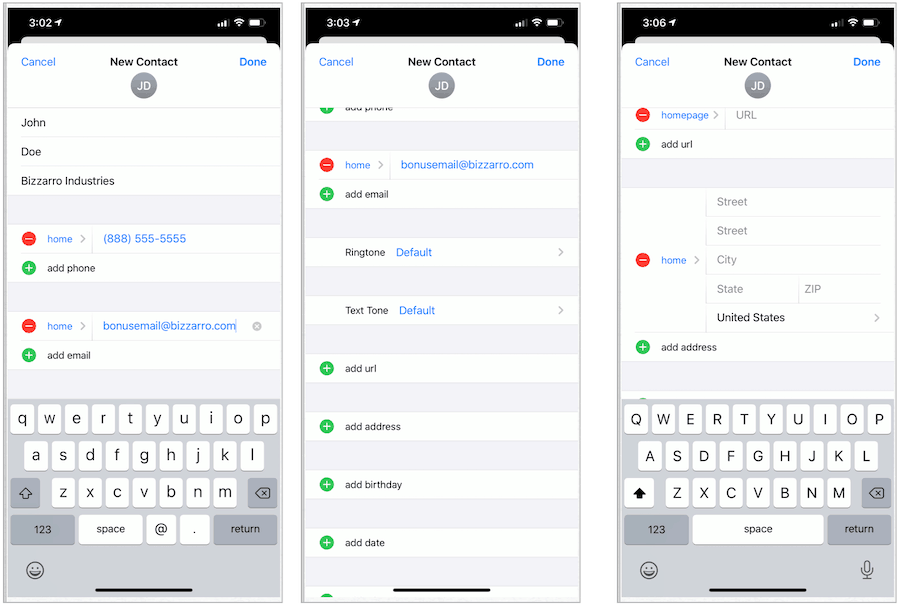
- In the spaces provided, add the person’s First Name, Last Name, and Company (where applicable).
- Tap Add Photo if you want to add a photo for the contact.
You can also add additional information, including:
- Select Add Phone, select the type of phone and add a phone number for the contact. Repeat for other phone numbers for that person.
- Choose Add Email, select the type of email, and add the email for the contact. Repeat for other emails.
- Tap Ringtone and Text Tone to customize the sounds for this contact, or leave the default selections.
- Select Add URL, select the type of URL, type the URL. Repeat as needed.
- Choose Add Address, select the address type, then type the Street, City, State, Zip, and Country for the contact. Repeat for more addresses.
- Tap Add Birthday, then add the birthday for the contact.
- Select Add Date, then select the type of date to add. For example, you could include the contact’s anniversary.
- Choose Add Related Name, then add the type of relationship for the person, then select the person. Use this field if someone else in your contacts is related to this person — for example, a contact’s mother.
- Select Add Social Profile to add the contact’s Twitter, Facebook, or another social account.
- Choose Add Instant Message to add the person’s Skype or another instant message account.
- Use the Notes section to include additional information for the contact.
- Choose Done to add the person to your Contacts app.
Here’s an example:
To Delete a Contact
To remove someone from your Contacts app:
- Tap on the Contacts app on your device’s Home screen.
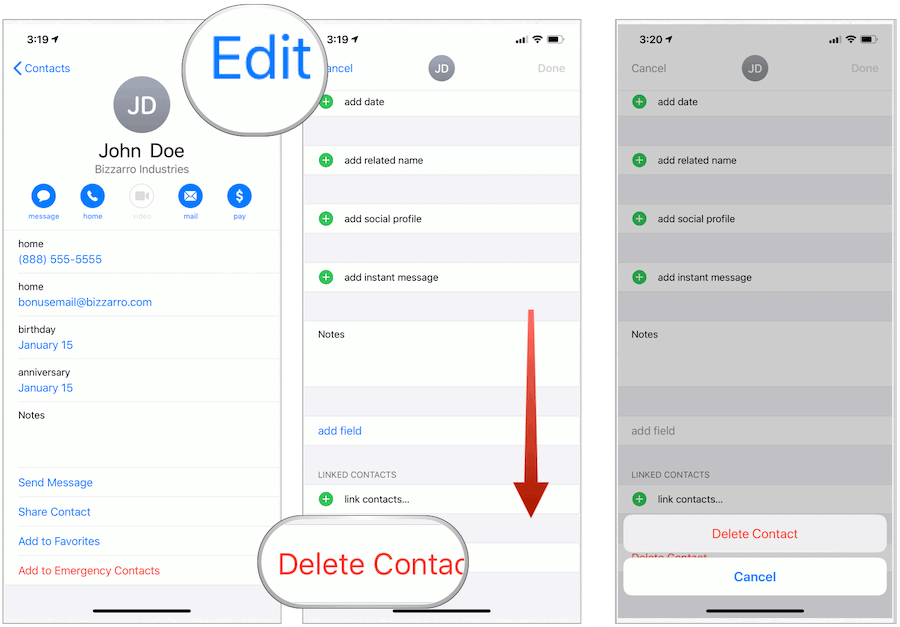
- Scroll down, then select the contact you wish to delete.
- Tap Edit at the top right of the contact card.
- Scroll down, then choose Delete Contact.
- Confirm Delete Contact in the pop-up.
To Make a Contact a Favorite
For the contacts you expect to call or text often, it’s best to make them a Favorite. That way, their contact information is quickly available in the Phone app on the iPhone.
To make a person a favorite:
- Tap on the Contacts app on your device’s Home screen.
- Scroll down, then select the contact you wish to make a favorite.
- Tap Add to Favorites.
- In the pop-up, decide how to add the person to your Favorites list. For example, you may want to add their home phone number or work text number.
You can find your favorites in the Phone app under the Favorites tab.
Removing a Favorite Contact
You can remove a contact as a favorite by:
- Tap on the Phone app on your device’s Home screen.
- Choose Edit at the top right.
- Select the red dash to the left of the contact.
- Choose to Delete to remove the contact from your Favorites list.

Block Contacts
You can block someone’s phone number regardless of whether they’re listed in your Contact app. If they are listed:
- Tap on the Contacts app on your device’s Home screen.
- Select the contact you wish to block.
- Scroll down, then tap Block this Caller.
- Confirm by choosing Block this Caller from the pop-up.

You can also block the number for those who have called you but are not listed as a contact.
- Tap on the Phone app on your device’s Home screen.
- Select the Recent tab.
- Choose to “i” icon to the right of the phone number you wish to block.
- Scroll down, then select Block this Caller.
- Confirm by choosing Block this Caller from the pop-up.
Remove Duplicate Contacts
Depending on your work type, your contacts list can grow significantly over the years. To remove duplicate persons in the native Contacts app on iPhone:
- Tap on the Contacts app on your device’s Home screen.
- Using the Search box, type in the name of the person you think was duplicated.
- Select the contact you wish to delete.
- Tap Edit at the top right of the contact card.
- Scroll down, then choose Delete Contact.
- Confirm Delete Contact in the pop-up.
A Better Way
Finding duplicate contacts gets much more difficult the larger the number of Contacts on your iPhone. However, before things get too difficult, you should consider a third-party solution. Among the apps designed to better assist you in removing duplicate contacts on your iPhone are:
Sharing Contact Information
Apple has made it much easier to share personal information from the Contacts app. For example, to share individual contact information on iPhone:
- Tap on the Contacts app on your device’s Home screen.
- Select the contact you wish to share.
- On the contact page, select Share Contact.
- On the Apple Share sheet, tap how you wish to share this information. For example, you could send contact information through email, messages, or third-party apps.
Making Contact
The Contacts app doesn’t just store your contact information. You can also use the app as a starting point to communicate with someone. At the top of each contact card, you’ll find a button for each type of communication activity for that person. Of course, whether a button is active depends on the information included on the contact card.
Remember those emails or phone numbers you placed for a contact? You can tap on those to begin communicating, whether through Phone, Messages, or FaceTime app.
The native Contacts app for iPhone and iPad is simple to use and maintain. Best of all, if you’re using iCloud, your contact information automatically syncs across other devices logged into your account.