Bokeh here, bokeh there…bokeh everywhere! Whether you’ve fallen in love with blurry backgrounds from hipster photos in Tumblr or from a wedding photographer’s example work, it’s a good thing to try out for yourself. The problem is that not everyone has a DSLR and not everyone has a prime lens. So let’s improvise. In this article we’ll talk about ways you can achieve great bokeh without using any expensive cameras or other gear.


What is Bokeh Anyway?
Well according to Wikipedia (the book of knowledge):
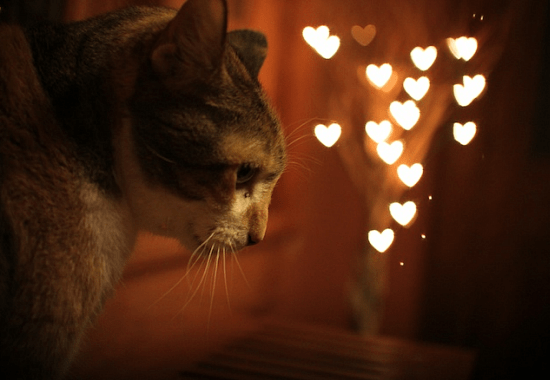
In photography, bokeh (Originally /ˈboʊkɛ/,[1] /ˈboʊkeɪ/ boh-kay — also sometimes heard as /ˈboʊkə/ boh-kə,[2] Japanese: [boke]) is the blur,[3][4] or the aesthetic quality of the blur,[5][6][7] in out-of-focus areas of an image. Bokeh has been defined as “the way the lens renders out-of-focus points of light”.[8] However, differences in lens aberrations and aperture shape cause some lens designs to blur the image in a way that is pleasing to the eye, while others produce blurring that is unpleasant or distracting—”good” and “bad” bokeh, respectively.[3] Bokeh occurs for parts of the scene that lie outside the depth of field. Photographers sometimes deliberately use a shallow focus technique to create images with prominent out-of-focus regions.
Bokeh is often most visible around small background highlights, such as specular reflections and light sources, which is why it is often associated with such areas.[3] However, bokeh is not limited to highlights; blur occurs in all out-of-focus regions of the image.
No worries, everything will become more clear once you continue through my steps in this article.
Do close-up shots (macro)
Macro photography is great. It shows you everyday things from a different perspective and is rather addictive to some photographers. The benefit of focusing up really close is that this typically produces a rather shallow depth of field, creating a beautiful bokeh background.


Tripod, Built-In Lens: 5,8-17,4 (f/2.8-4.8)
f/2.8, 1/10 seconds, ISO 400
I took this photo with an old 2007 point-and-shoot camera. While not the best image quality, even this camera can produce some great bokeh if you know how to do it right.-
Shoot from afar and zoom in as much as possible
Great tip to keep in mind. If your compact camera has plenty of zoom, or if you have a zoom lens for your DSLR, it’s a great way to get some nice bokeh.
Here’s a lens I borrowed to test out – the 55-300 DX. It is among the cheapest Nikon telephoto lens you can buy. It’s cheaper than some primes and does an acceptable job.


As I mentioned above, you don’t need a DSLR for great bokeh. Any turbo-compact with tons of zoom will work. Just try to keep these tips in mind whenever you want to get bokeh with a telephoto lens:
- As much zoom as possible
- Smallest possible distance between you and the subject (as close as your lens lets you focus)
- Narrow/distant background
Here’s an example of a narrow background. I lowered my tripod to the level of these water drops and focused around the middle. The result? Mind-blowing bokeh.


Tripod, 55-300 @ 300mm
f/5.6, 5 seconds, ISO 400
And here’s what we can call a distant background. I took this photo, focusing on a car that was right in the middle of the parking lane. The one in front one and the ones parked in the back got beautifully blurred.


Tripod, 55-300 @ 300mm
f/5.6, 2 seconds, ISO 200
Photoshop it
Sometimes it’s hard to get a blown background even with if you have great gear. So what do we do? We use Photoshop, of course!
Here is the original photo that I took for the purpose of this tutorial:


Tripod, 18-55 (f/3,5-5,6) – Kit Lens
f/8, 15 seconds, ISO 200
First, open your photo in Photoshop like you usually would. Quick tip – a Ctrl+O might help you with that.


Now use any selection method you like to select the areas which you want to “bokehfy”. If you’re not so familiar with Photoshop check out our basics guide and our other tutorials.
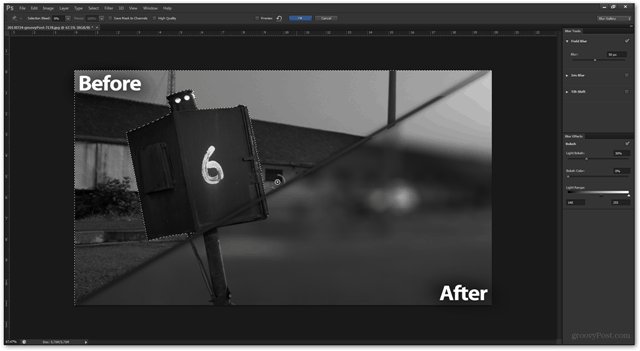
Now head to Filter > Blur > Field Blur.


Clicking on this option will take you to the Blur Gallery.


From here, you can adjust the Field Blur slider to determine the amount of background blur.


Here’s a comparison between field blurs from 10 to 50 pixels. For my image I’ll use 50.


You can also tweak the Light Bokeh slider and the Bokeh Color slider. I don’t have any extreme lighting in the current image and on top of all it’s a black and white image, so I’ll leave these at 30% and 0%. (Pro tip – use these sliders if you want nice and rounded bokeh circles like in pictures above).


You can quickly check and uncheck the Preview checkbox to view a before and after of your image.


After you’re done, pressing OK will confirm the changes… 

…and bring you back to your preferred workspace. 

After this, a quick Ctrl+D will deselect and a Ctrl+Shift+S will save a copy of your edited image.


Conclusion
Anything is possible if you improvise. Plan ahead and visualise what you want as a final result. And if it doesn’t work quite right, Photoshop can always rescue you!
Leave a Reply
Leave a Reply


