How to Setup a New iPhone or iPad (and Avoid Problems)

Starting over on a new iPhone or iPad can be a serious hassle. Fortunately, Apple makes it simple restore from a previous device IF you know all the tricks.
For many, upgrading to the latest iPhone or iPad has become an annual or biennial event. It’s no wonder then that Apple is made it easy to set up a new iPhone or iPad. Sometimes, though, it’s too easy. You can avoid some major pain points by following our handy guide.
Before you start, make sure you have a charger nearby. Nothing messes up a new device setup quite like losing power in the middle of it. I like beginning with the device fully charged to avoid any mishaps.
Since you’ll be downloading apps and updates, make sure you have a quality internet connection. For example, a Starbucks or Hotel wifi connection should be avoided. Also, don’t tether from another Internet device. You want a reliable and robust connection. Finally, if you’re traveling, wait until you get home. You don’t want the process to stop in the middle, like losing power.
If you already have an iPhone or iPad:
Update your old Device
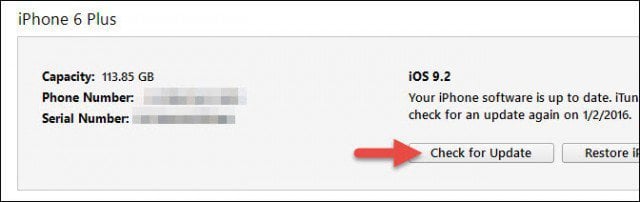
Before upgrading to a new device, you must first get a solid backup from your old device. Before beginning the backup process outlined below, I highly recommend you first use iTunes to update to the latest version to eliminate any restore issues on your new device.
Perform a Manual and Encrypted Backup
Most people probably back up their iOS devices using iCloud. It’s simple and automatic. The problem is it isn’t always reliable. It also takes forever to download a full image of your iPhone or iPad.
Instead, do a local backup with iTunes on your computer. First, plug your device into your computer. You can do this over Wi-Fi, but it’s slower. Next, click on your device in iTunes and click Summary. In the middle of that screen, you’ll see Backups. A convenient setting in the bottom left-hand corner of that screen is Encrypt local backup. Then you’ll want to click Back Up Now.

As it states, encrypting your backups allows account passwords (Pinterest, Instagram, etc…), Health, and HomeKit data to be backed up. Without that checked, none of your passwords and other sensitive data will be restored onto your new device. This can be a serious hassle if you no longer remember some of those passwords (speaking from experience…).
The backup will take a few minutes, depending on the amount of data and apps stored on it. Once completed, you’ll have all your data safely stored on your Mac or PC. If you have an Apple Watch, make sure it’s paired and in
Apple Watch Tip: If you have an Apple Watch, make sure it’s paired and in range of your iPhone shortly before you do the backup. You’ll then want to unpair it. That way, it’s backed up to your iPhone and can pair with your new iPhone.
Backup your Device to Apple iCloud
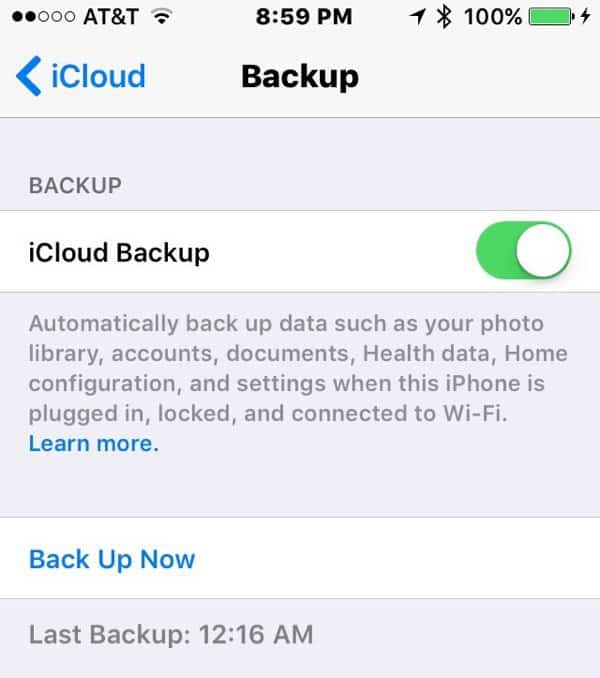
Even though you just did a manual backup, more backups don’t hurt. It sounds crazy, but what if your computer dies before you finish your iOS setup? In can happen. Anyone that has a beverage near a computer is at risk! On your iOS device, go to Settings > iCloud > Backup. Then tap Back Up Now and wait for the device backup to complete. As mentioned earlier, you’ll want to do this over a reliable Wi-Fi connection.
Find and Test Your Apple IDs
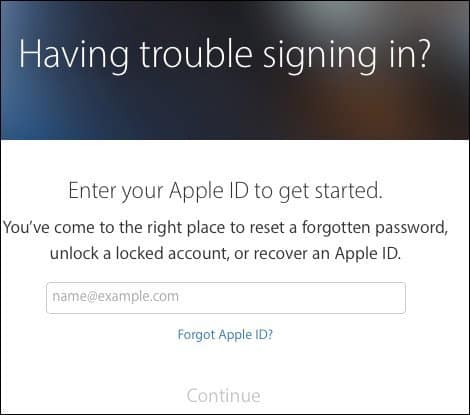 People sometimes have several Apple IDs and might have forgotten their passwords. The ID you use for the App Store and iCloud may not match. Even though you backed up your passwords using an encrypted backup, finding the names and passwords for any Apple accounts you use is a good idea. Head on over to Settings > iCloud and see what ID you are using for iCloud. From a browser on a computer, try logging into iCloud with what you think is the correct name and password. If you forget the password, you will be able to restore it.
From a browser on a computer, try logging into iCloud with what you think is the correct name and password. If you forgot the password, you would need to reset it. Then test your iTunes and App Store ID. Again, these may be the same. Sometimes I see a parent sharing the App Store ID with a child. They didn’t know about Family Sharing or didn’t want to mess with it. The ID used in the store will show up when you go to Settings > iTunes & App Stores. In rare circumstances, even if the iCloud and App Store IDs are the same, they could have different passwords. Most people know the password for this account because that’s the only way to buy apps. If you can’t buy an App from Settings > iTunes, tap the Apple ID and tap View Apple ID. If you can’t remember the password, go back to that screen and tap iForget. Apple will walk you through some verification.
Disable Find My iPhone or iPad
This step is optional, but many people forget to disable it when giving the device to someone else. I suggest doing it now, so you don’t forget. This step also makes a restore easier later on the old iOS device. On the device, go to Settings > iCloud, then tap off Find My iPhone.
Disable Two-Factor Authentication Temporarily (optional)
You could get locked out of your Apple account in rare circumstances if there is a problem porting your phone number to a new phone. Apple will eventually help you get access to your account; however, it’s a hassle. While setting up your new device, you can avoid any problems by disabling two-factor authentication. Of course, keep in mind this change will temporarily put you at greater risk of your account being hacked. However, you can balance that risk against being locked out of your account.

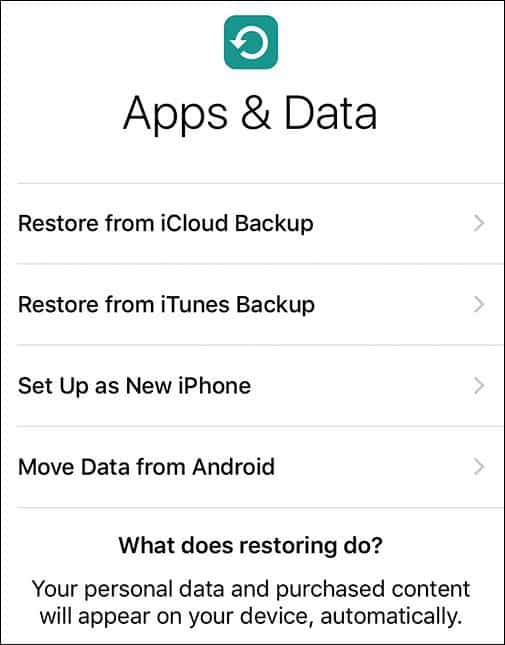
Start a Restore Using iTunes
Since you already did an encrypted backup through iTunes, this process should be quick. Connect your iPhone or iPad to your computer and follow the prompts to restore from backup. iTunes will ask for the password you used to encrypt the backup. A short time later, you will be all ready to go!
Pro Tip: Devices don’t need to be the same to perform a restore. For example, if you already have an iPhone, you can restore it to an iPad or vice-versa. Granted, it won’t restore Messages and Photos, but most other data will come over. It’s better than starting from scratch for most people.
Re-enable Find My Device and Two-Factor Authentication
Once your new iPhone or iPad is ready to go, now is the time to lock it down again. First, enable Find My iPhone or iPad and then set up your two-factor Authentication again. If you didn’t have a two-factor setup before, now is a great time to do it.
Setup New Device Options
If you’re upgrading from an older device that doesn’t support Touch ID, one of my favorite new features on iOS, you may need to set up and configure Touch ID. Unfortunately, new users forget to do this all the time.

Capture your Serial Number and Other Key Information
While you are still in the honeymoon stage with your new toy, play it safe and capture some of the essential information about it. This helps in case you lose it or need tech support. Go to Settings > General > About and take a screenshot. Now you have your model number, serial number, and other identifying info. I keep that info in 1Password, but you can save it to Photos and then email it or print it out.
Setting Up A New Device
Suppose you are completely new to Apple and iOS; welcome! You don’t have an Apple ID yet, and you’ll need to set one up. Apple walks you through the steps on your device. You’d be surprised how many people have an Apple ID, even if they never remember owning anything by Apple. This is the time to test to see if you have an Apple ID by trying iForgot.
Passwords, Passwords, Passwords
Yes, everything has a password. Your email account, Wi-Fi, Facebook, and everything else you want to access from your iOS device. Try to gather all this information before you start. This step saves headaches later. Now is a great time to start if you aren’t using a password manager.
Skip the iOS to Android App
Apple’s Move to iOS helps Android users move important stuff over to an iPhone or iPad. However, if you are using Google already, most of that stuff is stored by Google for you. In addition, Google has iOS equivalents of most apps. So you can download all that stuff and never use the Apple apps. This could make the transition easier from Android. The one groovy feature of the Move to iOS app is messages.
Enable Find My Device and Two-Factor Authentication
Now is the time to protect the device and your account. First, enable Find my iPhone. Next, tap Settings > iCloud > Find My iPhone or Find My iPad and then toggle it on if it isn’t already. Finally, follow our guide to set up Two-Factor Authentication for your Apple ID.
Wait to Get Rid of the Old Device
Before you give your old iPhone or iPad to another family member or sell it, wait at least 30 days. Glitches happen with new products. Being able to pick up your old phone or tablet is great for peace of mind. This also helps when you accidentally drop your new device that first month because you couldn’t find the case you want. If you are planning on selling online with a company like Gazelle, they’ll give you 30 days to send it in. Take advantage of that grace period.
After that 30-day mark, remember to disable Find My Device if you haven’t already done that. First, sign out of your Apple ID and iCloud account on the device. Then go to Settings and tap General > Reset > Erase All Content and Settings. That completely erases the device.
Following these steps could avoid a major headache with your new iPhone or iPad. If you’re new to the world of Apple, be sure to check out all our iPhone and iPad Tips and Tricks!