How to Open the BIOS on Windows 11

When troubleshooting a PC, sometimes you need to access the system’s BIOS/UEFI. Here’s how to open the BIOS on Windows 11.
Accessing your BIOS or UEFI on your Windows 11 PC can solve various problems. It can also make certain features work with the OS – enabling TPM 2.0, for example.
Technically most modern computers have a UEFI now; you can access it the same way as you’d the BIOS on older systems. The UEFI provides additional features, but most users still call it the BIOS.
If you need to access your BIOS to change a setting or enable a feature, here’s how to open the BIOS on Windows 11.
Enter the BIOS directly from Bootup
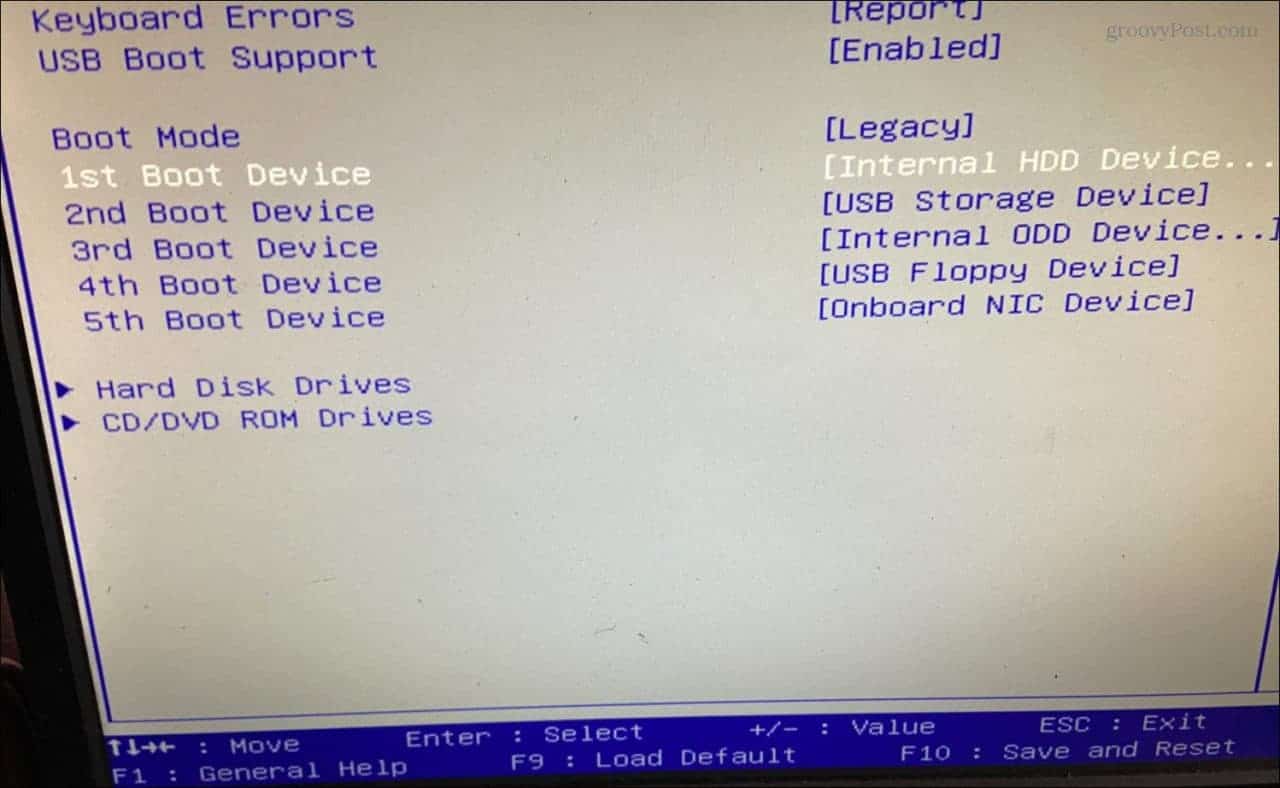
The straightforward way to enter the BIOS is by pressing a key on your keyboard while powering on the computer. The key you press to enter the BIOS varies between systems; however, it’s typically F2, F12, Delete, or something else. You should see which key it is when the first splash screen with the manufacturer’s logo appears. If you’re not sure, check the manufacturer’s support site.
To enter the BIOS by pressing a key, do the following:
- If your computer is already booted up, restart Windows 11.
- Press the BIOS key on your keyboard while the PC boots, and you should see a message letting you know you’re entering the BIOS.

Open the BIOS via Windows 11 Settings
If you can’t find the appropriate key to press and enter the BIOS, you can get there through Windows 11 Settings.
To access the BIOS via Settings, do the following.
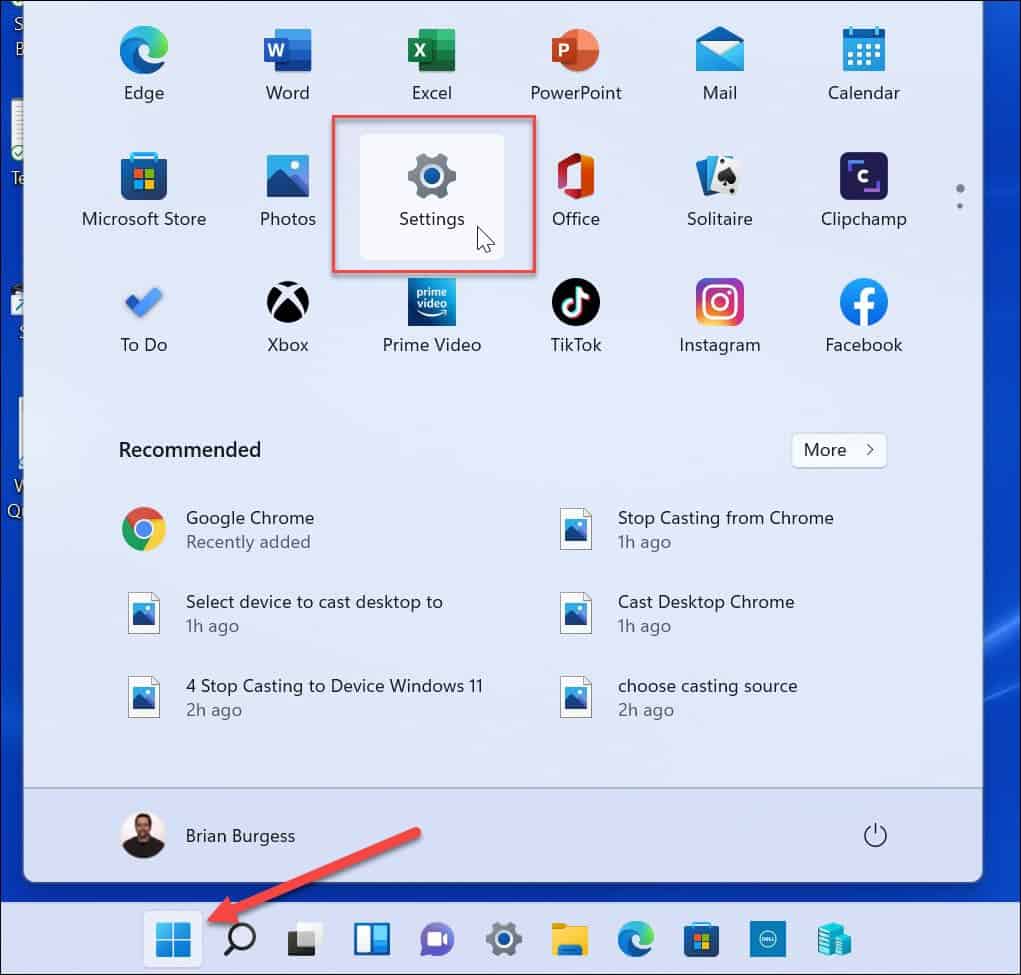
- Click the Start button or press the Windows key to launch the Start menu and click Settings.

- When Settings opens, click on System from the left pane.
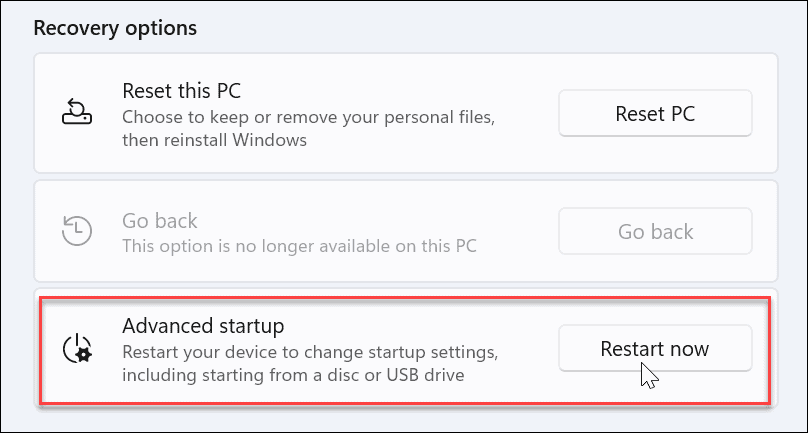
- Scroll down on the right side and click the Recovery option.

- In the Recovery section, find the Recovery options section and click the Restart now button next to Advanced startup.

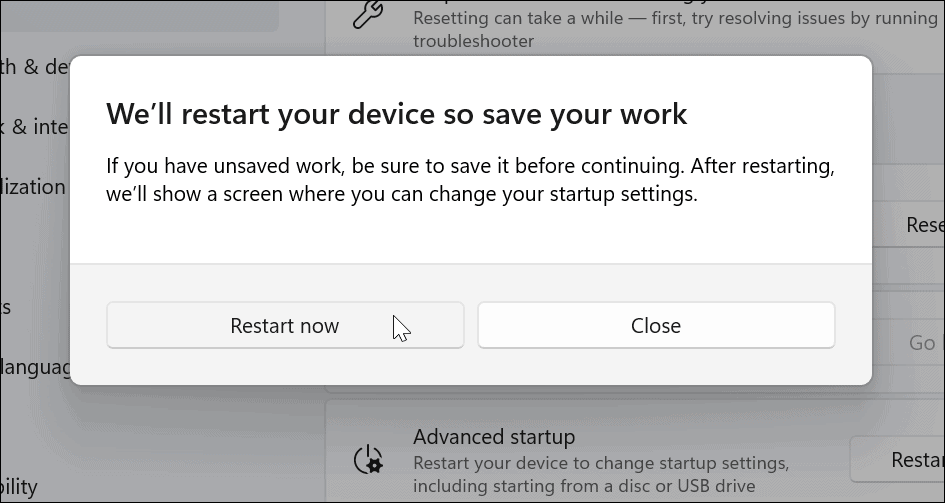
- When the restart verification screen appears, click the Restart now button.

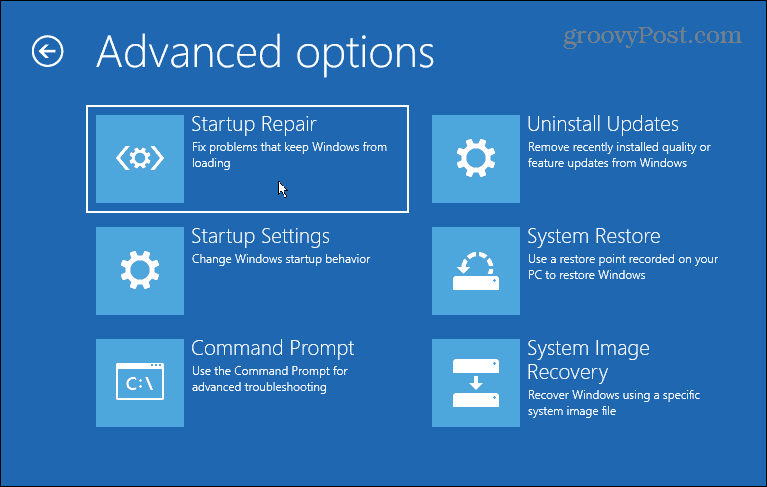
- When your PC restarts, you’ll find the blue Advanced Options menu.

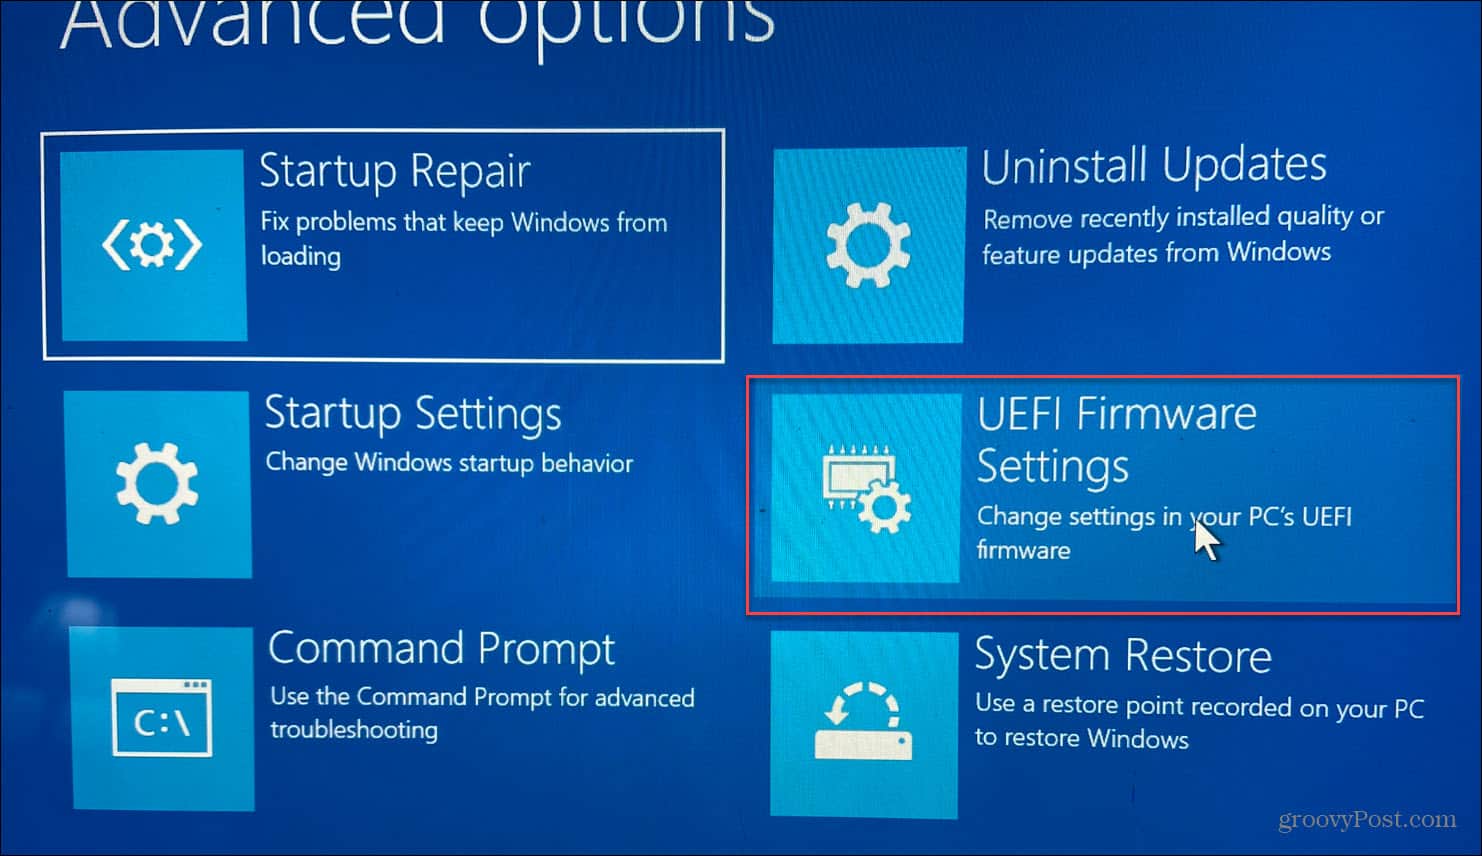
- Navigate to Troubleshoot > Advanced Options and select UEFI Firmware Settings.

- Click the Restart button.


Your PC will now restart and boot directly into the BIOS, and you can make whatever adjustments you need.
Enter Windows 11 BIOS Using PowerShell
You can also use terminal commands to enter the BIOS. You can use either the Command Prompt or the PowerShell terminal. In our example, we’re using PowerShell.
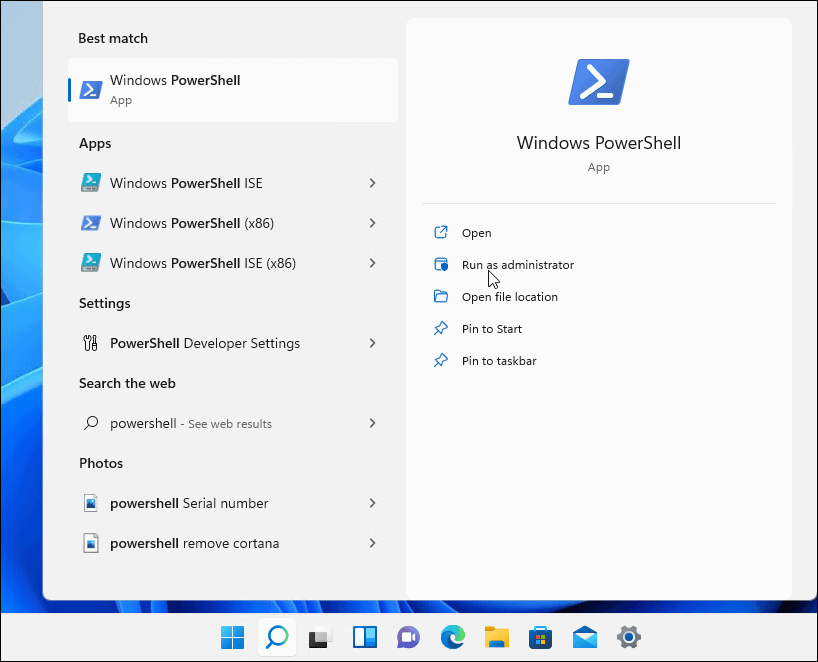
- Click the Start button, search for powershell, and click Run as Administrator from the results on the right.

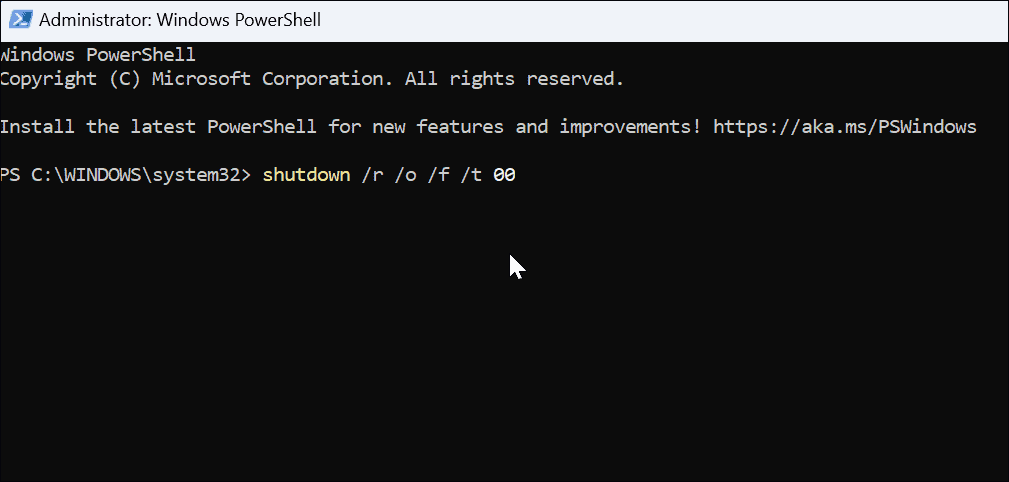
- Type in the following command and hit Enter.
shutdown /r /o /f /t 00

Your PC will reboot into the Advanced Options environment, as shown above. When it opens, navigate to Troubleshoot > Advanced Options and click UEFI Firmware Settings. Click the Restart button, and it will boot into the BIOS.
Open the BIOS on Windows 11
Remember that you need to know what you’re doing when accessing the BIOS/UEFI. Making an incorrect change could make your PC unstable or not work correctly. Luckily, you can make a change, but if things don’t work correctly, you can go back and change the settings. So, it’s essential to take notes when making changes in the BIOS.
Windows 11 is full of other features; for example, you might want to learn how to use File History. There are also different ways to back up your data on Windows 11. For instance, you can create a complete backup of your PC. You can then use that image backup to recover Windows 11 to a working state.


