How to Install & Remove Fonts on Mac and Linux

Tired of the built-in fonts on your Mac or Linux computer? Learn where to find free fonts and how to install them.
Linux and macOS systems come with many built-in fonts, but you may still not find the font you’re looking for. Many sites offer free fonts and we list some for you below. We’ve shown you how to install fonts on Windows 10, Windows 8, and from the Windows 10 Store. Installing fonts is easy on Mac and Linux and we’ll show you how.
Where to Get Fonts
You can find many free fonts online. Here are some websites you can check to see if they have any fonts that fit your needs.
- Free Fonts: 550 Commercial Use OpenType Fonts (on the Mac App Store, but they can be used on Linux also)
- Font Squirrel
- 1001 Free Fonts
- dafont.com
- Font Space
- Fontstock.net
OpenType (.otf) and TrueType (.ttf) font files are common formats you can use on Mac or Linux. So, we recommend you download your fonts in one of those two types.
Manage Fonts on Mac
You can install fonts on your Mac manually or using Font Book.
Font Book is included in the Mac system and has been the standard way of managing fonts since OS X 10.3 (Panther). There are other font management tools, but Font Book has all the basic features you’ll most likely need, including the ability to add, delete, and manage fonts.
We recommend using Font Book, because it provides the ability to disable fonts and resolve duplicate fonts. But we’ll also show you how to manually add fonts.
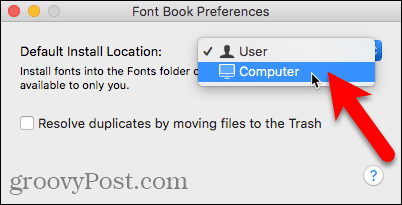
Change the Default Install Location in Font Book
In Font Book, there are two options for installing fonts. You can install fonts so they’re only available to you (User, the default) or so they’re available for all users (Computer).
To change the default font installation location, open Font Book and go to Font Book > Preferences, or press Cmd + , (comma). Select an option from the Default Install Location drop-down list.
Install a New Font Using Finder and Font Book
Once you’ve selected where you want to install fonts by default, open Finder and go to where you’ve stored downloaded fonts. Double-click on the font you want to install.
Click Install Font on the dialog box that displays.

Font Book opens, and the font is installed either just for you (User) or for all users (Computer), depending on what you selected in the Preferences.
A preview of the font displays in the right pane.

Install a New Font From Within Font Book
You can also add a font from within Font Book. Say you have the default location set to User, but you want to add a font for all users without changing the default location.
Click Computer in the left pane. Then, right-click on any font in the list to the right and select Add Fonts.

Navigate to the folder containing the font you want to add, select the font, and click Open.

Resolve Duplicate Fonts When Installing a New Font in Font Book
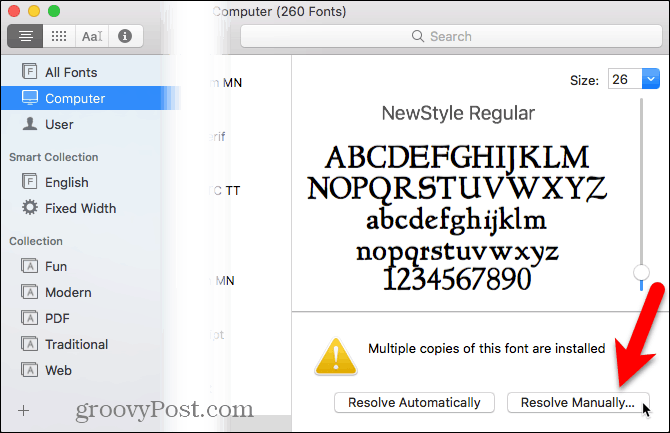
If you’re installing a font under Computer and the same font is installed under User (or vice versa), a warning message tells you that multiple copies of the font are installed.
You can resolve the issue automatically, which causes Font Book to make the decision about which font stays active and which one is disabled.
In our case, we’re going to manually resolve the issue, so we click Resolve Manually.
Both the Active copy and the Inactive copy of the font are displayed. Look at Access to see who has access to the selected copy of this font.

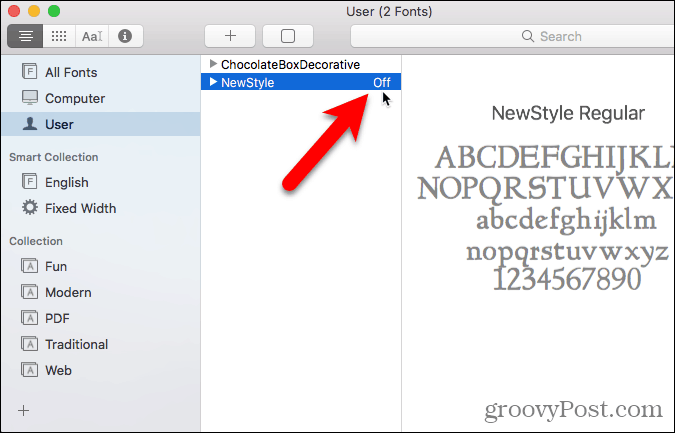
We would rather make this font available for all users, so we click the Inactive copy, for which Access is Computer. We want to make this the Active copy, so we click Resolve This Duplicate.

The copy of the font under Computer is made active and the copy under User is disabled, or Off.
Install Fonts in Font Book Not Downloaded Yet
Many fonts are installed on your Mac for all users, under Computer. In this list, you’ll see some fonts in gray text. These fonts are either disabled (indicated by Off to the right of the font name) or they have not been downloaded.
To download a font not on your computer yet, right-click on the font and select Download <Font name> Family. You can also click the Download button in the right pane.

Validate Fonts on Mac
When you install a font in Font Book, it’s automatically checked for errors, or validated. You can also manually validate fonts after installation if it seems there’s something wrong with the font.
Disabled fonts remain on your Mac but aren’t available for use in apps.
Select the font(s) you want to validate and do one of the following:
- Right-click on the font and select Validate Font.
- Go to File > Validate Font.

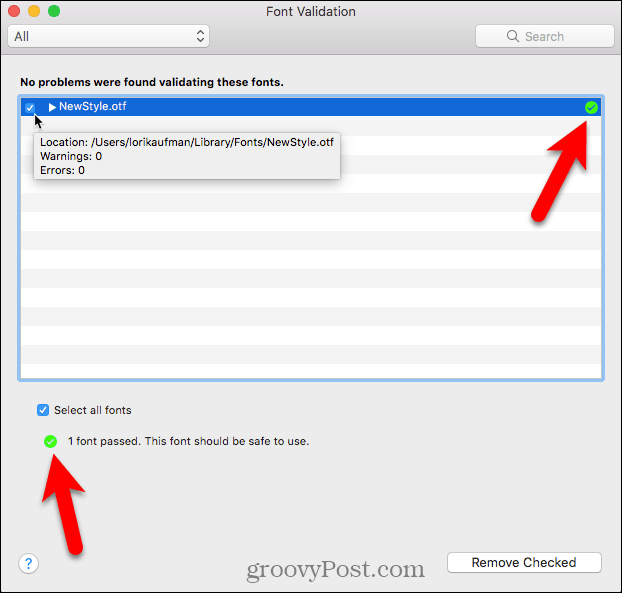
One of three icons displays next to each font on the Font Validation window:
- A green icon indicates the font passed.
- A yellow icon indicates a warning about the font.
- A red icon indicates an error. The font failed the validation.
To resolve warnings and errors with an enabled or disabled font (the next section shows you how to disable fonts), select the font and click Remove Checked.
If you have a long list of fonts you validated, there’s a way to make it easier to find the fonts with problems. Select Warnings and Errors from the drop-down list at the top of the Font Validation window.

To validate a font file before installing it, open Font Book and go to File > Validate File. Select the file and click Open. The Font Validation window shows the status of the font file. You can then install the font, if you want, on the Font Validation window by checking the box for the font and clicking Install Checked. We don’t recommend installing fonts that show warnings or errors after validation.
Disable Fonts on Mac
If you decide you don’t want to use a font anymore, but you’d rather not delete it, you can disable it.
First, select the font(s) you want to disable. Then, do one of the following:
- Right-click on the font and select Disable.
- Click the Disable button.
- Go to Edit > Disable.
System fonts cannot be disabled.
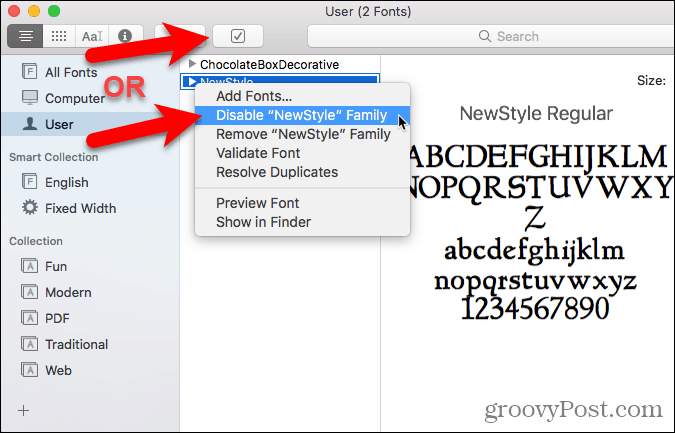
Disabled fonts display in a light gray and are labeled Off. They are not removed from your Mac, but they are not available for use in apps.

Remove Fonts on Mac
If there are fonts you don’t want on your Mac at all anymore, you can remove them.
To remove a font in Font Book, select the font and do one of the following:
- Right-click on the font and select Remove.
- Press the Delete key.
System fonts cannot be removed.

Click Remove on the confirmation dialog box that displays.

Removed fonts are moved to the Trash and aren’t available in Font Book or in apps.
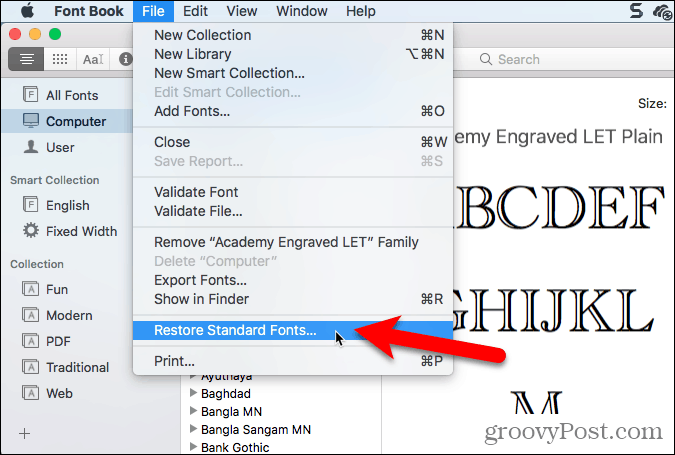
Restore the Standard Fonts That Came with Your Mac
If you’re having problems with any of the fonts you’ve installed in Font Book, it might be a good idea to restore the fonts originally installed on your Mac. This moves fonts you’ve installed into a separate folder, making them unavailable for use in apps.
Open Font Book and go to File > Restore Standard Fonts.
Click Proceed on the confirmation dialog box that displays.

You’re notified with the standard fonts are restored. Click OK.

Non-standard fonts are moved to a dated folder in the user’s Library folder, ~/Library/Fonts (Removed), or the computer’s main Library folder, /Library/Fonts (Removed), depending on where it was installed.
To install the removed fonts again, install them again using one of the methods we covered above.

Install Fonts Manually on Mac
If you would rather install fonts manually, you can copy font files into the appropriate Fonts folder on your Mac.
To make the font available for only you, copy the font file and go to the /Users/Username/Library/Fonts folder, replacing Username with your username. If you want the font available for all users, go to the /Library/Fonts folder on the main Mac hard drive.
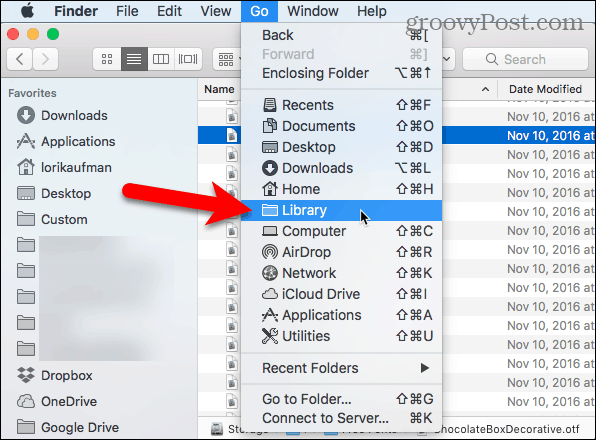
If you don’t see the Library folder in Finder, open the Go menu and press and hold Alt to make the Library option available on the menu. Then, select Library. You can also make the Library folder permanently available in Finder.
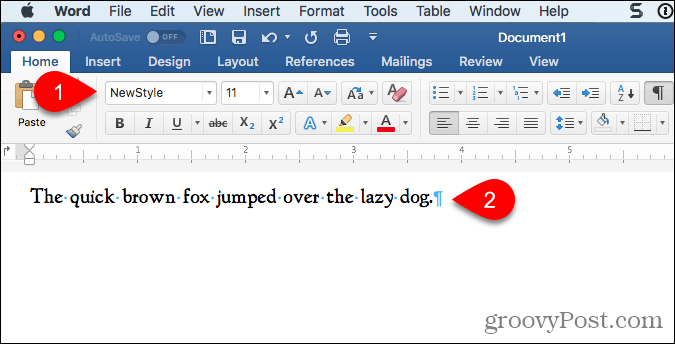
Paste the font file in either Library folder by right-clicking and selecting Paste Item or by pressing Ctrl + V.

The manually installed font is now available in apps. For example, here’s the NewStyle font in use in a Word document.
Manage Fonts on Linux
Linux distributions come with different desktop environments and different applications for managing fonts. We’ll show you how to install fonts on Ubuntu using the Font Viewer, and how to install fonts manually in Nautilus in Ubuntu. Most other Linux distributions have similar tools.
Install Fonts on Ubuntu Using the Font Viewer
Ubuntu comes with a Font Viewer that allows you to easily install fonts, but only installs fonts for the current user. If you want to install fonts for all users, you must install them manually as we show you in the “Install Fonts Manually For All Users” section below.
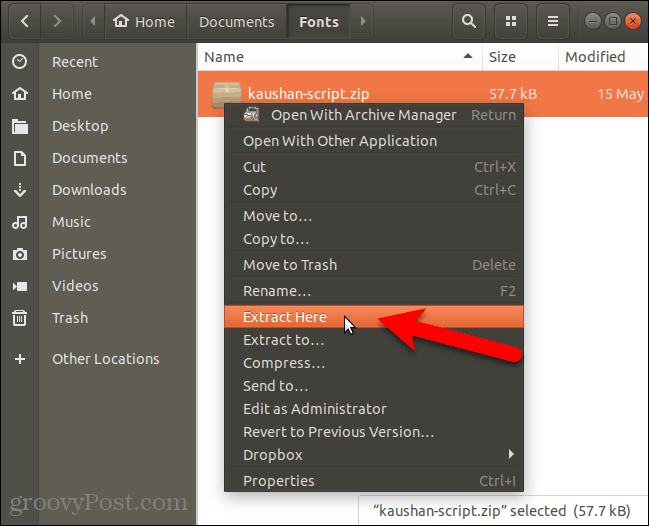
Download the font you want to install in TrueType (.ttf) or OpenType (.otf) format. Fonts usually come in a .zip format, so right-click on the .zip file and select Extract Here.
Then, double-click on the font file.

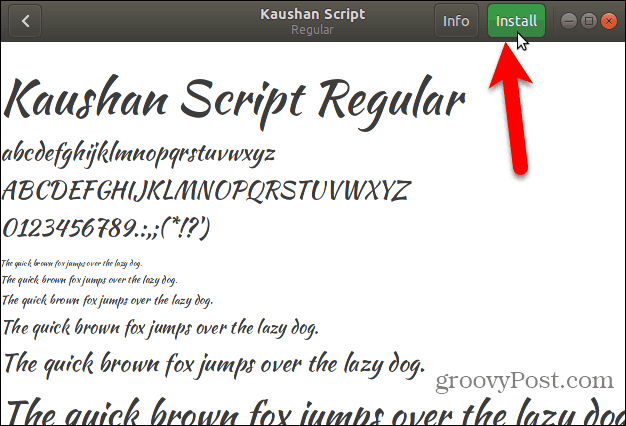
The preview window in the Fonts Viewer displays showing what the font looks like.
Click Install.
An “Installed” message replaces the Install button when the font is installed.
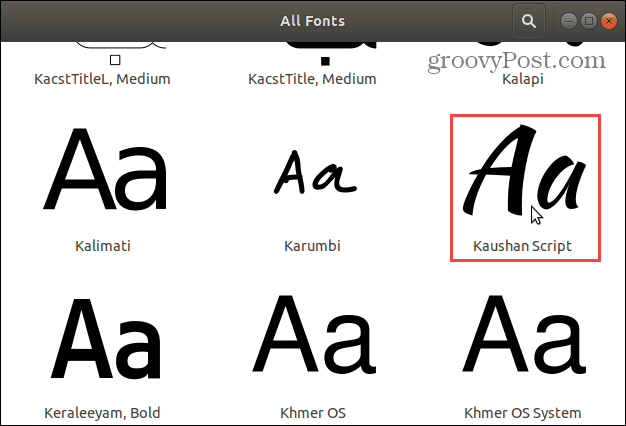
To return to the All Fonts window, click the Back button in the upper-left corner.

The installed font shows up in the list of all the fonts on your system.
Now, you can select the new font in any application that deals with text, like LibreOffice Writer.

Install Fonts Manually For a Specific User
To install fonts for a specific user manually, first log into that user’s account. Then, open your file manager, like Nautilus in Ubuntu, and go to the ~/.local/share folder. The tilde character (~) represents your Home folder, for example /home/lori.
Files and folders beginning with a dot (.) are hidden. So, if you don’t see the .local folder in your Home folder, hit Ctrl + H to show hidden files and folders.
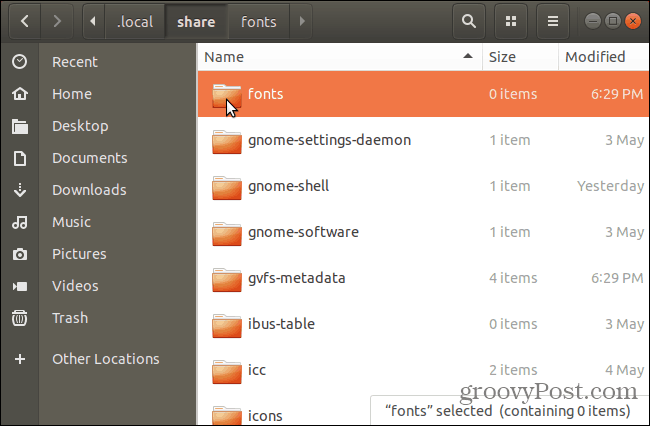
If you see a fonts folder in the share folder, you’re all set. If not, create a new folder named “fonts” in the share folder. In most file managers right click and select New Folder.
Copy and paste the font files into the ~/.local/share/fonts folder to install them for the current user.
After installing fonts manually for the current user, you must update your font cache to register the fonts in the system.
Hit Ctrl + Alt + T to open a Terminal window. Type the following command at the prompt and press Enter.
fc-cache -f
The -f option forces regeneration of all font files, whether they’ve been changed or not. This makes sure all your fonts are available.

Install Fonts Manually For All Users
If you want your fonts available for all users on your system, you must install them manually. The procedure is like the one for installing fonts manually for the current user. But you’ll need to access the folder you’re going to paste the fonts into with administrator privileges. We’re going to use Nautilus in Ubuntu to install fonts manually for all users. So, before continuing, install the necessary option onto the right-click menu in Nautilus.
The process is most likely similar in file managers in other Linux systems, like Linux Mint or Fedora.
In Nautilus, go to the folder containing the fonts you want to install, select the font files, and copy them (Ctrl + C).
Then, click Other Locations at the bottom of the list of locations on the left and click Computer on the right.

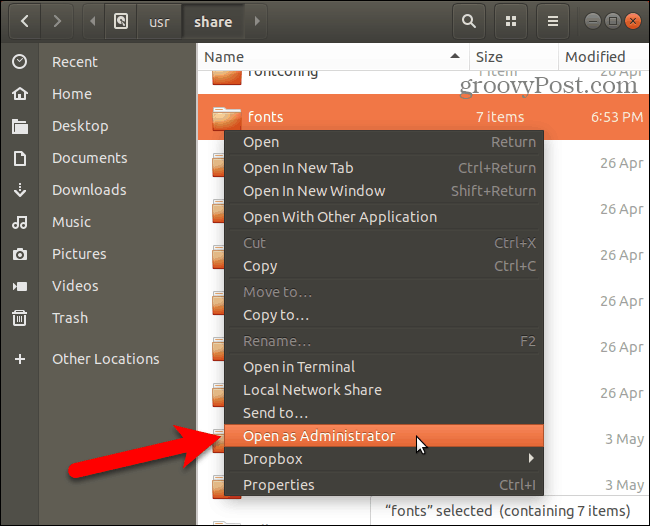
Navigate to the /usr/share folder. You’re going to paste the fonts you copied into the fonts folder. But first, open the fonts folder with administrator privileges by right-clicking on the fonts folder and selecting Open as Administrator.
Enter your password on the Authentication Required dialog box and click Authenticate.

A new Nautilus window opens directly into the fonts folder with administrator privileges.
Paste the font files you copied into the fonts folder.
After installing fonts manually for the current user, you must update your font cache to register the fonts in the system.
Hit Ctrl + Alt + T to open a Terminal window. Type the following command at the prompt and press Enter.
fc-cache -f
Remove Fonts on Linux
Removing fonts on Linux must be done manually, no matter which method you used to install them. The Fonts Viewer does not provide a way to remove fonts.
To remove a font installed only for the current user, open Nautilus and navigate to either the ~/.local/share/fonts folder.
Then, select the font you want to remove and press Delete. You will not see a confirmation dialog box.

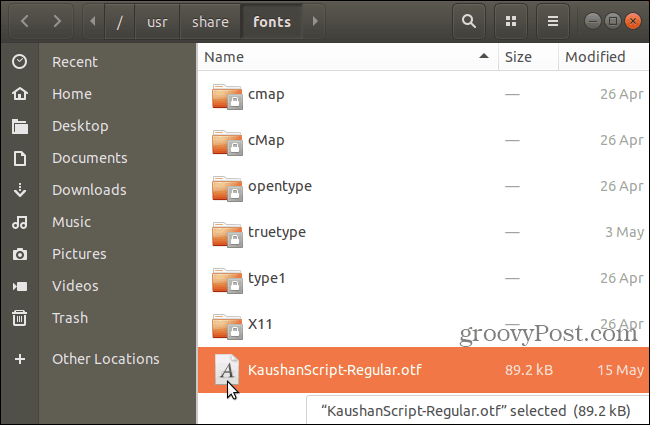
If you’re removing a font installed for all users, you must use the command line. you must open the fonts folder in the /usr/share folder as administrator as described in the previous section.
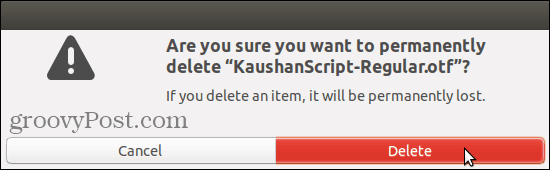
Select the font you want to remove and press Delete. Then, click Delete on the confirmation dialog box that displays.
After removing fonts that were installed for all users, you must update your font cache to unregister the fonts in the system.
Hit Ctrl + Alt + T to open a Terminal window. Type the following command at the prompt and press Enter.
fc-cache -f
Enjoy Your New Fonts, But Be Careful How Many You Install
Just because it’s easy to install fonts on your computer, doesn’t mean you have to install a lot of fonts you don’t need. Installing too many fonts can slow down your computer. So, only install fonts you plan to use. And when you’re done with them, consider uninstalling them.


Kuba
August 25, 2021 at 7:14 pm
Thank you ! Useful and clean document!