How To Manage Your Wi-Fi Networks Using Windows 7

This guide will show you the ropes for managing wireless networks with the new changes in Windows 7.
With Windows 7, Microsoft vastly upgraded how Wireless networks are handled. If you consider the tremendous growth of wireless over the last five years, it’s easy to understand why this upgrade was a shoo-in. This groovy guide will show you the ropes for managing wireless networks with the new changes in Windows 7.
How To Manage Wireless Networks In Windows 7
If you have a wireless network card installed, an icon will display in the windows system tray. You can Click this icon to view available networks and quickly access the Network and Sharing Center.
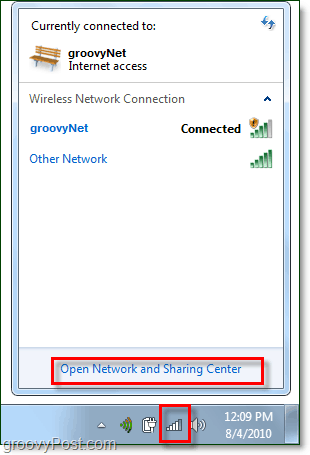

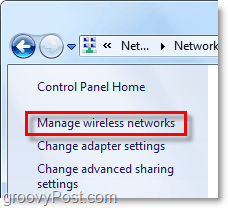
From the network and sharing center, the first stop is the wireless network management screen. To get there Click Manage wireless networks from the left sidebar.
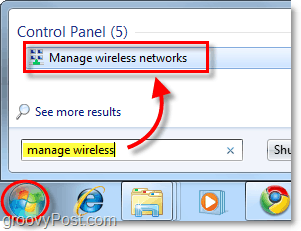
Alternatively, you can access this from the Start menu by Typing manage wireless into the search box and Clicking the Manage wireless networks control panel link.

![]()
![]()

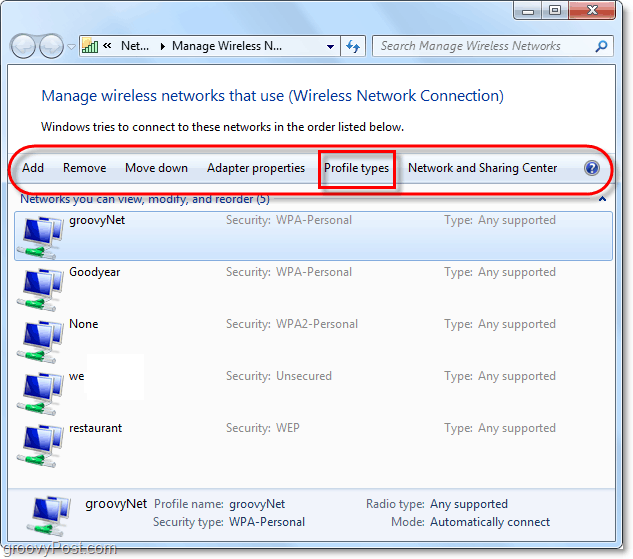
Now we’re on the screen we want to be, the control panel section titled Manage Wireless Networks. Listed will be all of the wireless networks that Windows 7 has connected to and saved the connection data for. From here you can do quite a few different things. Just to list a few:
- Adjust network priority by moving networks up or down on the list
- Adjust adapter properties
- Add new networks
- Remove existing networks
- Adjust profile types
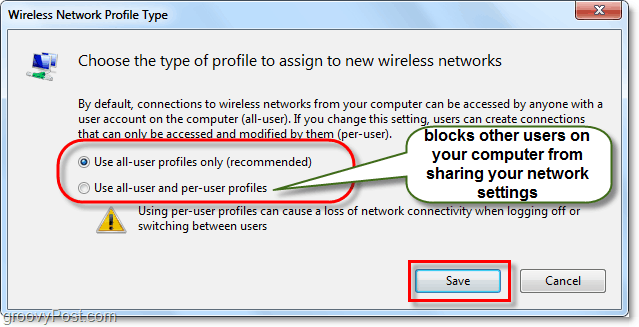
If you have multiple users on your computer and security is an issue, the first thing you’ll want to do is Click Profile types and adjust the settings in there.

If security isn’t a problem the best option to choose would be “Use all-user profiles only (recommended)” – it depends on what network you are connecting to and the circumstances. But if you want to keep other users on your computer from accessing the same networks, then set the profile type to “Use all-user and per-user profiles.”

Now we need to open up the Network and Sharing Center to adjust a few more settings. You can get here by Clicking the back button on the window or just Click the Network and Sharing Center button.


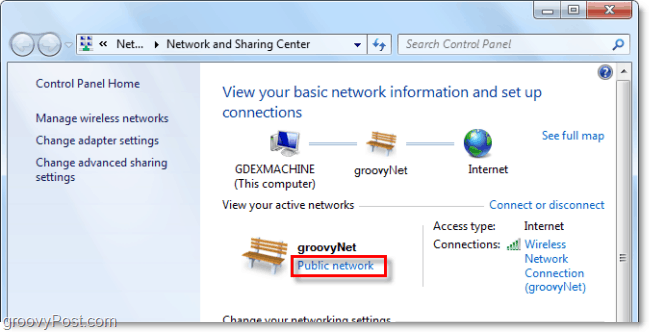
The Network and Sharing Center is just the hub for your network management. You can’t do much from this actual page, but it gives you access to all of your other network dialogs. For example, if you connected to a wireless network but set the wrong type of access point or weren’t prompted – you can change that here. To adjust how Windows treats the network you are connected to, Click the network type right under the network name. In the example below, it says Public Network.

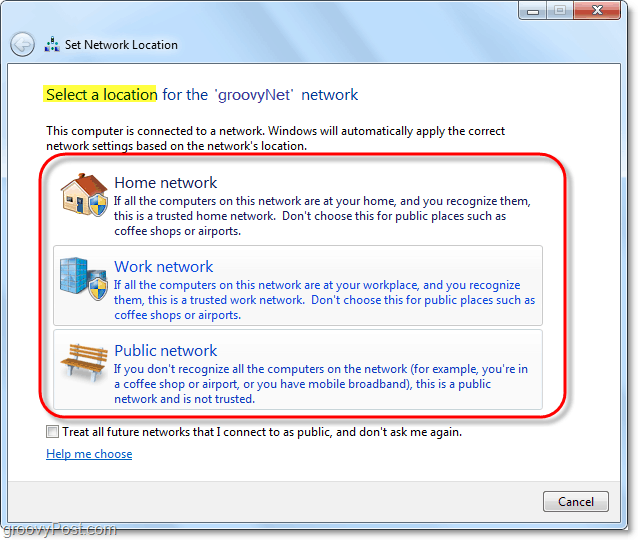
A new dialog will appear that will give three different network types to choose from. Select the option that best describes it. There is even a check box at the bottom if you want Windows to remember this selection and treat ALL new networks it finds as that type, though that feature should be left off unless you are going to be in the same spot for a LONG time. Once you’re finished, you’ll be brought back to the network and sharing center.

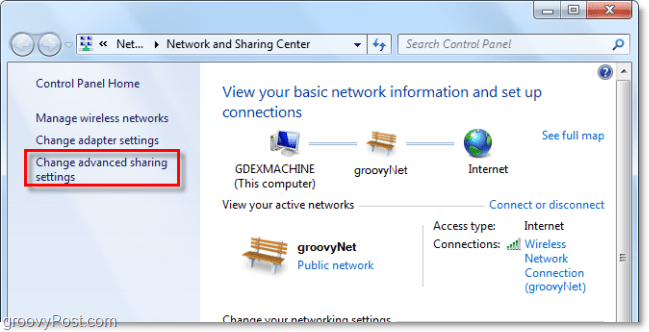
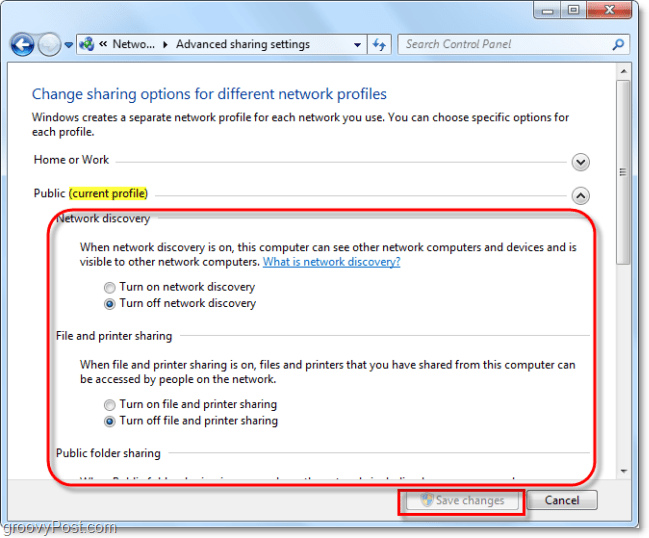
Now that we’ve assigned what type of network we are on, let’s next customize how Windows 7 deals with all networks of this kind. To do this Click Change advanced sharing settings from the Network and Sharing Center.

This is a huge step up from the previous version regarding wireless network management. From this advanced sharing settings window, you can fully customize how Windows treats every network that you assign as a particular type. This means that all public networks you connect to will use these settings, and the same goes for all home networks. You won’t have to customize each connection, just assign each connection as home, work, or public networks. Each setting has an accurate and detailed description next to it, so go through and customize them according to your needs.
Once you are done enabling or disabling each feature, don’t forget to Click Save Changes.

Conclusion
That is all there is to managing wireless networks in Windows 7. It isn’t painfully complicated even though at times it can seem like a maze, especially if you are coming from Windows XP. Hopefully, this groovy guide will help you to understand the basics of how wireless networking in Windows 7 functions.
2 Comments
Leave a Reply
Leave a Reply


Mike
December 19, 2015 at 5:28 pm
Using Win7; if you have to enter a password each time that means the adapter is managing the wifi, to get windows to manage wifi go to START, type wifi, click on wifi connection utility, click on advanced tab, scroll down to use Windows…
This fixed it for me using a Dell e6420 running Win 64bit
Hopefully this will help you
shehnaz jamil
June 16, 2016 at 11:28 pm
thanx