Photoshop Tip: Create and Follow a Smart Workflow
Photoshop is a great tool with uses that are almost endless. When I was learning Photoshop, nobody told me what to do or where to go. I’m mostly self-taught, yet I’m happy with the results. There are, however, some things I wish I knew right from the beginning. One of them is following a smart workflow, and in this article, I’ll show you how to do just that.
Use Layer Groups in Photoshop
When dealing with complex projects in Photoshop, it’s important to keep everything well organized. Layer groups can help a lot when it comes to dealing with multiple versions of a PSD or simply applying effects in a non-destructive way.
Here’s an example PSD that I have created for the purpose of this tutorial.

Let’s say I’d like to apply an effect to this image, but I want to keep all of its original layers in case I want to change them later on. To do this, I can group all my existing layers into a layer group called “Original”.

Then I can duplicate that group and rename it to “Effects”. That way the effects I apply to the image will have their own separate layer group and will not alter my original composition.

Here is what an example of this technique looks like:

Pro Tip: You can record an Action or use the Notes tool to remember the exact values used for each applied effects. This way, if you ever have to go back and edit the original files you’ll know exactly what to do to achieve the same look.
Use Smart Objects
Like layer groups, smart objects can also come in handy in a number of occasions. The image below is another sample PSD to help illustrate this.

Let’s say I want to change the image I have used. Since the border for the image is a simple rectangle with an inner stroke, if I were to delete the previous image, I would have to set up new guides to have it fit the exact same way. Sounds like a lot of work, doesn’t it? That’s because it is. However, there is an easier way. Simply convert the existing image for smart filters.
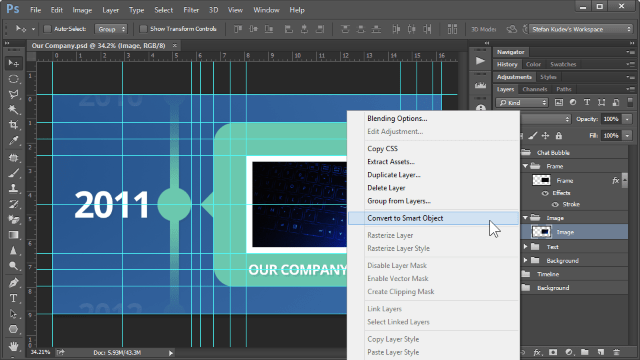
Then double-click it to enter its own isolated editing environment.
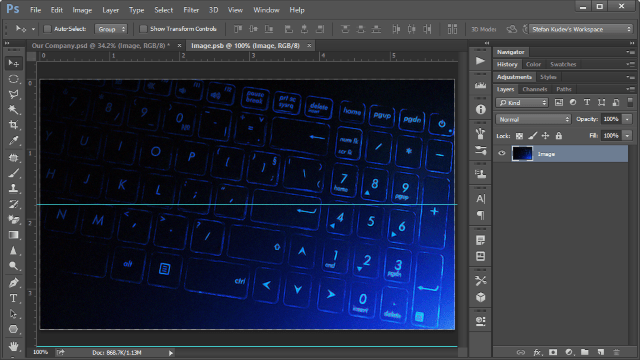
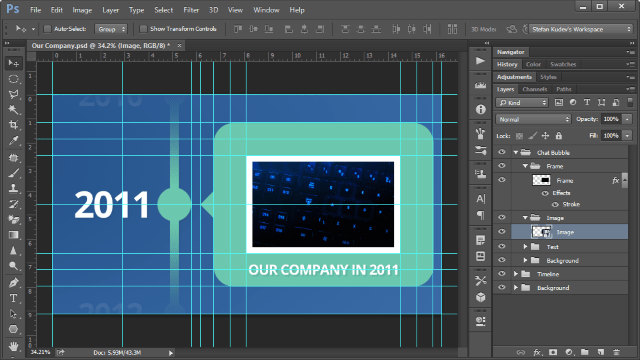
From there you can easily place your new image within the provided bounds, save with Ctrl+S and return to the original PSD.

This will ultimately save you a lot of time.
Save Multiple Photoshop PSDs
This one may seem like the most obvious, but lots of people forget to do this as they are working. Whenever you decide to do any changes to a project, save them as a separate PSD file.
This way you can neatly keep all different versions of the same project in one folder and easily get back to a previous version if you have to.
![]()
Keep Different Versions in One PSD
Woah! Did I just counter my previous piece of advice? No, not really. If the differences between your versions are small to minuscule, you can keep each element as its own layer and simply toggle its visibility on or off. Here’s an example with a PSD where I’m not sure which font to use as a subtitle. Instead of saving each one as its separate PSD, we can save some time and space by having two different layers for each version.
Rename Your Layers
Here’s some more advice that can seem far too obvious, but it’s still useful to keep in mind. Rename, rename, rename!
Renaming your layers is the ultimate key to staying organized, even in the most complicated and expansive projects. Yes, this will take you more time as you’re working, but in the end, it’s all worth it. If you keep your layers panel well organized, you will be able to easily find and edit layers within seconds, as opposed to minutes if you have a clutter of “Copy of New Layer (32)”.
If you’re self-teaching yourself Photoshop, make sure to check out our archive of awesome Photoshop tutorials.