If you use VirtualBox to run your virtual machines, there might be times where you would like to see the OS in all it’s glory. Take Windows 7, unless you do a few configurations, you won’t get the Aero Glass borders and other effects.
Granted, if you’re using a virtual machine for research, or have it doing something on your network, chances are you don’t care what it looks like. But, if you’re using VMs in situations like like blogging about the Windows, you might need images that just look good. Eye-candy isn’t always a bad thing.
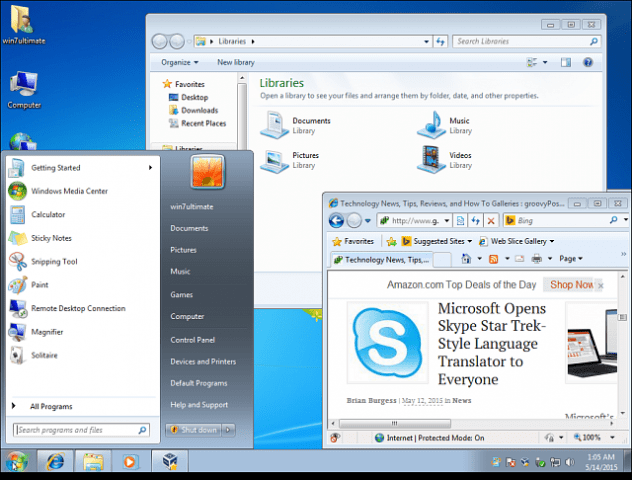

Whatever reason want to enable the Aero effect in Windows 7 on VirtualBox, you can. As shown on the image above, by default, VirtualBox displays the basic theme, and you can’t change it without continuing with the steps below.
Enable Guest Additions in VirtualBox
No matter how you’re using VirtualBox, after installing it, the first thing you need to do is enable Guest Additions — not only for getting Aero to work, for several other additional features that will allow your VM to work a lot more smoothly. In fact, Guest Additions is the first thing I install after setting up a new VM with VirtualBox.
Enabling it a piece of cake. From the top menu bar select Device > Insert Guest Additions CD image.
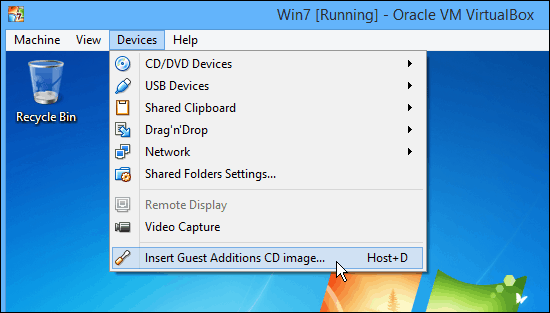

What will launch the virtual disc’s AutoPlay feature and you can go through the Wizard excepting the defaults, until you get to the follow screen. This is where you need to pay attention.
Notice that here you can choose Direct3D Support (Experimental), which enables better graphics support for the OS.
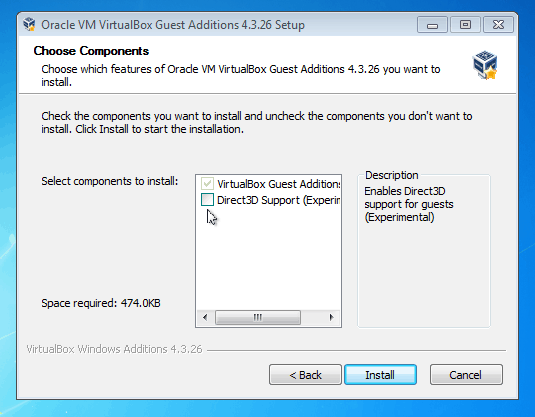

When you check that box, you will see the following message letting you know that “VirtualBox support for this feature is experimental…”
Then asks if you “would like to install basic Direct3D support instead?” Click NO. I can’t tell you how many times I have messed this simple step up…Click NO to this dialog!


The next message you’ll see is shown below. It reminds you that 3D acceleration requires at least 128 MB of memory. If you didn’t dial that in on the initial install, you can add it later.
For this message just click OK, and continue the last few final steps of the wizard and a reboot of the VM will be required.


If you need to set your VM to 128 MB of video memory, which the machine off, go to Settings > Display to set the slider to the amount you want and click OK.


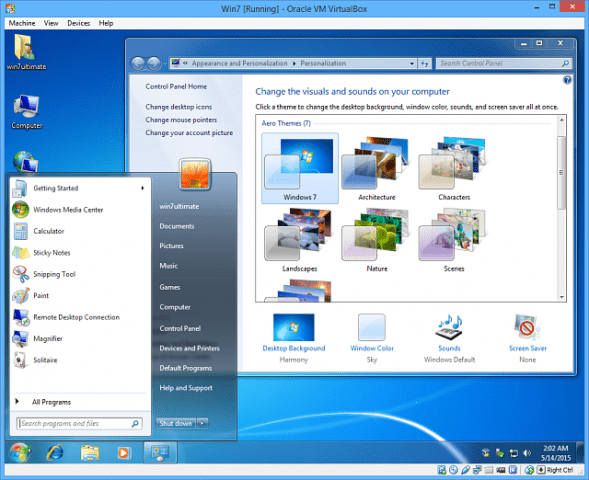
After the reboot, right-click on the desktop and select Personalize. Then from there, select the Aero theme you want to use, an Viola!

6 Comments
Leave a Reply
Leave a Reply




CJ Burkey
June 20, 2016 at 9:33 am
I did this but it didn’t work for me.
Brayden
August 27, 2017 at 2:15 pm
My Computer Of course supports Windows aero because it came with Windows 7, But when I try to download Direct3D through VirtualBox Guest additions, when I restart the VM, it Wont do anything. still would have Windows 7 Basic Theme. I even said no to basic Direct3D, but it wont work. I turn 3D and 2D Video Acceleration on put Video memory to 128MB, But it still Wont work.
aviallon
January 1, 2017 at 1:52 pm
Thank you so much man ! I always clicked Yes on the dialog asking for basic Direct3D support. I would have done this mistake over and over if you weren’t there.
ckong
July 4, 2017 at 4:06 pm
I just wanted to say thanks for this. It worked. Two years after you posted it, your walk-thru is still valid (even the screen shots matched) and is helpful.
Marcus Caixeta
August 18, 2018 at 5:03 am
thank’s this tutorial it is working perfectly!! ;)
KirkH420
June 27, 2020 at 5:22 pm
The directions have changed. Now there is a “Enable 3D Acceleration” checkbox. It says that this allows access to 3D capabilities on the host machine. You’ll need to power OFF your VM and then go into the VM’s settings > Display. Here you will see the Checkbox. Once you enable it, you will see that your video memory option has grown larger and now you should be able to select 256mb if you want. I used 128mb and then booted the VM, right clicked on desktop, chose personalize and then set Windows Aero and then it worked.