How to Disable Find My iPhone

While it should remain enabled most of the time, there may come a time when you need to disable the Find My iPhone feature. Here’s how.
If you want the ability to locate your lost or missing iPhone, iPad, Apple Watch, or AirPods, you’ll want to turn to on the Find My iPhone feature. However, there may come rare occasions when you want to disable Find My iPhone.
While keeping Find My on most of the time is essential, you may need to turn it off when bringing your phone or tablet in for repair, selling, or gifting it to someone.
Whatever the reason you want to turn it off, we’ll show you how in this article.
Why Should You Disable Find My iPhone?
The Find My feature is an essential part of the iOS experience. It lets you find your device if you lose it in your car or under couch cushions. It also can find your device and provide its location on a map and remotely erase your data if it’s stolen,
It’s important to note that once you enable Find My iPhone, you should keep it on except in a few situations where you can safely turn it off. For example, if you take it into an Apple Store for maintenance or repair. Apple will request that you turn it off in those situations.
If you are selling or gifting your iPhone, it’s a best practice to disable the feature before you go through the steps to reset your iPhone or iPad. Doing so will allow the next owner to set it up like a brand new device.
How to Disable Find My iPhone
Turning off the Find My iPhone feature on your phone or tablet is straightforward and only requires a few taps on your screen.
To disable Find My on an iPhone or iPad:
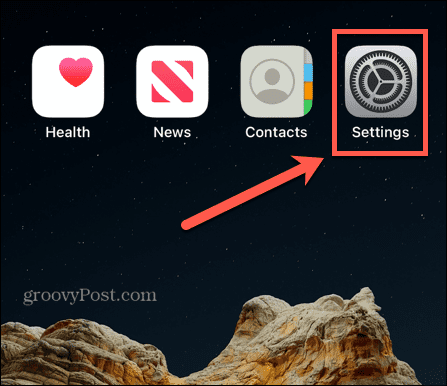
- Select the Settings icon on the home screen.


- Tap your name at the top of the following screen.


- Swipe down and select the Find My option from the Apple ID screen.


- On the Find My screen, tap Find My iPhone from the menu.


- Toggle off the Find My iPhone switch on the following screen and enter your Apple ID password to verify the action.


How to Disable Find My iPhone from a PC or Mac
If you are selling or gifting an iPhone or iPad, you can remotely erase it and then disable Find My from the device or your computer.
Note that you may need to erase the phone or tablet first, so only use this option if you no longer need the data or device.
To disable Find My from a computer:
- Launch a browser on your Mac or PC, head to iCloud.com, sign in with your Apple ID, and choose Find My from the Apps menu.


- Click the All Devices dropdown menu, select the device you need to erase and disable the Find My feature.


- Select Remove from Account on the following screen.


- Click the Remove button when the verification message appears.


- Enter your Apple ID password when prompted and click Remove.


Once you complete the steps, iCloud will remove the item from your All Devices list. If the iPhone or iPad is already sold or given away, you can clean up your list of old devices for easier management.
If you haven’t reset a specific device yet, you need to erase it by clicking the Erase button and removing it from your account.


Managing Your iPhone or iPad
While it’s best to keep Apple’s device recovery feature on most of the time, sometimes you’ll need to disable Find My iPhone on your iPhone or iPad. Turning it off is straightforward using the above steps.
The Find My feature isn’t just for locating your iPhone or iPad. You can use it to track and locate missing AirPods or to find a missing Apple Watch. Another interesting thing is that it’s possible to use Find My iPhone on Android to locate your Apple devices.
In addition to remotely locating and erasing your data, you might be interested in how to install Apple’s public beta of iOS on your iPhone. Or, if you can’t download an app, you may need to fix the cannot connect to App Store error on your iPhone.
Leave a Reply
Leave a Reply


