How to Deactivate Your Facebook Account but Keep Facebook Messenger
Are you tired of your Facebook profile, but need to keep in touch with contacts on Messenger? Here’s how to deactivate your account and use the app only.
Are you growing tired of Facebook but still want to chat with your friends via Facebook Messenger? You can! With the standalone Facebook Messenger app. You don’t need to use a traditional Facebook timeline. A lot of people don’t know that’s possible, but it is.
Instead of signing up for a traditional Facebook profile, you can download the FB Messenger App. Instead of logging in with your Facebook profile, choose “Create a New Account,” which will not create a profile but allow using the app. But most people already have a Facebook profile, and if that’s you, here’s how to deactivate your Facebook account and use FB Messenger.
Note: Before deactivating your account, you might want to download a full copy of your photos, videos, and other data first.
Deactivate Your Facebook Account but Keep Facebook Messenger
This is probably where most people are at right now. You have your Facebook account, don’t want to use it, but need to stay in touch with people from your Messenger list. Also, you might want to have the option to go back to your regular Facebook timeline someday. This is where deactivating your account comes in, and it’s easier than you might think.
Launch a browser on your computer and log into Facebook. Click the Account dropdown button on the upper-right corner of the page. Then click Settings & Privacy.
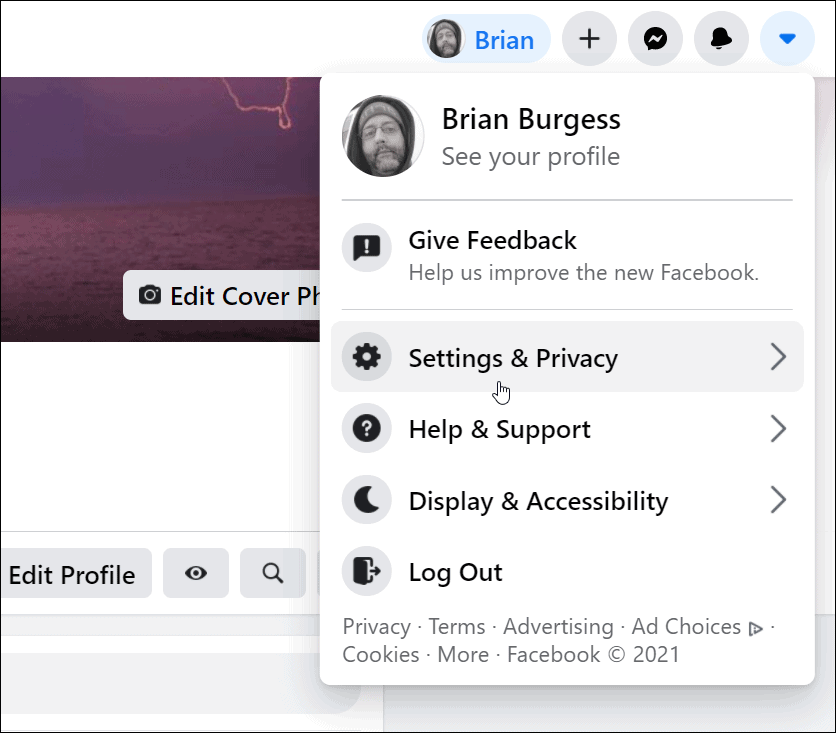
Now click on Settings from the menu.

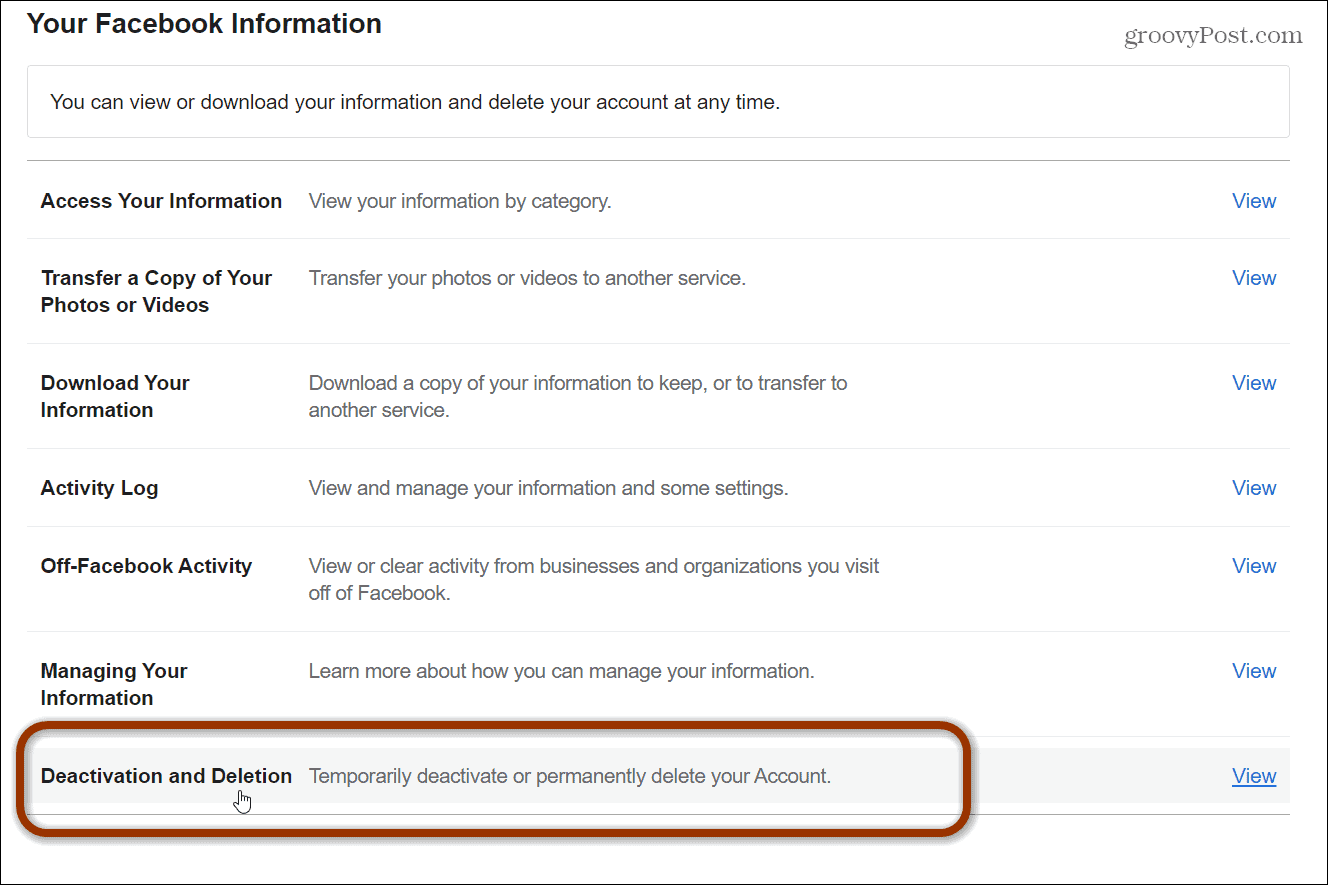
Next, from the left-hand menu, click on Your Facebook Information.

Scroll to the bottom of the list and click on Deactivation and Deletion.
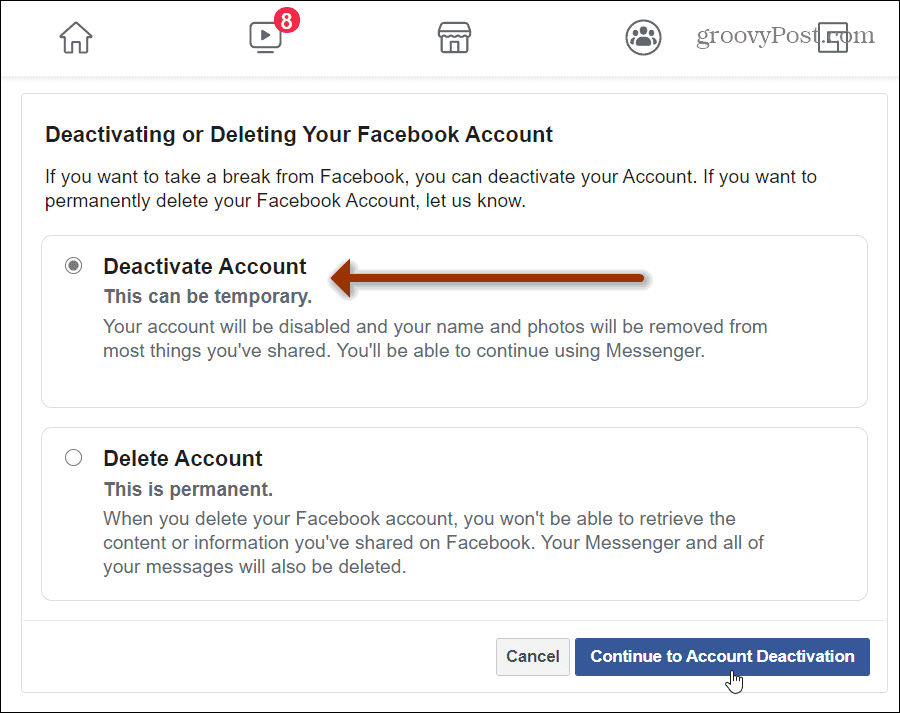
Select the Deactivate Account option on the next screen and then click the Continue to Account Deactivation button.
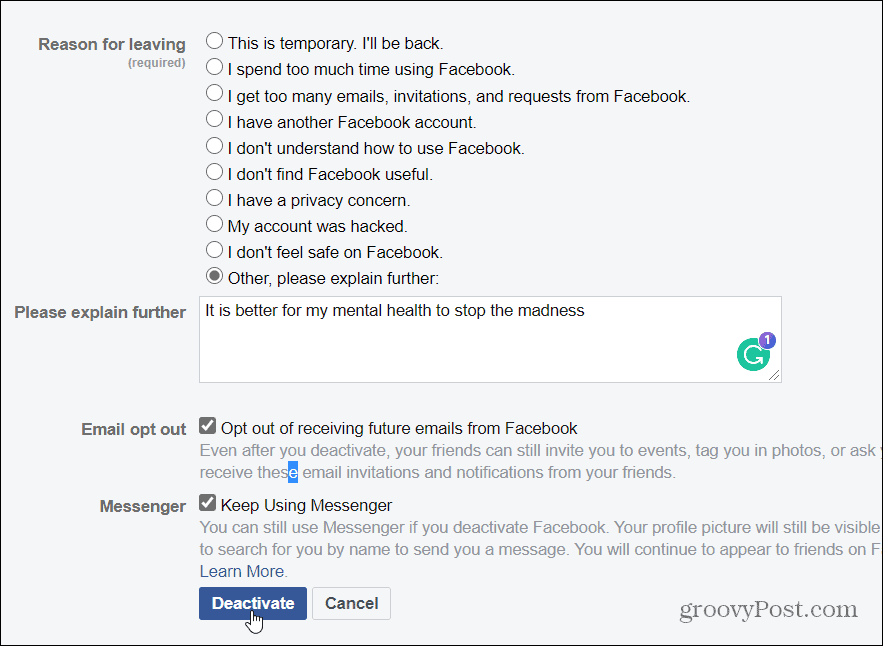
Next, you will get a short questionnaire on why you’re deactivating your account. To get out quickly, click the “Other” option. If you choose anything else, it will pop up more suggestions with links that prompt you not to deactivate your account.
Click the Email opt-out option if you want to stop emails if you want. And make sure to check the “Keep Using Messenger” option and then click the Deactivate button at the bottom.
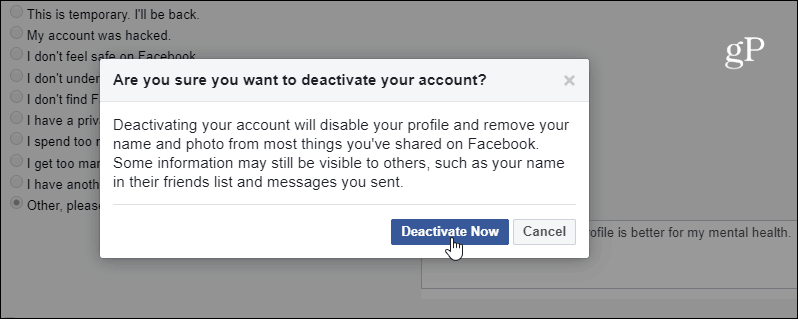
A final message will pop up asking if you’re sure you want to deactivate your account. Click the Deactivate Now button.
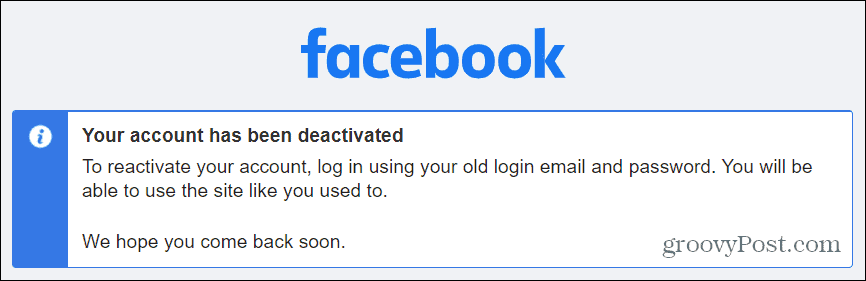
That’s it. You will be logged out of Facebook and see the following message letting you know your account has been successfully deactivated.
Deactivating Your Account
Now, it’s important to know that deactivating your account is just getting rid of your timeline — your name, photos, and some things you have shared. Your items will not be deleted. You’re essentially pressing the “pause” button. It doesn’t get rid of everything, and some info will still be visible to others. And this will allow you to reactivate your profile later if you want to.
The idea here is you are getting rid of your profile, the news feed, and the rest of the traditional interface. Moving forward, you can keep in contact with your friends and family via the Facebook Messenger app only.
If you want to completely and permanently get rid of your Facebook account, read our article: How to Permanently Delete Your Facebook Account. After that, if you want to use FB Messenger again, download the app and sign up with a new account.
You can download the standalone Facebook Messenger app for iOS and Android or use the FB Messenger web app from any device. Or, on Windows 10, you can download the Messenger UWP desktop app.
Note: 2-22-2021 This article has been updated to reflect changes to Facebook options and the current interface.