How to Customize Autocorrect in Word on Windows and Mac

Autocorrect can be useful and helpful in applications like Microsoft Word. We’ll show you how to customize autocorrect in Word to work for you.
Autocorrect is one of those features that most people either love or hate. While it can save you from embarrassing moments, it can also create them. But moving away from autocorrect on your mobile device in texts and emails; we’re looking at the feature on your computer in Microsoft Word.
By using autocorrect in Word, you can save time and reduce errors when composing documents. A word that the application senses is incorrect is automatically replaced with what it believes is correct. This is especially helpful for school essays or business documents. Here’s how to customize autocorrect in Word so that it works effectively for you.
Autocorrect in Word on Windows and Mac
The autocorrect feature in Word is similar on Windows and Mac with only slight differences that we’ll note. Let’s start with accessing your autocorrect options on each platform.
Access Autocorrect on Windows
Follow these steps to open autocorrect in Word on a Windows computer.
- With a Word document open, click File from the menu.
- Select Options.
- Choose Proofing on the left.
- Click the AutoCorrect Options button at the top.

Access Autocorrect on Mac
Follow these steps to open autocorrect in Word on a Mac.
- In the menu bar, pick Word > Preferences or click Tools.
- Select AutoCorrect.

Autocorrect Options
Technically, autocorrect in Microsoft Word refers to words. This includes capitalization, replacements, and exceptions.
But you’ll also notice tabs for AutoFormat As You Type, AutoFormat (Windows), and AutoText (Mac). These three are for things like replacing straight quotes with smart quotes, formatting a new list item like the one before it, and linking internet paths. So while they are in the autocorrect settings, they really apply to formatting.

Here, we’ll go through the AutoCorrect tab and touch briefly on Math AutoCorrect.
Customize Autocorrect in Word
Click the AutoCorrect tab in the AutoCorrect Options window to start customizing how the feature works in Word. Note that some terms vary between Windows and Mac.
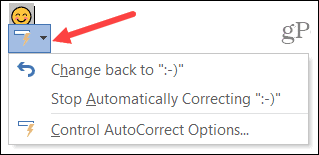
Autocorrect Button
The first option is to show the autocorrect button. This is the tiny button that appears next to a word in your document when a correction is made. It allows you to undo the correction if you like. It can be helpful but also distracting. So if you’d like that button to appear, check the box.
Capitalization and Exceptions
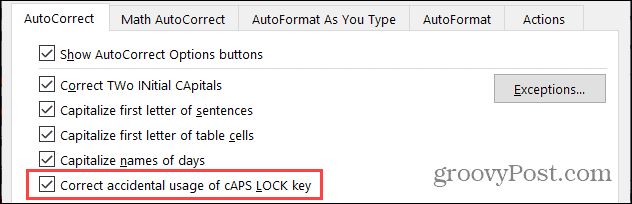
The next items apply to capitalization and can be very useful. If you miss capitalizing the first letter in a sentence or day of the week, autocorrect can fix those types of mistakes if you check these boxes.

Windows has an extra item in this section for correcting accidental use of the Caps Lock key. So if you mistakenly have Caps Lock on, checking this box will autocorrect mistakes made while Caps Lock was on.
Click the Exceptions button to exclude specific items from those you’ve checked the boxes for above. A small window will pop open with tabs for First Letter, Initial Caps, and Other Corrections. This is ideal for words with odd formatting like a product or company name. Good examples of when to use Exceptions include words like “iPhone” and “SEMrush” where you do not want the capitalization changed.
Type the word or phrase in the Don’t capitalize after or Don’t correct box (depending on the tab) as you want it to appear. Click Add to insert it into the list at the bottom. Click OK when you finish.

Replacements
Next, you’ll see the Replace text as you type checkbox. This is what turns autocorrect on and off, so it’s good to keep in mind should you decide to no longer use the feature. Check the box to use autocorrect and then continue on with text replacements.

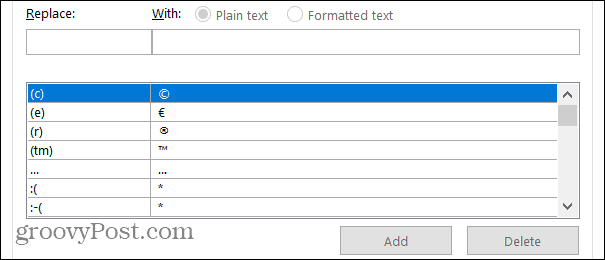
Review the list of replacements near the bottom. On the left is the typed text and on the right is what replaces it. You’ll notice symbols, emoticons, and many common words. You can add, edit, and remove replacements within this list.
- Add a replacement: Enter the way the text is typed under Replace and the way you want it corrected under With. Click Add.
- Edit a replacement: Select a replacement in the list, edit the Replace or With field, and click Replace. (The Add button will change to Replace automatically.)
- Delete a replacement: Select a replacement in the list and click Delete. You will not be asked to confirm, so be sure you want to remove it.
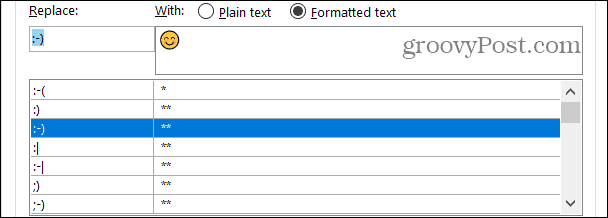
Use the Plain Text or Formatted Text buttons as they apply to your replacements. Formatted Text normally applies to things like symbols and emoticons where the typed text is replaced with something like an image.
Check the final box in the AutoCorrect Options window if you want to automatically use suggestions from the spelling checker if you use spell check in Word.
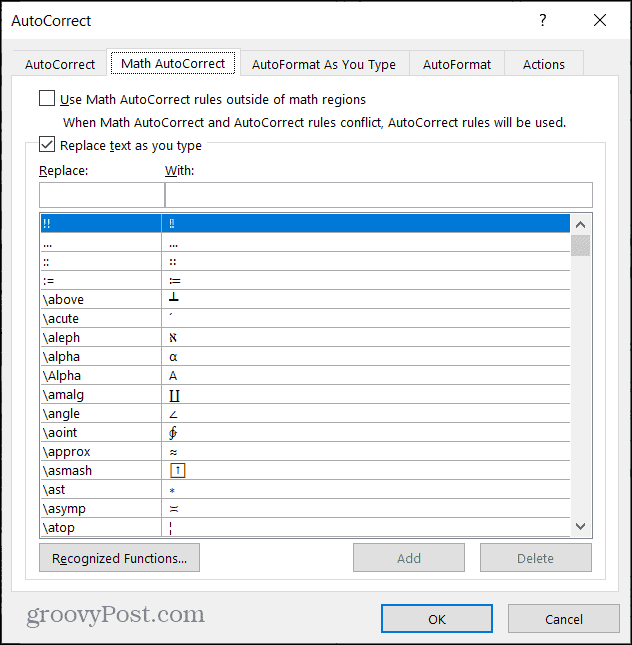
Math AutoCorrect
If you type equations and use math functions in Word, you may also want to use the Math AutoCorrect tab.
This tab works pretty much like the AutoCorrect tab. You can view a list of replacements, add, edit, or delete them, and look at recognized functions.
If you want to use Math AutoCorrect outside of math regions, check that box. Note that when Math AutoCorrect and AutoCorrect conflict, the AutoCorrect rules will prevail.
Also, like the AutoCorrect options, you can turn on Math AutoCorrect by checking the box for Replace text as you type.
Use Autocorrect in Word to Your Advantage
Autocorrect really can be your friend when it comes to using it in Microsoft Word. And since you have more time to review a Word document than a quick text message, you can adjust if necessary when something strange pops up.
For more, take a look at how to find and replace formatting in Word and Excel.


