How to Create and Edit GIFs on Windows or Mac
If you want to edit GIFs on Windows or Mac, you can do using paid and free tools, as well as by using online services like GIPHY. Here’s how.
If you use tools like WhatsApp, Discord, or Facebook Messenger to communicate, it’s likely that you’ve seen GIFs pop up in your messages from time to time. GIFs are short videos that play themselves, often used as an amusing way to convey emotion or message without needing to write anything. In many cases, the GIF speaks for itself.
You can use GIFs everywhere, from your group chats to your PowerPoint presentations. Millions of GIFs are readily available, but you can also create and edit your own GIFs on Windows or Mac. The best way to do this is by using tools like Adobe Photoshop, although you can use online sites like GIPHY as an alternative.
If you’re trying to figure out how to edit GIFs on Windows or Mac using Photoshop, here’s what you’ll need to do.
How to Create and Edit GIFs Using Adobe Photoshop
Adobe Photoshop is one of the best tools for standard image editing but it can also be used to create and edit GIF files. This assumes you already have a GIF file you’re able to edit, although you can easily convert the frames from an existing video file to create a GIF first.
These steps should work for both Windows and Mac users, but there may be small differences depending on your OS and Photoshop version.
Opening an Existing GIF or Importing a Video
To begin, open Photoshop on your PC or Mac. If you want to edit an existing GIF file, you can do this by pressing File > Open and selecting the GIF file you wish to edit.

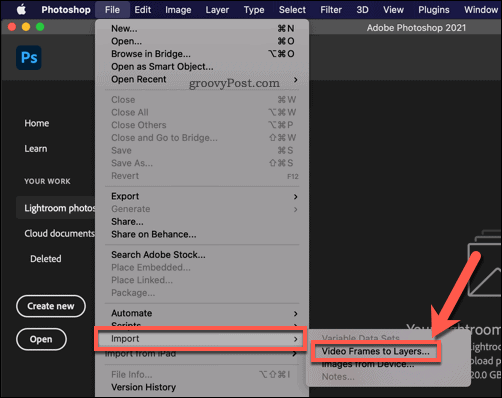
If you want to import an existing video to create a new GIF, however, press File > Import > Video Frames to Layers and select a suitable video file. Each frame of the video will be imported into a new Photoshop project, allowing you to edit the frames before you save it as a GIF.
In the Import Video To Layers menu, you can determine how much of the video you want to convert to a GIF. If you want to use the whole video, select From Beginner to End. Alternatively, press Selected Range Only. You’ll need to choose the length of video you want to save using the sliders beneath the video preview.
You’ll also need to determine how many frames are saved by enabling the Limit to Every Frames checkbox and selecting a suitable value. Reducing this number will reduce the file size, but will make your GIF playback less smooth to watch.
Press OK to import your video once you’re done.

Enabling the Timeline Panel
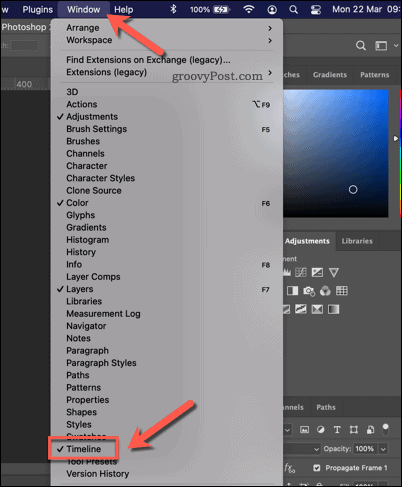
The Timeline panel in Photoshop allows you to view and customize each individual frame of a GIF or imported video. This is similar to the timelines you’ll see in standard video editors. The Timeline panel should automatically become visible at the bottom of your menu when you open a GIF for editing.
If it doesn’t automatically open, press Window > Timeline to view it.
Setting Frame Speeds
Before you begin editing the individual frames of your GIF, you’ll need to set the frame speed. This determines how quickly your GIF plays through each frame. You only need to do this if you’ve imported a video or if you want to change the playback speed of an existing GIF.
To do this, select all of the frames shown at the bottom of the Photoshop panel (hold the Shift key to do this). Once selected, choose a new delay time from the drop-down menu beneath any of the selected frames.
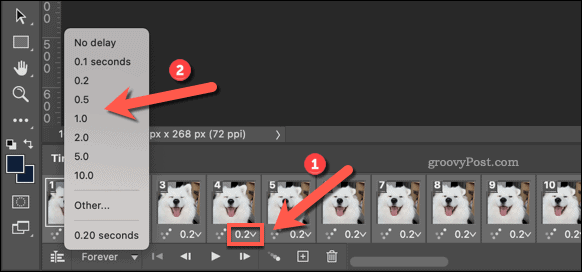
This is the playback time for each frame. You can set these to any figure between 0.1 and 10 seconds (or set a custom speed by clicking Other instead).
Creating a GIF Loop
Once you’ve set the frame speeds, you’ll need to set your frames to loop. This creates the GIF effect, repeating the video clip on a loop continuously. You should only need to do this if you’re creating a new GIF using a source video—this should be set automatically for existing GIFs.
To do this, select the drop-down menu in the bottom left corner of the Photoshop menu. From there, select the Forever option.

Making Further Changes and Saving Your GIF
At this point, your GIF is ready to be exported, but you may wish to use Photoshop’s many other features to make further changes to your GIF first.
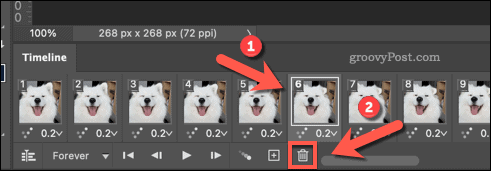
For instance, you can delete certain frames by selecting them individually in the bottom timeline, then pressing the Delete button underneath. You’ll need to confirm your choice by pressing Yes in the pop-up window afterward.
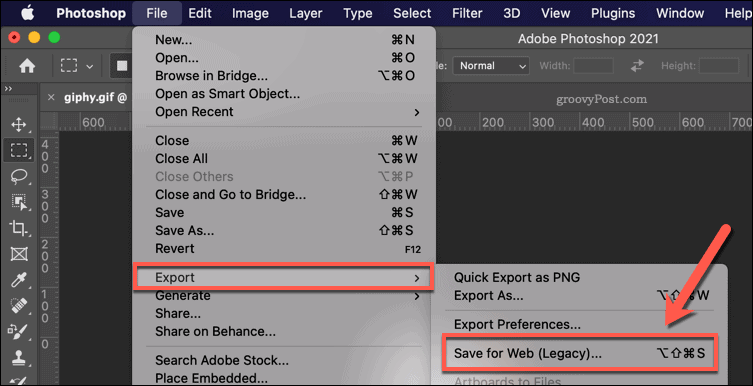
You can also edit each frame like any other Photoshop image by adding effects, drawing on the frame images directly, adding shapes, cutting or rotating each frame, and more. Once you’re ready to export your GIF, however, press File > Export > Save for Web (Legacy).
Select GIF as the output file type in the top right, then make additional changes to the settings below it (as required).

You can also select one of the preset options for GIF images using the Preset drop-down menu. This will change the export settings (including the colors used) to those preset settings.

When you’re ready to export the GIF, press Done.

You’ll need to provide a filename and save location at the next stage—provide these to save your GIF. Once saved, you can open the GIF using your PC or Mac’s image viewer or upload it to use elsewhere.
Producing High-Quality Content on Windows and Mac
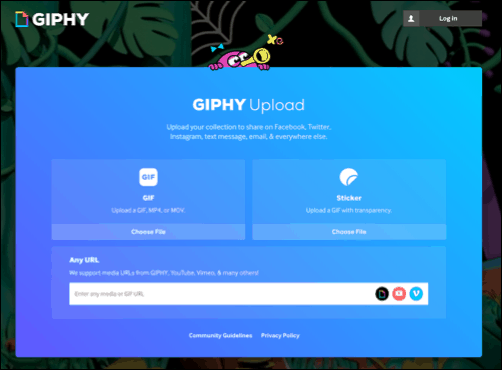
GIFs are a fun way to create short snippets of video content you can share and play on any device. You can create GIFs in other ways, such as capturing your screen as a GIF to show off a new skill. If you don’t have Photoshop installed, you can use online sources like GIPHY to quickly upload videos and turn them into GIFs without installing any additional software.
You can also use GIPHY to export video content from YouTube and other online sources, allowing you to share your GIFs on other platforms like Facebook and Twitter directly.
Creating high-quality content requires skill and training, but if you’re a Photoshop beginner, you can make things easier by using and creating presets. While Photoshop is a great tool, the free and open source GIMP is a worthy competitor, with both tools offering professional-level features for beginners and professional content creators alike.


