How to Add and Remove Table Borders in Google Docs

If you want your table border to stand out (or not), you can change your table border settings in Google Docs to do it. Here’s how.
Tables are a useful tool for organizing and presenting data in a way that makes that data easier to understand or read. Thankfully, Google Docs makes creating and customizing tables in your documents an easy process.
One way to customize a table in Google Docs is by adding or removing borders. Borders can help to define the cells and separate the data within the table. If you’re inserting a table of contents into your document, for example, a border can help it stand out. You can also use table borders to make your table fit more with the style choices you’ve made in your document.
Let’s look at how to add and remove table borders in Google Docs.
How to Add or Remove a Table Border in Google Docs Using Table Properties
Google Docs allows you to customize the appearance of a table, including adding or modifying borders. You might want to add a border to emphasize the data held within it and to make it stand out more against your text or background. If you’re using the default template for documents in Google Docs, then your table should come with a 1pt border. However, if it doesn’t, you can add it using the Table Properties menu using the steps below.
- Open your Google Docs document.
- Select the table you want to modify.
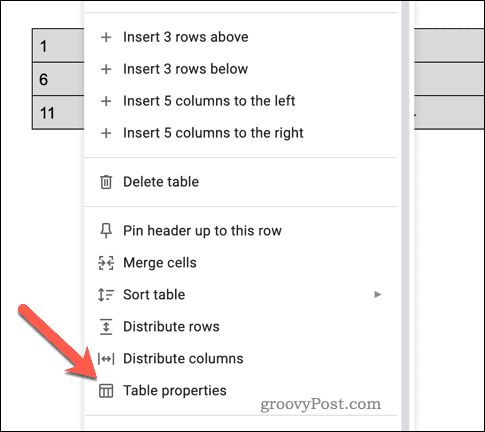
- Right-click on the table and select Table Properties from the menu.


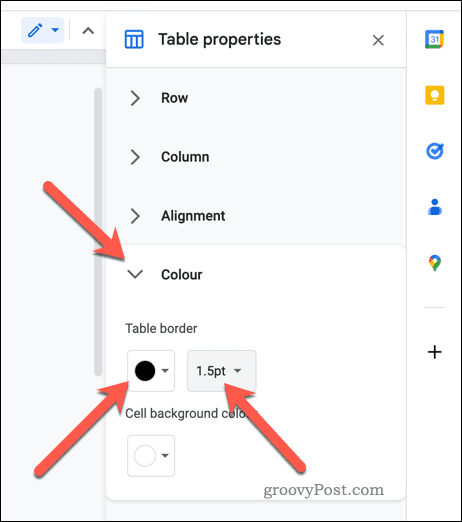
- In the Table properties menu on the right, select the Color tab.
- In the Table Border section, choose your color and set the border to at least 0.5pt to make it visible.
- To remove the border, select 0pt as the border width and set the color to white.


- When you’re done, close the menu by clicking the Close icon in the top-right corner of the Table Properties menu.
Any changes you make to your table borders will apply immediately.
How to Add or Remove a Table Border in Google Docs Using Toolbar Icons
You can also add or remove a table border in Google Docs using the border options on your toolbar.
- Open your Google Docs document.
- Select the table you want to modify.
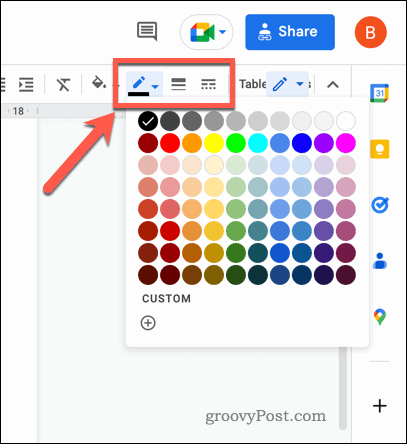
- Select the Border Color icon to choose the color for your border.
- Next, click the Border Width icon to choose the width, setting it to at least 0.5pt to make the border visible.
- To change the border style, click the Border Dash icon and choose your preferred style.
- If you want to remove the border, choose Border Width and set the style to 0pt.


The changes you make will appear immediately. You can also customize the border around individual cells or individual lines in your table.
Format Better Documents in Google Docs
Thanks to the steps above, you should know now how to add and remove table borders in Google Docs. Formatting tables is a great way to help make it easier to analyze long and complex documents, in particular.
What other tips do you have for working with tables in Google Docs? Let us know in the comments!
Leave a Reply
Leave a Reply


