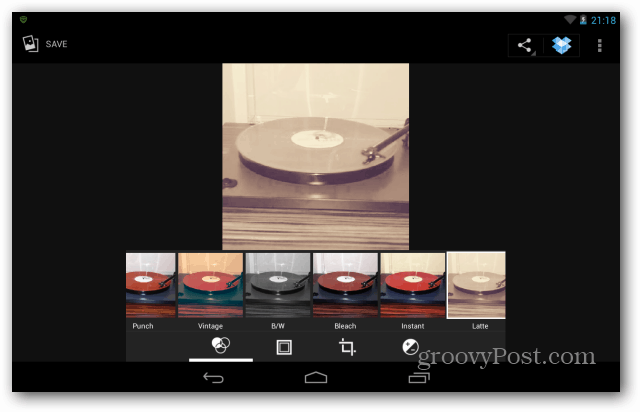
The Google Nexus 7 has a groovy built-in image editor which includes image filters found in other third-party products. Today I was playing around with it and took a few screenshots for all you groovyReaders. Enjoy!


As I was saying, not only does Instagram allow user profiles to be viewed online, it also allows you to add filters and effects to your images. For example, if you’ve taken a self-portrait with the Nexus 7 camera, you can easily edit it, adjust it, or add filters and borders.
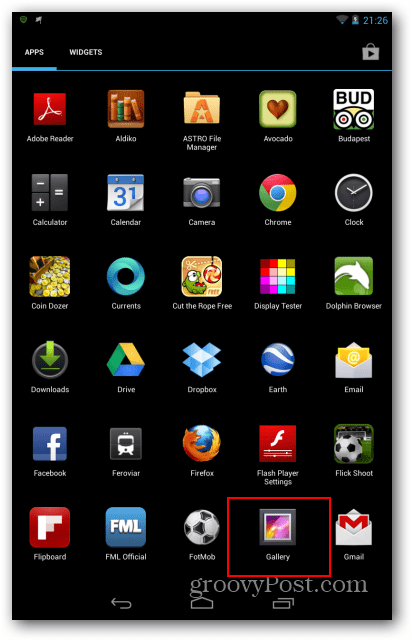
In order to do so, first go to the Gallery and find the picture you want to play with.


Click anywhere on the picture. Apart from the normal Android virtual buttons, another button should appear on the bottom left side looking like three intertwined circles, like the one marked below.
![]()
![]()
If tapped, a list of filters will appear allowing you to modify your photo. What’s different about these filters is that they have normal names, unlike Instagram.


Now, you’ll notice three more buttons on the bottom side of the window. They all hide some groovy things. Clicking the second one allows you to add borders to your image.


The third one offers a list of adjustments you can make to your image, like straightening or cropping it…


The fourth option allows for more “serious” adjustments like exposure, shadows, hue and curves.


Overall, the built-in image editor of the Nexus 7 is very powerful which is surprising because it’s often overlooked. It allows for some really cool image edits in a flash. OK — time go go play!
2 Comments
Leave a Reply
Leave a Reply


Bruce
March 2, 2013 at 8:31 pm
If you save changes to your image it creates an copy of the image with the changes. I wondered why I was getting so many duplicate images every time I rotated an image and it saved it!
Bogdan Bele
March 3, 2013 at 12:33 am
That’s good to know.