How to Set Aside Tabs for Later in Microsoft Edge Using Tab Groups

Do you have a bunch of tabs in Edge you want out of the way temporarily, but you don’t want to bookmark them? Set them aside for later using Tab Groups.
In the Creators Update, among other new features and improvements, Microsoft introduced the ability to set aside groups of tabs for viewing later in Edge. This is helpful if you’re doing something like online research or planning a trip and you need to move on to another task. If you don’t want to bookmark all your tabs, you can temporarily save your current tabs for later.
Today, we’ll cover how to use tab groups in Edge to save groups of tabs for later viewing.
Step 1: Set Tabs Aside
To save the current group of tabs, click the Set these tabs aside button in the upper-left corner of the Edge window.
You can do this multiple times to set aside different groups of tabs.

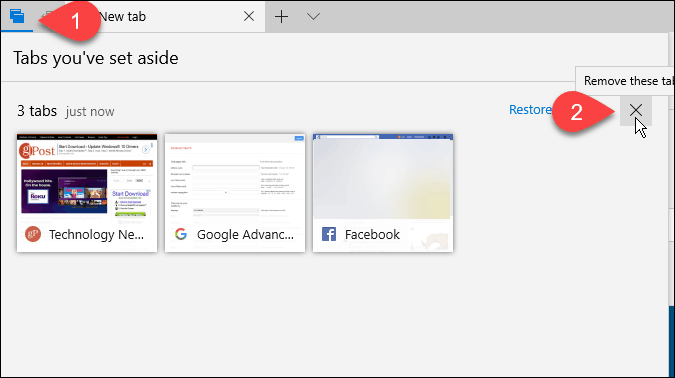
Step 2: Access Tabs You Set Aside
All the open tabs disappear from the browser window, replaced with a New tab. To access the tabs you set aside, click the Tabs you’ve set aside button in the upper-left corner of the Edge window.

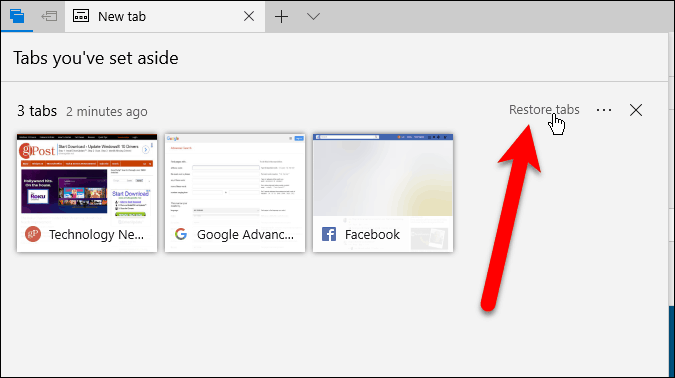
Step 3: Restore Tabs
On the Tabs you’ve set aside a panel that slides out, and you’ll see your tabs neatly organized into groups. To open a set of tabs again, click Restore tabs on the right side of the panel for the group you want to open.
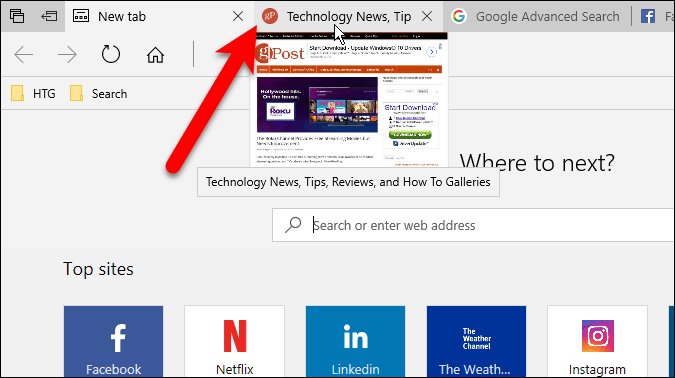
The restored tabs open next to the tabs that are already open in the browser. If you don’t want to mix groups of tabs, close all the currently open tabs before restoring a group of tabs. You can always save the currently open tabs as a group before opening another group.
Groups of tabs you’ve set aside are saved even after you close Edge until you restore or delete them (discussed at the end of this article).
NOTE: Tabs you’ve set aside on one device will not sync to other Windows devices using your Microsoft account.
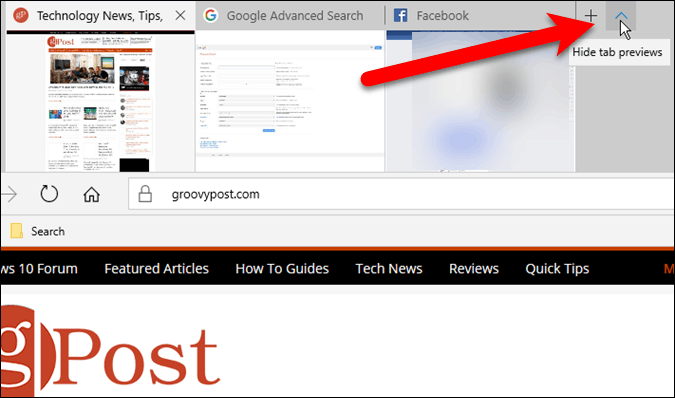
TIP: You can also preview all open tabs by clicking the Show tab previews button (down arrow) to the right of the tabs. To hide them again, click the Hide tab previews button.
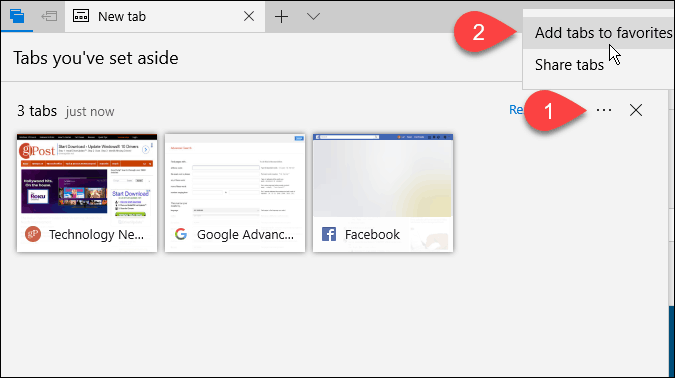
Step 4: Add Tabs to Favorites
If you access the webpages in a group of tabs frequently, you can add all the webpages in a group to your Favorites.
Click the menu button (three horizontal dots) to the right of the group you want to add and click Add tabs to favorites.
A folder is added to the bottom of your Favorites list with the current date, and links to all the tabs from that group are added to the folder.
You can right-click on the folder to perform various tasks on the folder, like opening all the tabs (just like restoring them from the tab groups panel), sorting them, and renaming the folder.

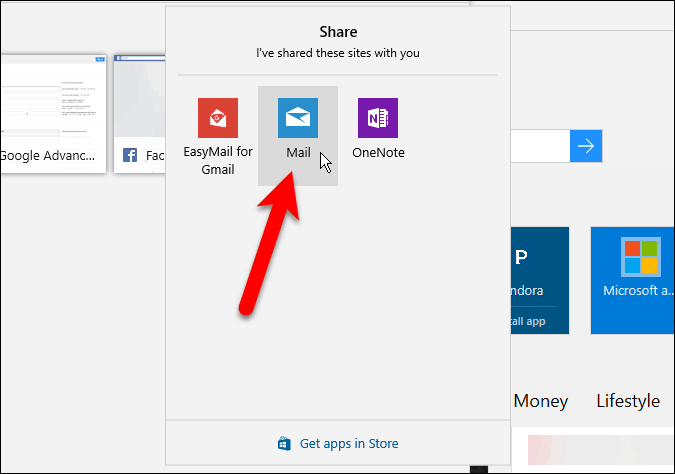
Step 5: Share Tabs
In Edge, you can share a single webpage link with other people using the Share button in the address bar. Tab groups allow you to share multiple links at a time.
Click the Tabs you’ve set aside button to access your tab groups. Click the menu button and then click Share tabs. On the Share dialog box, click the app you want to use to share the links, like the Mail app. Complete the steps to share your links.
Step 6: Remove Tabs
To remove a group of tabs you don’t want anymore, click the Tabs you’ve set aside button and then click the Remove these tabs (X) button to the right of the group you want to remove.
No confirmation displays when removing a group of tabs, so be sure you want to remove them before you do so.
Do you use Tab Groups in Edge? How do they make you more productive? Share your thoughts and experiences in the comments below.
Nick
March 21, 2024 at 9:26 am
Will this work with tab groups or just individual open tabs? (ie: if I have 5 named & color-coded tab groups with multiple tabs in each, will it restore those 5 tab groups with their tabs?) Thanks!