How to Record Your Desktop Screen Using VLC on Windows

VLC is a powerful tool for playing any media file, but it can do so much more. Here is a look at how to use it to record your desktop on Windows.
When it comes to open source software, VLC is arguably the most popular media player because it can play virtually any media file format you throw at it. But it’s capable of a lot more than just playing video and music files. We’ve shown you multiple things you can do with VLC that you might not be aware of. And today we’ll take a look at another handy trick you can do in recording your desktop activity.
Record Your Windows Desktop with VLC
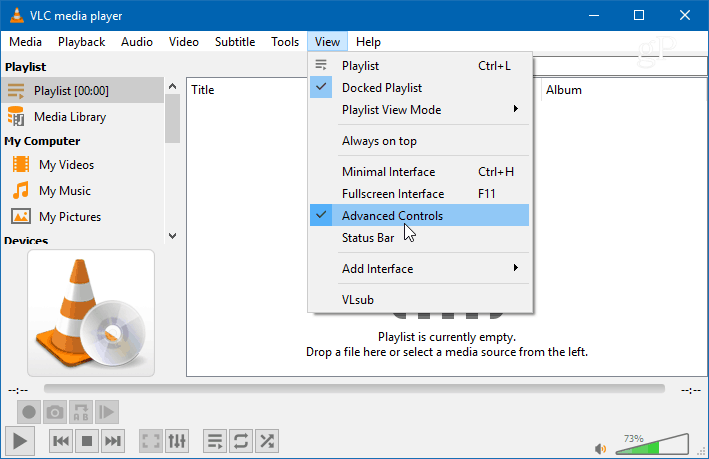
To get started, launch VLC and head to View > Advanced Controls to display an extra control bar to the bottom of the player that contains the recording buttons you will need.
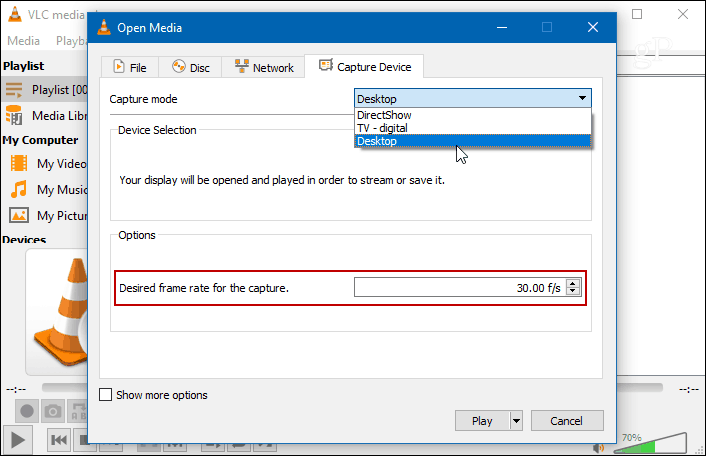
Next, open Media > Open Capture Device and change the “Capture mode” menu to Desktop. You will also want to set the “Desired frame rate for the capture” to at around 30 f/s for decent video quality. Of course, you can set that higher or lower based on the quality you really need. After you’ve set the capture device and frame rate, hit the Play button.
You will see your desktop in VLC, but it isn’t recording until you hit the record button. Hit the Record button from the extra advanced controls you enabled earlier and minimize VLC. Otherwise, you will only see an infinite cascading video of VLC recording the desktop.

Once you’re done, restore the VLC view and hit the Record button again to stop recording the desktop. Your video will save to the local Videos folder as an AVI file.
Convert On the Fly
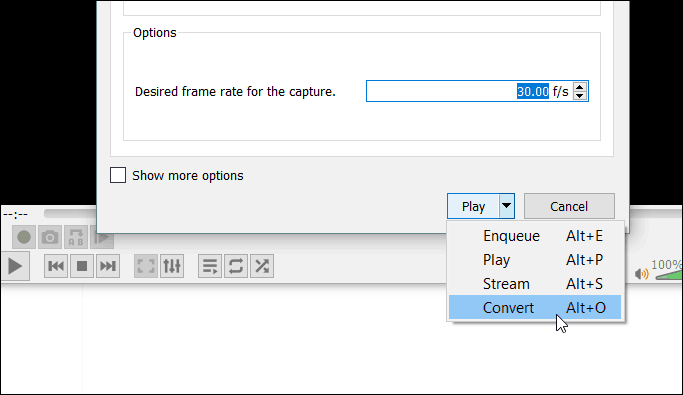
With an AVI file, the size will be quite large so you will want to convert it before sending it off or posting it online. You can avoid that extra step by converting it to an MP4 while doing the recording. To do that, when you’re in Media > Open Capture Device, after selecting Desktop as the source, and set the frame rate, select “Convert” from the drop-down instead of Play.
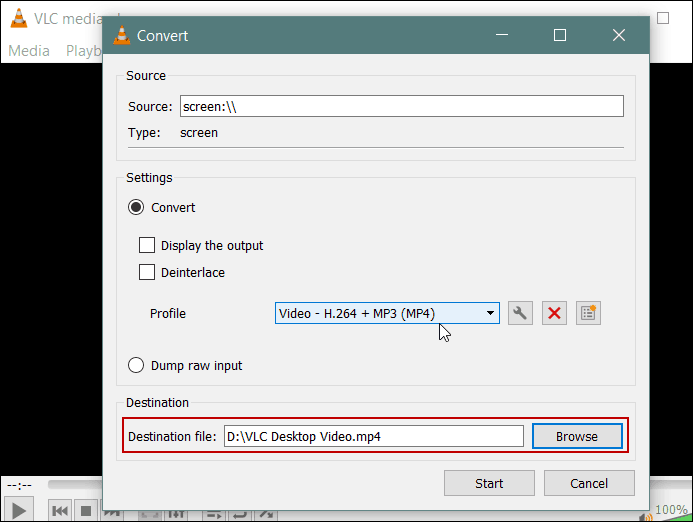
From the “Profile” drop-down choose Video – H.264+MP3 (MP4) and put in the destination where you want to save the file. Then click the Start button to begin the recording. When done, bring up VLC and click the Stop button. In this scenario, you don’t need to worry about clicking the Record button.
Now, keep in mind that this isn’t going to give you the options and quality you’ll get with dedicated screencast recording software such as Camtasia from SnagIt. With VLC you can’t choose audio inputs, select a specific region of the screen, or highlight the mouse pointer. But it does the job for a quick raw video to a family member or your IT dept, for example.


Michael
November 27, 2018 at 9:06 am
I tried to record Youtube using VLC and your’s instructions, but got a lot of small screen shots on my laptop screen.
Did I do anything wrong? What is the best program to record Youtube?
DebbyS
November 27, 2018 at 4:26 pm
Years ago I bought a program called CaptureWiz for my Windows XP computer. I used it also on Win 7 but also eventually upgraded it. I now use that old upgraded version on Windows 10 Home. It has some problems with the audio, and the results are a video file as WMV (which is better than nothing). If I were to use it more often, I’d probably pay for the next version and probably get a lot more choices. Also, for YouTube videos, there are a number of free YT video downloaders available. The only problem I have encountered is if the uploader has somehow set the video to not be download-able.