How to Plan Your Next Hike Using Google Maps

Many people don’t realize that while Google Maps is great for navigation and sightseeing, it’s also fantastic for planning out hiking expeditions.
Hiking is one of the most enjoyable pastimes. It’s one hobby where you can get great exercise, enjoy seclusion and peace, and have a different adventure each time you go. However, hiking also takes planning and preparation. You need to find those adventures since the best and most secluded ones aren’t advertised on tourist pamphlets. Many people don’t realize that while Google Maps is great for navigation and sightseeing, it’s also fantastic for planning out hiking expeditions.
Finding Hiking Trails on Google Maps
When you visit the Google Maps website, most people know that you can search for an address or a business, and Google Maps will provide you with a marker showing its location. If you search for something general, like “gas stations”, you’ll see markers for all the gas stations within the view on your map.

Did you know you can also do this to find hiking trails? It’s true! To give it a try, just type “hiking trails” in the search bar at the upper left of the window.
Press Enter and you’ll see the location of all of the hiking trails in the Google Maps window.

Select any of the trail names on the left, and you’ll typically find a bunch of information listed about the trail. These details should help you decide whether or not the trail is right for you.

These details include:
- “Plus Code”, which is based on latitude and longitude
- Photos of the trailhead or the trail itself that other users have uploaded
- Trail rankings and reviews of the trail by Google reviewers
It’s not a lot of information, but it’s enough to get an idea of where the hike is located and what the experience was like for other hikers.
Exploring Trails in Google Maps
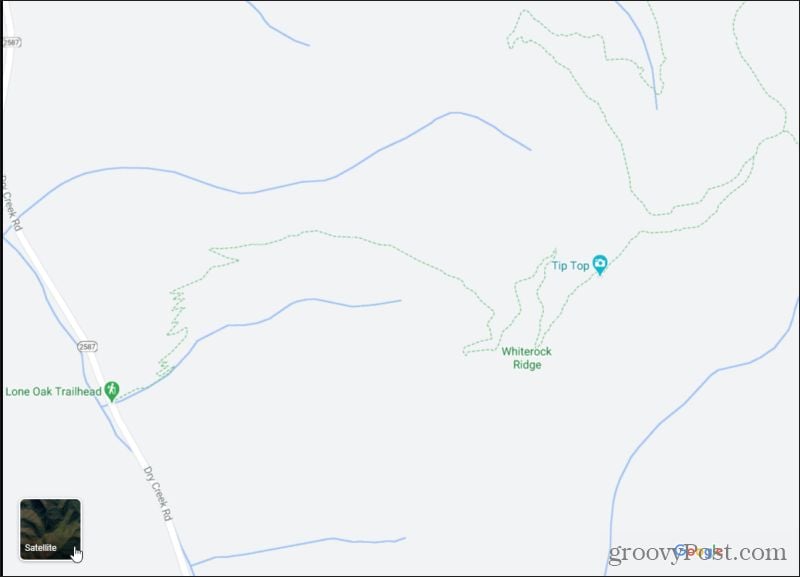
Next, zoom in to any of the listed trailheads. When you zoom close enough, you’ll see a light green dotted line that represents the trail itself.
This usually starts at a trailhead near some kind of road, and then meanders into the woods, up mountains, or along rivers.

Preview Scenery with User Photos
You may notice a small, blue camera icon in random locations along some trails. if you see this, it means a Google user took a snapshot there and uploaded the image to Google Maps to share with other hikers.
You can hover over this blue camera icon and see a preview of the image. Use the white arrows on the side of the image to navigate through images other users have uploaded.

If you want to see the images in a larger resolution, select the camera image, and you’ll see the picture appear at the upper left corner of the Google Maps window. Select the image to see that image full size, plus a list of any images other users have uploaded at that location.
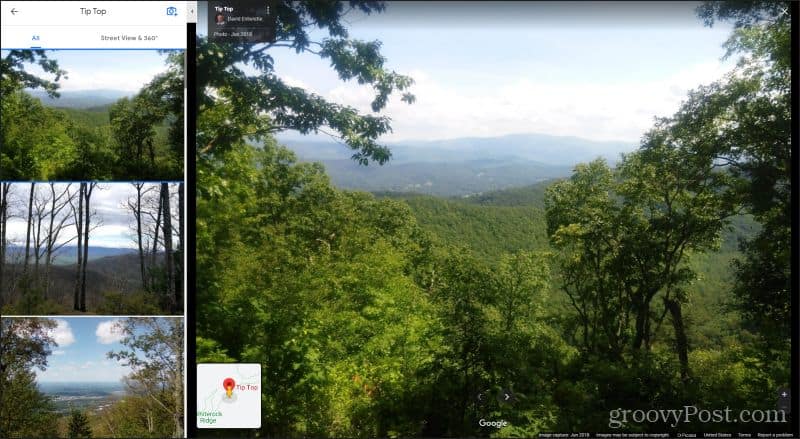
What better way to know if you want to go on a hike than to get a preview of the scenery you’re going to see there?
Gauge Difficulty with Satellite View
Here’s another important tip. Get a better understanding of trail difficulty by using Google Map’s satellite view. To do this, just select the Satellite icon at the lower-left corner of the Google Maps window.
This converts the entire map to satellite views. These are images captured from satellite at some point in the past.
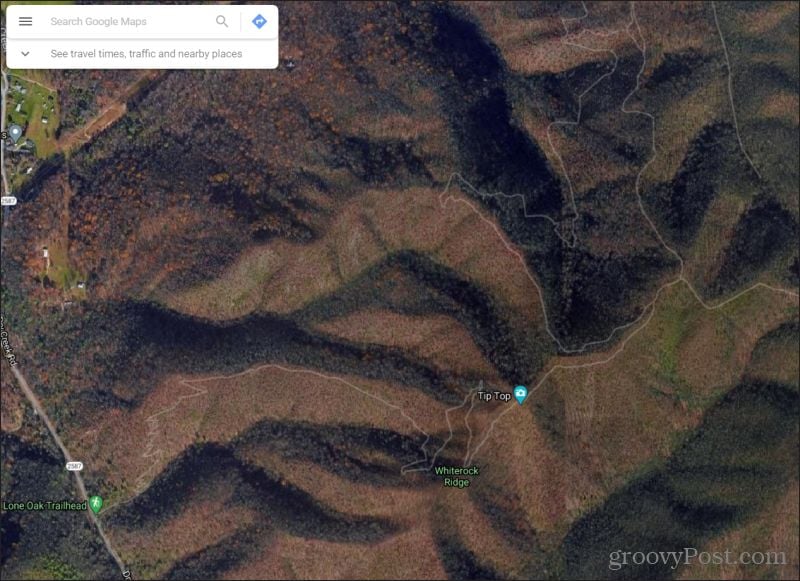
The best use for this view is to follow along the trail and see how often it transverses upwards along a slope. You can see from the shadows of the mountains above that identifying slopes and ridges in this view is very easy.
In the example above, you can see that from Lone Oak Trailhead, the trail zig-zags up a slow incline to the top of a ridge, goes straight along a ridge for some distance, before heading back down into a valley. After a few switchbacks, in then heads up a steep incline to the scenic location called “Tip Top”.
Here are a few important tips for scoping out trails with Google Maps:
- Map view will clearly show you nearby water sources like streams, creeks, and lakes.
- Satellite is best for seeing elevation and what the challenges the landscape may pose.
- Avoid using satellite view for predictions about foliage since some photos have been captured by satellite years earlier.
Another important thing to keep in mind about old satellite photos is that things change over time. Large boulders or structures like cabins could not be present any longer.
Measuring Hikes with Google Maps
One thing you may notice as you zoom in or out of the map to examine the trail is that the scale at the lower right corner of the Google Maps window adjusts accordingly.
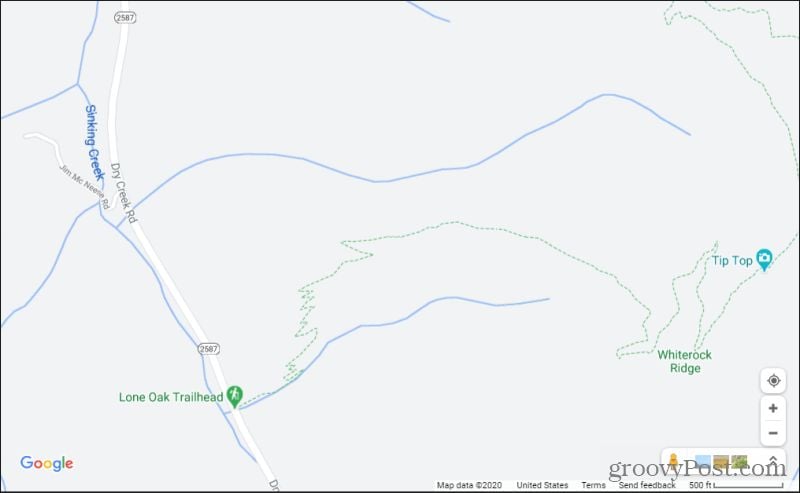
It may show 500 feet per inch now, but if you zoom out it’ll change to 1000 ft per inch.
To measure the distance of a trail, you could take a ruler and hold it up to the screen. By counting out the inches of the trail you want to take, you can multiply by the scale number and get an estimated trail distance.
Thankfully, you don’t have to waste time (or look silly) holding a ruler up to your screen. Google Maps has an embedded measurement tool that’ll help you do this.
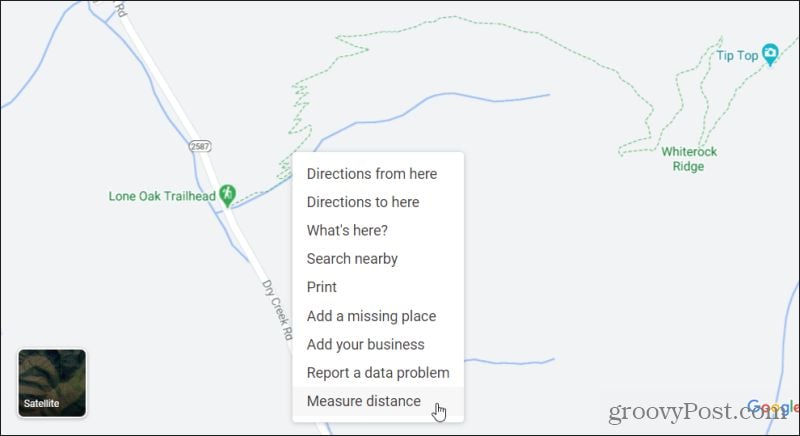
To use this, right-click on the map where the trail starts, and select Measure distance from the menu.
Now you can click on the map and trace the trail in sections. As you trace each section, you’ll see the distance plotted alongside your measurement line.

Once you’re done tracing the trail route you want to take, you’ll know the exact distance of the entire hike, much more accurately than if you tried to use a ruler on the screen!
Using Google My Maps to Save Hikes
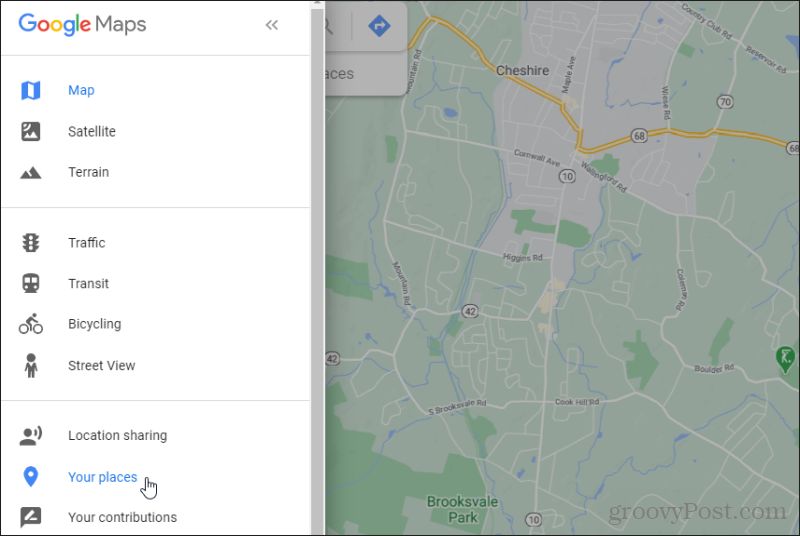
Finally, another very useful thing you can do is create and save hiking routes using My Maps. To access this, select the Google Maps menu, and then select Your places.
At the bottom of the left menu in Your Places, select the Create Map link at the bottom.

Find Your Hiking Trail
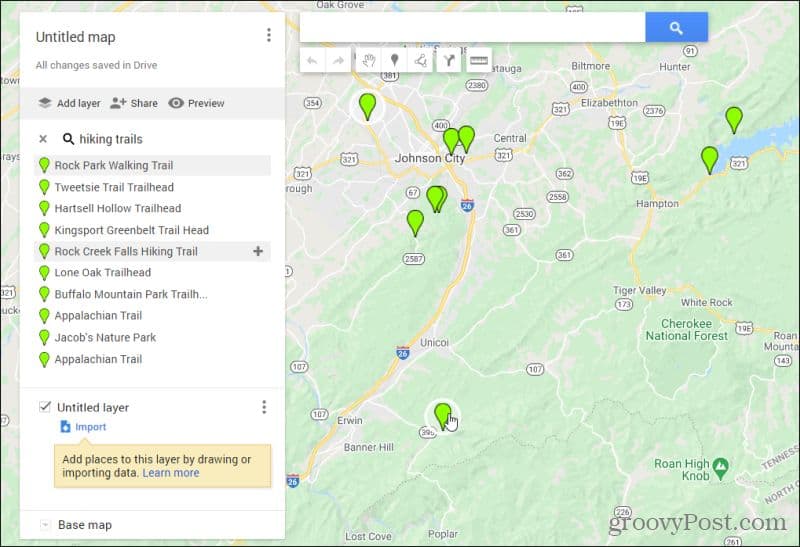
Just like in Google Maps, you can find the area where you want to chart out your hike and then search for “hiking trails”. You’ll see green marks where there’s a trail. Find the one you want to visit and select it.
If you need to zoom in, you can do that on this map as well using the zoom controls at the lower right.
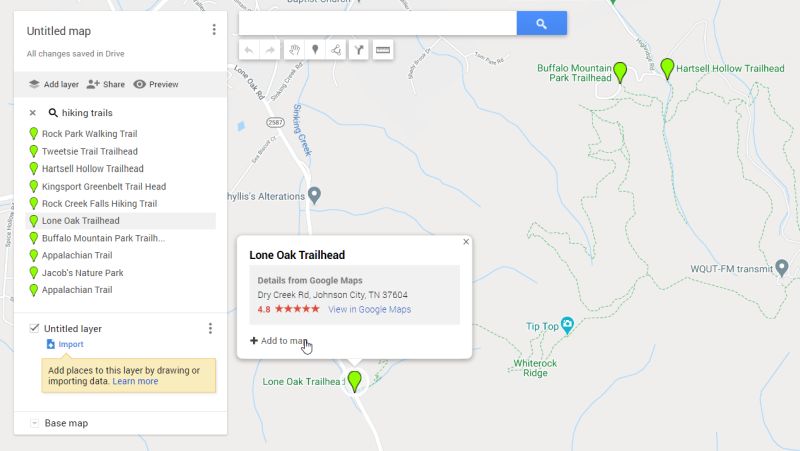
When you select a green marker, you’ll see the trail details.
Next, you’ll want to draw out the hiking route you want to take on the trail.
Add a Walking Route
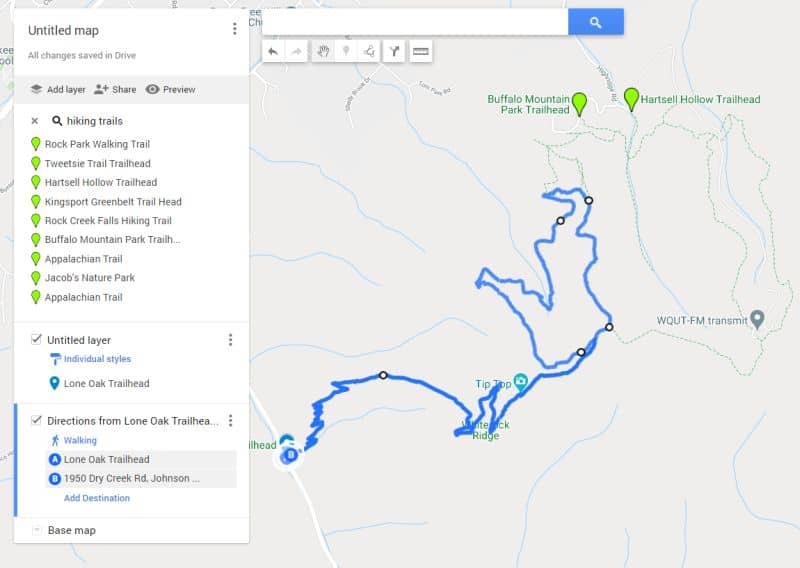
At the top of the map, select the curved arrows icon. Then, select Add walking route from the dropdown menu.

Finally, select the starting point (the trailhead). Then trace out the trail route you want to follow during your hike. You’ll see a blue line trace out the trail path on the map behind your pointer.
Each time you left-click the mouse, you can leave a trail marker. Use this to highlight any stopping points you’d like to check out.

Once you get back to the starting point, the tracing will complete and the blue line will stop following your cursor.
You’ll see the walking route listed in the left navigation menu when you’re done.
To finish, type in the map name field at the top and give your map a name.
Save Your Hiking Route
Now, any time you go back to the Your places window from Google Maps, you’ll see your saved hike in the list.
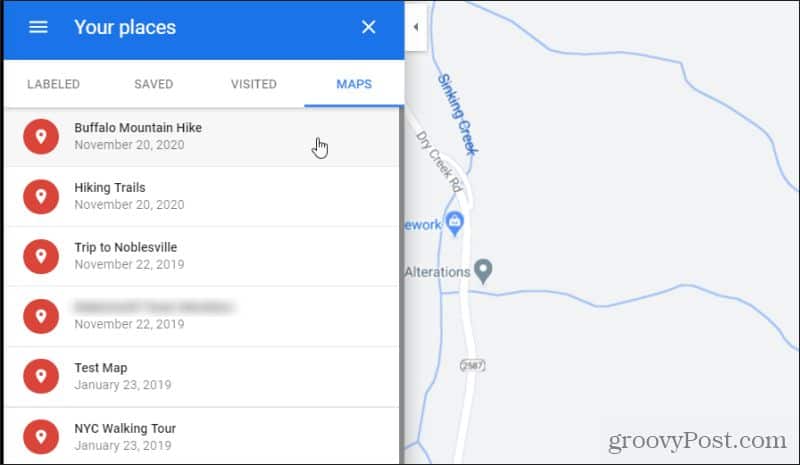
You can go back to this planned hike from your phone any time you like, no matter where you are. As you’re on your hike, you can also check your phone and see your present location along the trail route that you planned.
You can also export any of your route data as well so you can save it on your computer or transfer it to another device.
As you can see, Google Maps is a fantastic tool for planning out hiking trips. Explore these tools before you head out on your next adventure and you won’t have to worry about wondering how much further you’ve left to hike, or where you are on the trail.
If you’re interested in doing more with Google Maps, learn more from 7 tricks you can do with Google Maps.