How to Activate and Use Inking in Word 2016

Inking has been a feature in Office as far back as version 2002 but rarely used. Now with more tablet-type devices like Surface, it’s worth checking out.
Inking has been a part of the Microsoft Office as far back as version 2002. In Microsoft Word, inking is fast, smooth, and powerful. Here’s how to get started with this handy feature.
Many years ago, I scanned my signature for use in digital documents, but I always wanted to be able to sign a document on the fly. The capability existed for many years; I just never saw the value of owning a tablet to enter my signature. In late 2015 I became the owner of a Microsoft Surface Pro; little did I know how much I would underestimate the Surface Pen as part of the user experience.
Using Inking in Microsoft Word
To enable inking, hover the Surface Pen or similar stylus anywhere in the tab region of a document. The inking context tab will open and provide various tools you can use to accomplish various tasks.
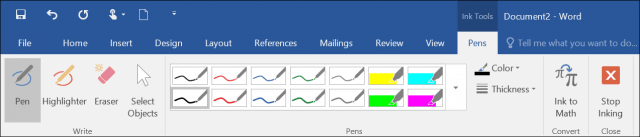
The Pens group provides a collection of colors, styles, and functions to choose from.

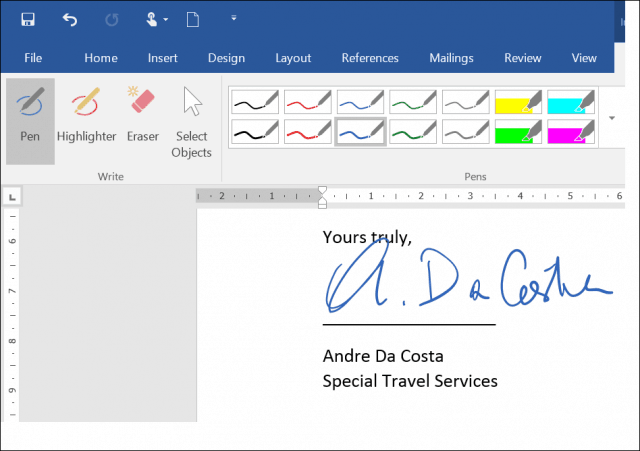
After selecting a color and size, just starting writing anywhere in the document as you normally would on a physical sheet of paper.
If you want to erase a mistake, activate the Eraser, then rub out any markings in the document.

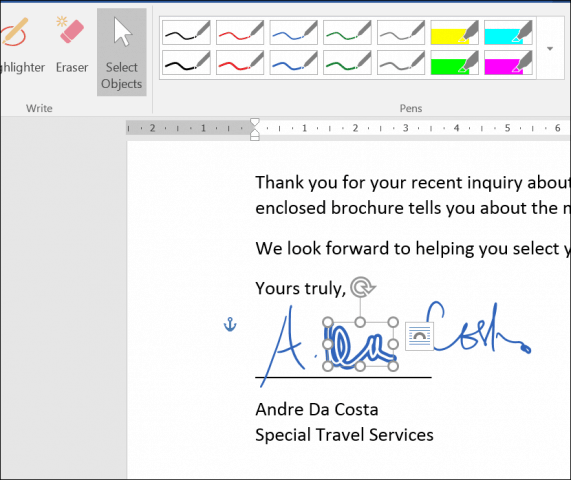
The Surface Pen supports the selection of objects, too. After selecting one, you can use it to resize and modify items in your document.
Inking in Word also supports entering mathematical formulas. If you prefer writing instead of typing, you can activate the touch keyboard and enter text using the pen. If you annotate documents a lot, the inking tools in Word make it easy to highlight text. When you are done using Ink, select the Stop Inking button on the Ribbon.

Word 2016 and the Surface Pro Pen provide a powerful experience when preparing documents. When combined with capabilities such as saving as PDF, there is less of a need to print and sign documents anymore. If you consider a Surface Pro or any convertible tablet device running Windows 10, this is a key feature that will make your daily workflow easier.
What’s your take? Do you have a Surface or other touchscreen device and used the inking feature? Let us know in the comment section below.


Stan Silverman
April 24, 2016 at 6:51 pm
I can’t find a way to turn inking off, either in Word or Excel on my Surface Book. Sometimes I’d just like to use my pen as my finger tip, for menu selections, cell selection, etc. But inking seems to be on permanently. Is there a way to disable it?
Vera K.
July 21, 2016 at 7:36 am
To disable inking: File -> Options -> Advanced -> check the box “Use pen to select and interact…”
There’s also a button you can add to your ribbon from the ribbon customization menu called “Start Inking”.
konstantinos
September 10, 2018 at 7:15 am
Is there a way to keep inking preferences of a word document, so that whenever I open it I don’t have to choose them again?
Roy Planalp
March 19, 2020 at 3:52 pm
Thanks much for this tip Vera. I was going nuts. Also I’d like to add that after turning ink drawing off by checking the “Use the pen…” box, the tool I found (to add to the ribbon) to turn ink back on/off again is a toggle Called “Draw.” It lives under the “Draw” menu of Word. :) -Roy
Peter Steier
October 2, 2016 at 5:57 am
Inking creates a graphics object for each stroke – How can I group them together? Is there a possibility to select all of them, without Ctrl-click each one (which is certainly ridiculous)? I want to chenge the style to “move with text in the line”.