How to Setup the Windows 7 VPN Client

Usually (about 99% of the time), VPN is used by corporate users to connect back to their Corp. network to get access to their file shares, SharePoint servers blah blah blah.
Occasionally, however, VPN can be used by home users to connect back into their home network (or on the other side of Mom’s firewall when she needs <cough> tech support) to access their files or photos on their home boxes. To help with this, Microsoft built both the VPN client and server into Windows 7. Earlier today, I wrote about the Server / Host side, so let’s jump into the client side.
How To Set Up A Home-Based VPN Client With Windows 7
1. Click the Windows Start Orb and type network into the search bar. Then click the Network and Sharing Center.

2. From the Network and Sharing Center, click the link to Set up a new connection or network.

3. Click Connect to a workplace, then click Next.

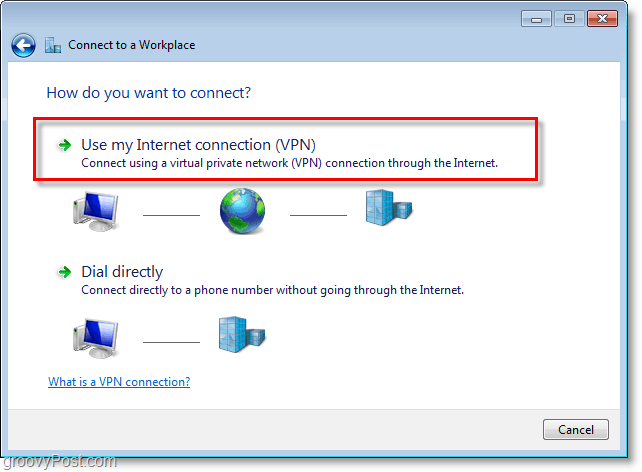
4. Click Use my Internet connection (VPN.)
5. Under Internet address, type in your WAN or Global IP address. Under Destination Name: type in any description of what to call your connection. Then check the box Don’t connect now; just set it up so I can connect later. Click Next to continue.

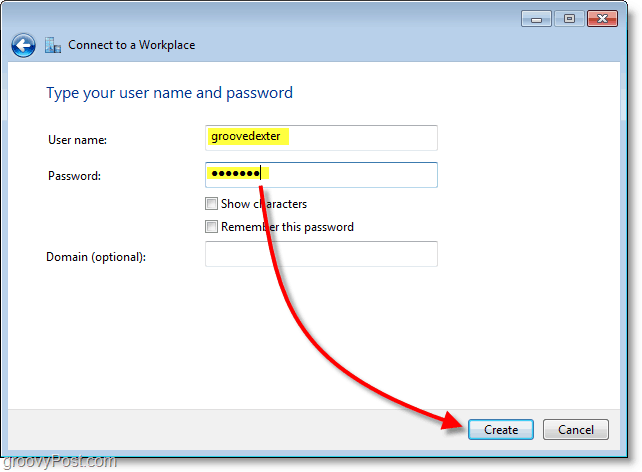
6. Type in the assigned User Name and Password for the VPN host. Most likely, it’s a user account that exists to log in to the VPN host machine. Click Create when done.
Note: You can choose to Remember this password. However, a connection is more secure if you require credentials to be re-entered every single time.
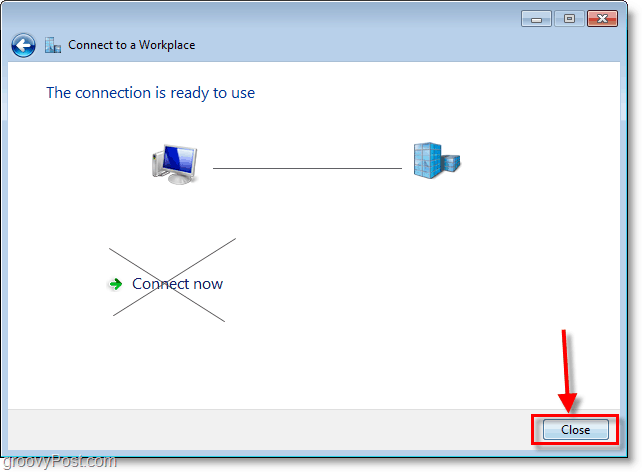
7. We don’t want to connect just yet; a few settings need to be adjusted to make the connection more secure. Click Close and then navigate back to the Network and Sharing Center (shown in step 1).
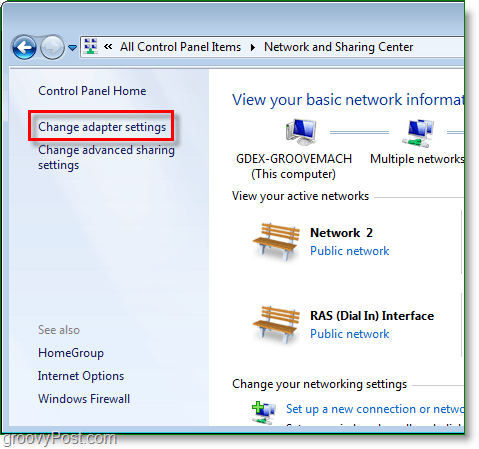
8. From the Network and Sharing Center, click Change adapter settings.
9. Right-Click the newly created VPN Connection (Destination Name) and select Properties.

10. Click the Security tab and set Data Encryption to Maximum strength encryption (disconnect if server declines). Then below, make sure to check both CHAP boxes. Click OK to save and continue.

11. Next, right-click the VPN Connection and this time select Connect. Type in the User name and Password, and then click Connect.
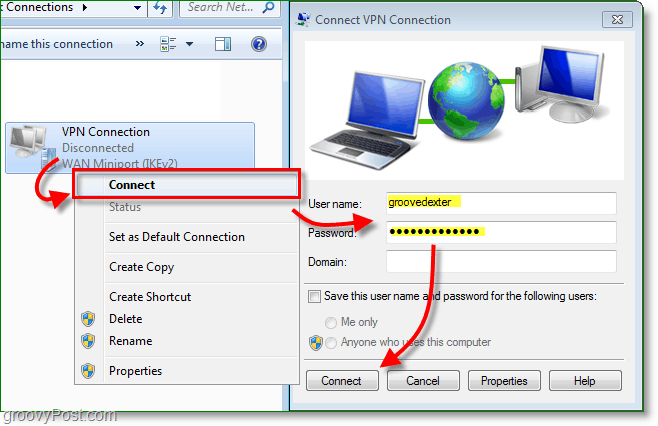
The VPN connection should now be live.

As a reminder, this is probably 1 of about 100 different configs for the VPN client, so unless you manage both sides (client and server), you will probably need to get the correct client configs from your IT team to get the VPN client set up perfectly.


zack
December 30, 2009 at 10:19 am
Very good post and information with all the nice pictures! Thanks. Which tool you use for all the nice callout, highlights? It looks so professional with these!
Steve
December 31, 2009 at 10:45 am
It’s called Snagit
It's a great APP. I think you can pick it up for ~$20.00 yeah i know… it's not free :(
If you don't want to pay, you can also get their free app called Jing.
drp37
June 15, 2011 at 6:46 am
I’m hoping this will not sound like a dumb question, but you only discuss being able to access files on the destination network. Will this set up also allow me to access the internet through the VPN host?
Thanks!
Joey H
June 20, 2011 at 11:16 pm
I have a static IP from my provider… how would I login (the syntax) to my home machine from a starbucks…? What ports would I need to open in the router to do this?
Joe
mike
October 3, 2011 at 8:19 pm
hello, i had a question about this, i have followed your guides to the letter and every time i try and connect to the vpn i set up at home i get error 800. any ideas as to why i receive this?
thanks.
Juzar
November 18, 2011 at 12:35 am
Dear friends,
Many thansks for posting, but I don’t understand second, what will be my server name and how will I have user name and password, how can other person connect to my computer, means how will I brother connect to my computer.
Regards
Juzar para
OnTheRun
January 20, 2012 at 1:19 pm
Hi,
I know your post went up a few years back, but hopefully you’ll still reply. It’s about using VPN from an Android tablet.
I have ICS on my tablet and I’m connect to this VPN Only wireless connecting at an office. I was able to setup VPN host successfully (I hope) using your “Setup a VPN – PPTP Host On Your Home Windows 7 PC” Post; however, I’m trying to connect from my tablet with no success. It appears like it try to connect, but I get a connetion timeout. I’m doing something wrong somewhere, but I can seem to figure it out. It is a corporate office…not sure if the issue is that I’m using PPTP, instead of using some other type.
FYI. While connected to this wireless guest account I’m able to receive emails from my hotmail account…weird as I shouldn’t be receiving anything since it’s only for VPN connection.
Girl007
March 29, 2012 at 2:53 am
Yo que vivo en China les puedo asegurar que el vpn que mejor se adapta a windows 7 es el vpn ninja, yo lo descargue desde vpnninja.com
juanras
April 9, 2012 at 2:52 am
Yo tambien utilizo vpn ninja, vivo en Colombia y me funciona muy bien!!