Create a Custom Windows 10 VM on Mac with VMware Fusion 8
Our first look at using VMware Fusion was straight-forward and in this second installment, we’ll take a look at how to create a custom virtual machine.
In our previous article, we used VMware Fusion to set up a new virtual machine running Windows 10. The great thing about VMware is the performance; it is almost identical to the Boot Camp experience. Our first look at using VMware Fusion was straightforward. In this second installment, we’ll take a look at how to create a custom virtual machine.
Customize Virtual Machine Configuration using VMware Fusion
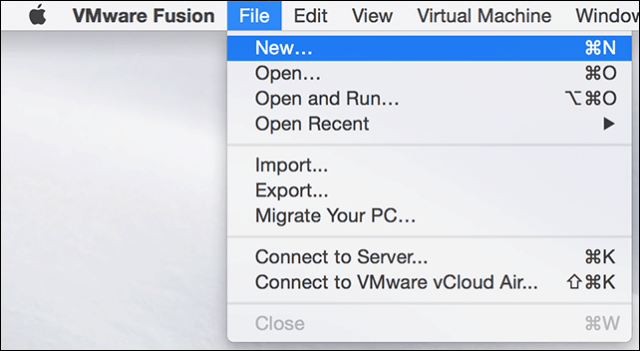
Depending on what you plan to use as your virtual machine, you might need to configure it to work suitably with a particular application. Launch VMware Fusion, click the File menu, click New, select Create a custom virtual machine, and click Continue.
Choose the desired operating system you would like to install. VMware Fusion supports a wide selection of operating system brands and versions. You can install Apple’s OS X versions as far back as 10.5. Once you have settled on your choice, click Continue.

Select Create a new virtual disk and then click Continue.

Depending on your system configuration, you might want to customize your virtual machine. In my case, the hard disk is too big, so I will modify the size, click Customize settings.
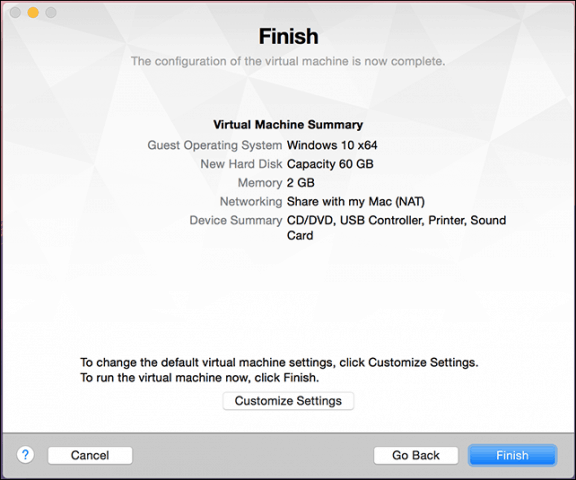
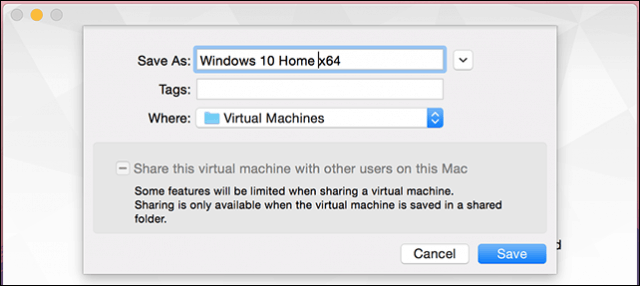
You will be offered the option to edit the name of your VM; if you are happy with the default, click Save.
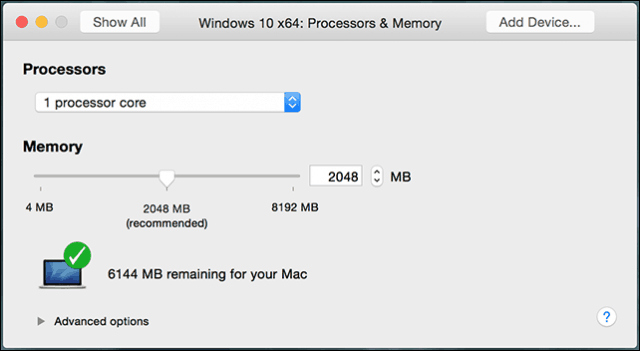
VMware Fusion provides a System Preferences interface, which lets you fine-tune your virtual machine for specific needs. We will focus on three areas: storage, memory, and the startup media of the operating system.

Click the Hard Disk item, then drag the knob to change the size of the virtual disk.

Next, click Processors and Memory, and adjust the amount of memory to allocate to the VM. The more memory, the better your virtual machine will perform.
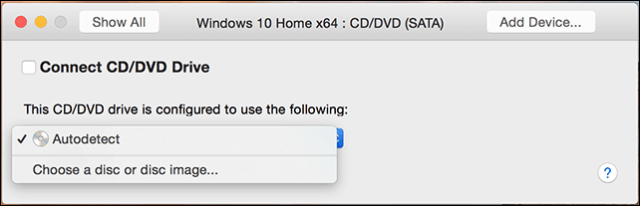
Modifying your starting settings is also important because the custom wizard does not offer the option to choose installation media. From the main menu, click CD/DVD and then click This CD/DVD drive is configured to use the following popup menu. Browse to where your ISO image is stored or choose the default, then check the box, Connect CD/DVD Drive, if your Mac has one.
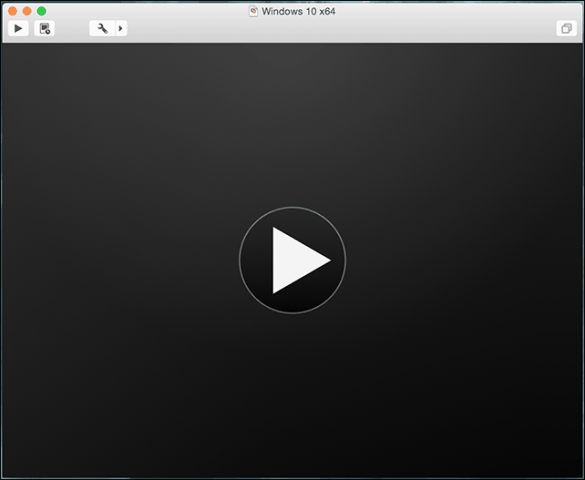
Starting the installation
Click the Play button to start the installation.
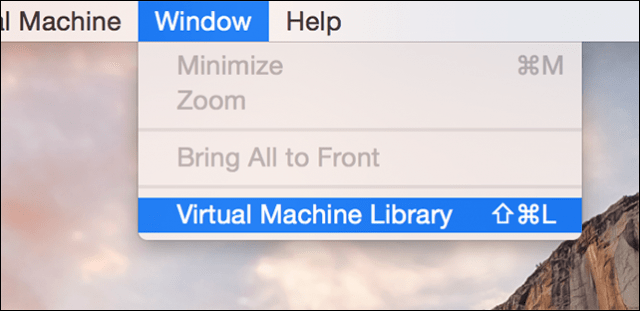
If the virtual machine window is not open, click the Window menu, then click Virtual Machine Library.
Select the virtual machine, then select the Start Up button. Then follow the on-screen instructions to perform a new installation. If you have never performed a new installation of Windows before, check out our article here for instructions.

If you would like to delete your virtual machine, go to the Virtual Machine Library, select the virtual machine, click Edit, then Delete.

Our third and final article will look at some of the unique and fun features of VMware Fusion running Windows 10 under OS X.


