Increase The Streaming Buffer in VLC To Prevent Video Stutter

Is VLC player having stutter issues while streaming your media? Increasing the buffer cache might fix some of those video and audio stuttering problems.
VLC Player makes a great streaming video player, but sometimes it can run into spikes in the stream buffer. Part of this may be due to hardware or network issues, but it could also be because of the 0.3-second default buffer cache. It’s easy to change this, but finding a buffer that works best for your connection might take some tweaking.
There are two methods for changing the streaming buffer in VLC Player. One is permanent, the other is temporary and resets after each stream. You can change either, or both (in which case the temporary fix temporarily takes precedence.) Just follow the instructions below.
Permanent VLC Buffer Change
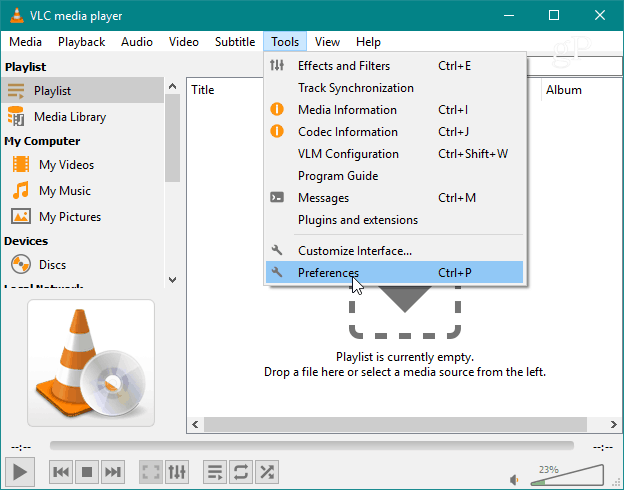
Launch VLC and open Tools > Preferences or press the keyboard shortcut (Ctrl + P).
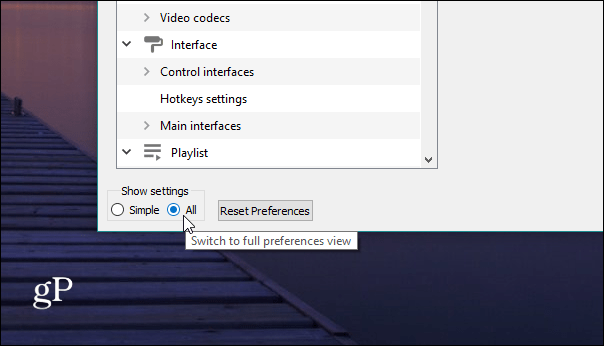
At the bottom-left of the Settings window click the All bullet to display additional settings.
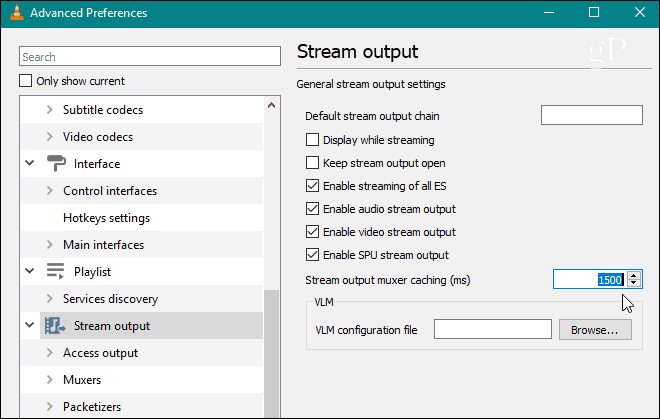
Now scroll down to Stream Output and change the caching to a larger number. It’s 1500 milliseconds by default which is equal to 1.5 seconds.
Change Buffer on a Per Stream Basis
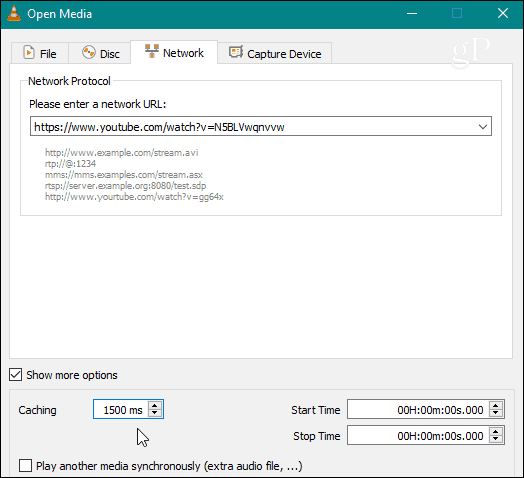
During playback in VLC Player Click the Media tab and then select Open Network Stream.
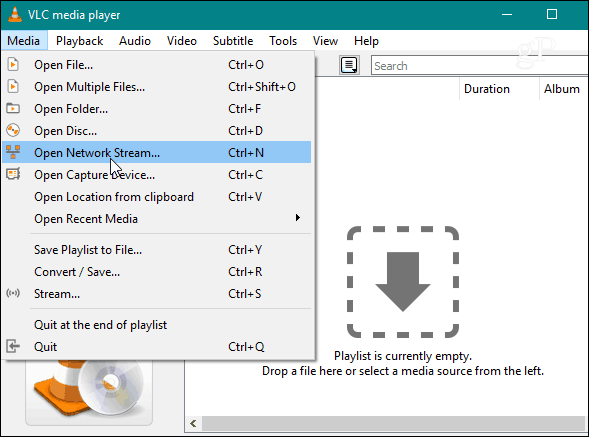
The settings menu will bring up to the Network tab. At the bottom of the window click the “Show more options” box. Additional information will appear at the bottom; in the “Caching” box fill in a higher Caching number than the existing one. For example, if you want the buffer to be improved to 1.5 seconds, change the number to 1500 ms.
Unlike the other method, this change won’t save beyond the media currently being streamed. Instead, it will revert to the default as soon as your current stream ends.


Nathan
October 5, 2013 at 2:59 pm
This along with every other piece of advice I’ve found on Google doesn’t work for me. When I edit the number there is no “Play” or “Save” or “Accept” option, and when I restart VLC it goes back to the default value. Frustrated.
Binkie
June 20, 2014 at 11:54 am
It stays set for me, and it seems to have fixed the problem: Some Internet radio stations were having frequent brief dropouts, and after changing the buffer from 1500 to 3000 they now play continuously. Very cool. Thanks Austin!
patmull
June 26, 2015 at 1:41 pm
This really works!!! Awesome, thank you, now I can watch Glastonbury live without glitching!
jujufree
July 4, 2015 at 12:03 am
Merci, grace à vous, je peut envoyer un flux audio avec VLC sans que côté reception cela ne coupe
whwwho
October 7, 2015 at 2:50 am
well aparently this works, thanks to you
Tiker
March 8, 2016 at 4:29 pm
on Windows Media Player, it never lags.
On VLC it buffers with grey.
I’m talking about URL Streaming links.
bob job
May 31, 2016 at 9:22 pm
Awesome, thanks.
Joris
June 14, 2016 at 1:30 pm
How to do this with the iPhone VLC app? I have problems on the iphone client and am not able to change this setting?
soph
July 22, 2019 at 6:13 am
How does this work on VLC for iOS? It’s called “Network Level Caching”
dondd
December 5, 2020 at 1:44 pm
What is to longest caching allowed in the buffer?
Tommy
November 21, 2023 at 5:08 pm
streaming youtube and adding a zero (10X) to the buffer did not change the “stuttering”.