Use the Magnifier on iPhone to Zoom in on Small Objects
You don’t have to struggle to see something tiny. With the iPhone Magnifier feature, you can zoom in, use a light, and snap a photo.
Our smartphones can do amazing things. Aside from placing and receiving calls, we use cell phones as stereos, televisions, note-takers, email tools, and much, much more. So, why not a magnifier?
The Magnifier on the iPhone is one of those lesser-known features but is one of the handiest. Whether you need to find a sliver in your finger, read the fine print on a document, or thread a needle, look no further than the Magnifier on iPhone.
Not only does the iPhone Magnifier help you zoom in on small objects, but it offers a built-in light, filters for those with vision problems, and photo-taking ability.
The Magnifier in Control Center
What better spot is there on your iPhone for a handy tool than in the Control Center? This gives you quick and easy access to the Magnifier with just a swipe. Here’s how to add the Magnifier to your Control Center for when you need it.
- Open the Settings on your iPhone and select Control Center.
- At the bottom are available tools under More Controls. Scroll down and tap the plus sign in green next to Magnifier.
- This moves the Magnifier to the top, meaning you’ll see it in your Control Center. But before you leave Settings, tap and drag it to put it where you want it in the list of Included Controls.
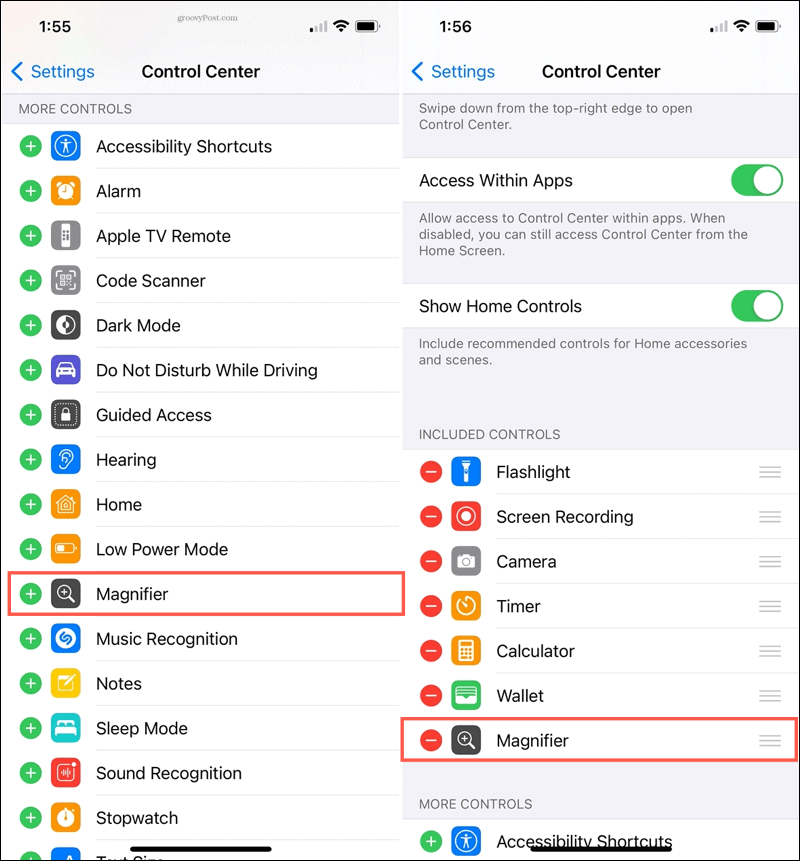

Now, simply access your Control Center when you need to use the Magnifier.
Use the Magnifier on iPhone
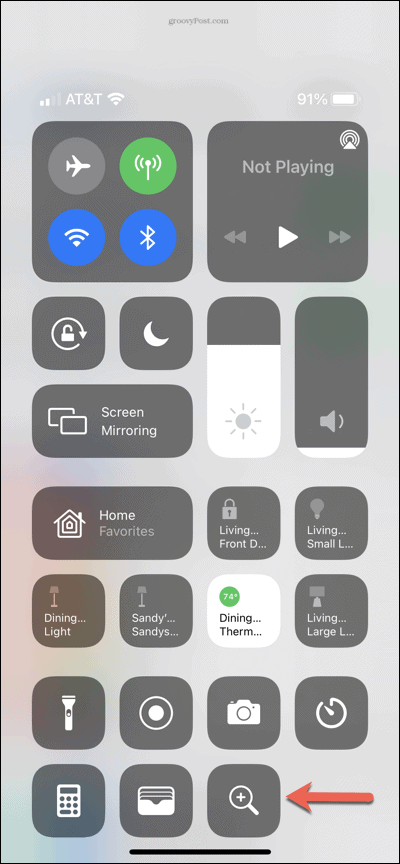
Open your Control Center and tap the Magnifier icon to use the tool. On iPhones without a Home button, swipe down from the top right corner. On iPhones with a Home button, swipe up from the bottom of the screen.

Adjust the Zoom
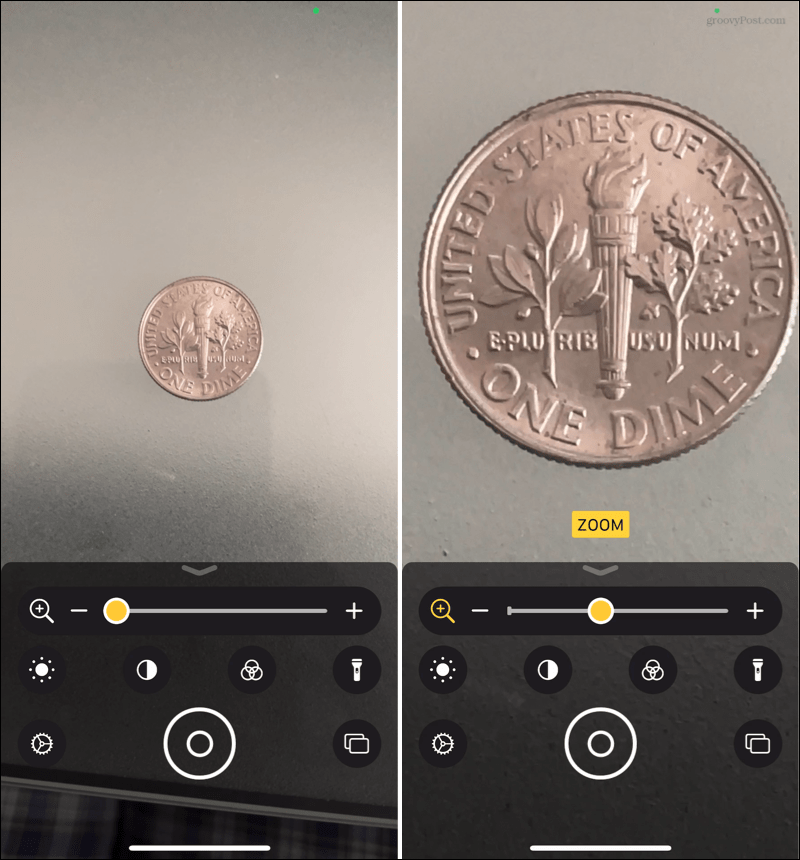
Use the Zoom slider at the top of the Magnifier to zoom in and out of the object you’re viewing. Slide the yellow button or use the plus and minus signs.

Change the Brightness
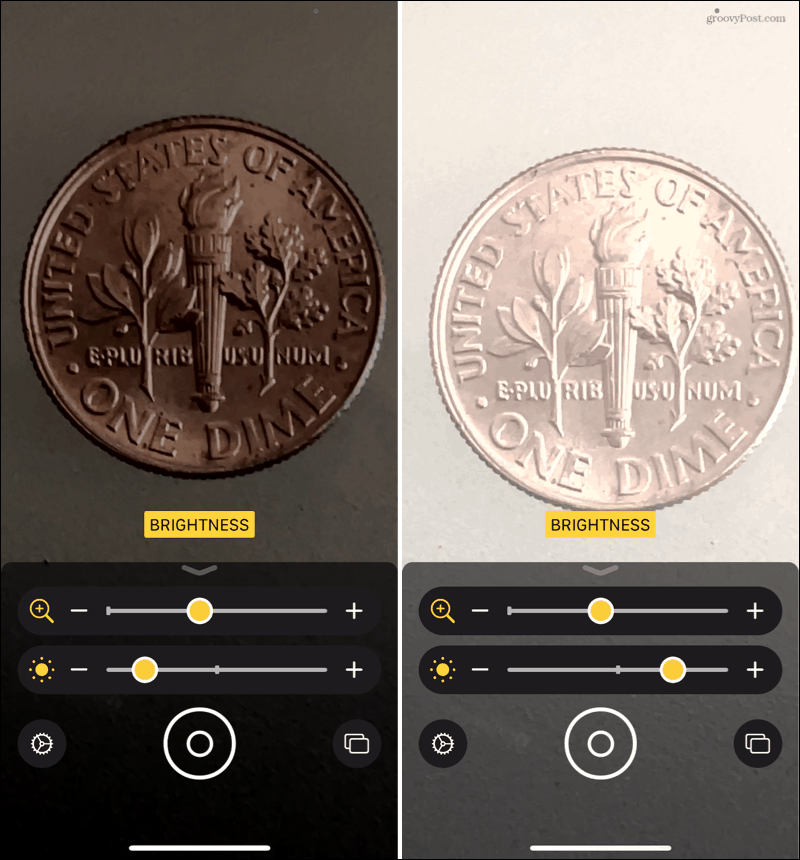
Depending on your environment, you may want to make the image appear brighter or dimmer. Tap the Brightness icon and use the slider to adjust.

Modify the Contrast
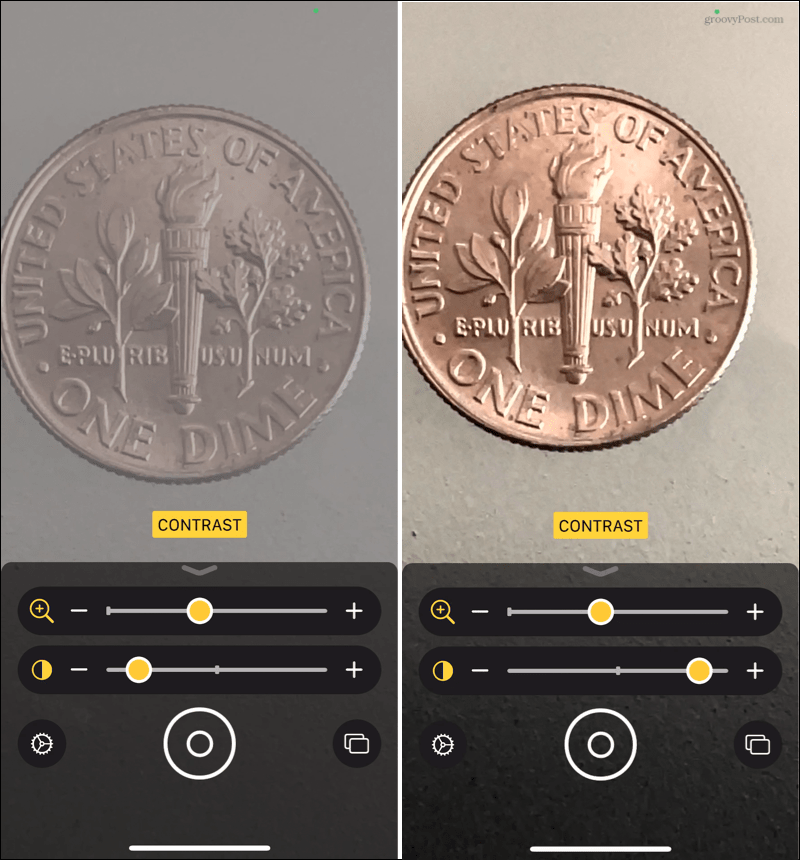
Maybe the object you’re magnifying is two-tone where adjusting the contrast makes it easier to see. Tap the Contrast icon and use the slider to modify it.

Apply a Color Filter
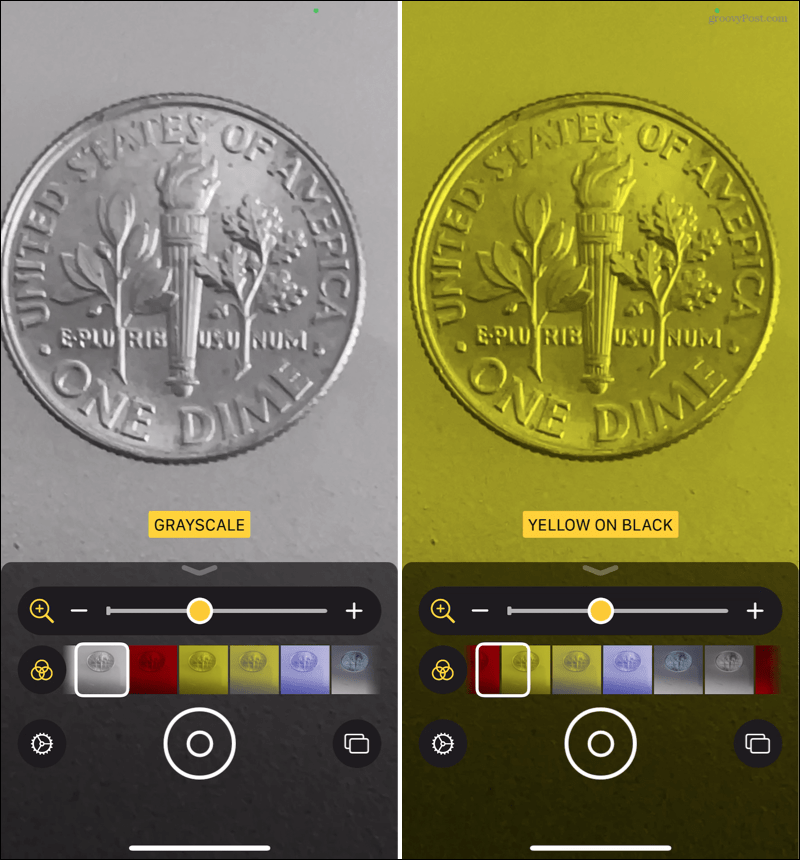
If you have a vision impairment, applying a color filter may help you see the image more clearly. Tap the Filter icon and choose from a variety of filters like red on black or yellow on blue. You can also pick from inverted filters.

Let There be Light
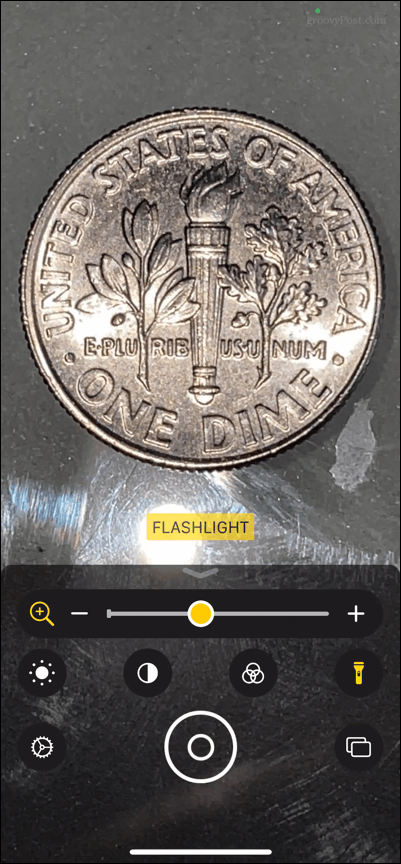
A super convenient feature of the Magnifier is the built-in flashlight. Tap the Flashlight icon to illuminate your view and tap it once more to turn it off.

Capture a Photo
Another great feature of the Magnifier is the ability to capture photos. And you can take just one photo or several.
Single-Photo Mode
By default, the single-photo mode is enabled. To capture a shot of the object, just tap the Shutter button in the center at the bottom. If you’d like to save or share the photo, tap the Share button on the top right.
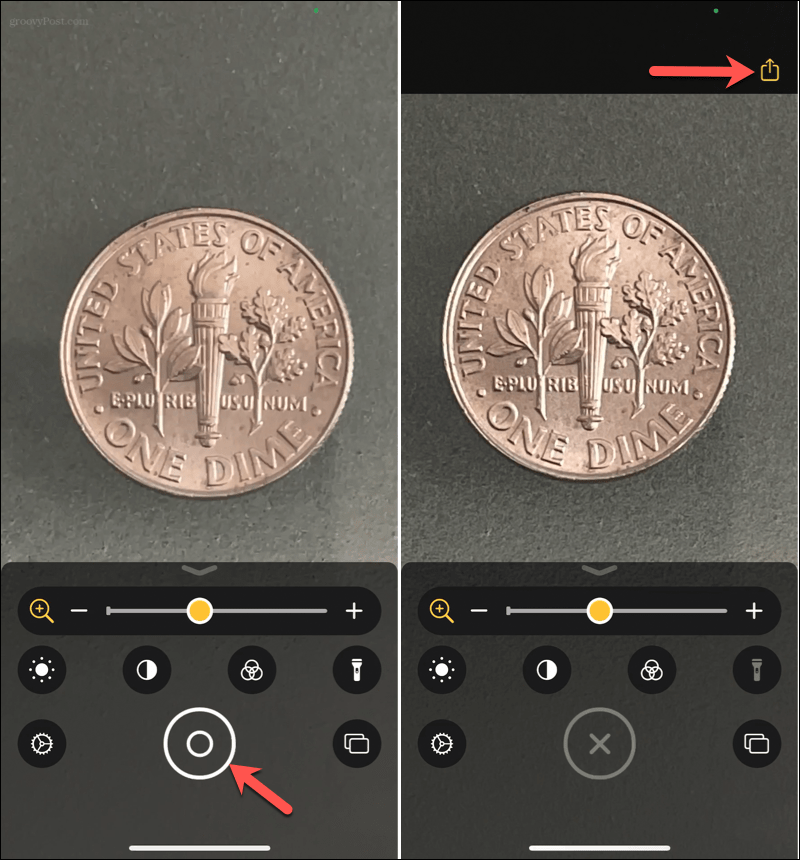

Tap the X that replaced the shutter button to return to Magnifier.
Multi-Photo Mode
If you prefer to capture several photos, turn on the multi-photo mode by tapping the Photos icon on the bottom right. Then, you’ll see the shutter button turn into a plus sign. Tap the plus sign to capture each photo.
Review the photos by tapping View in the bottom right corner, which also displays the number of photos you capture. You can see each photo and then tap the Share button on the top right to save or share the individual photos.
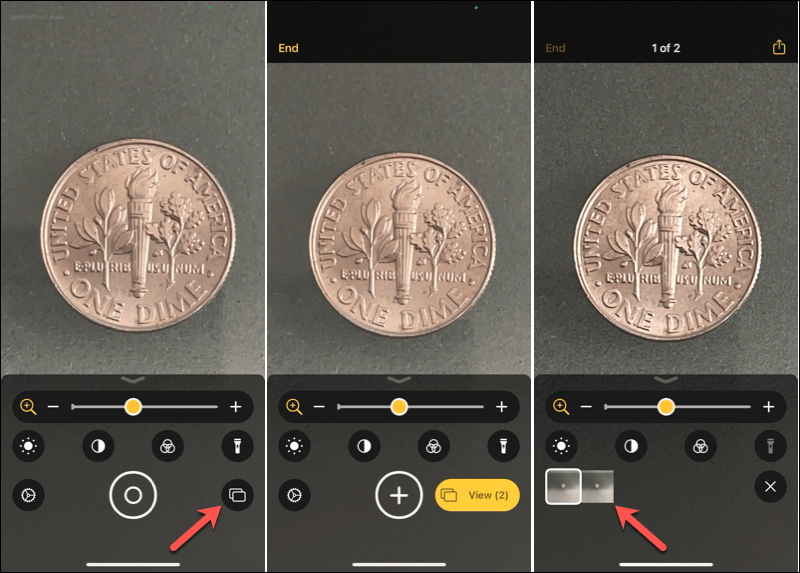

Tap End when you finish with multi-photo mode.
Change the Magnifier Settings
For all of the settings described above, you can make a few changes. With Magnifier open, tap the Settings icon (gear).
At the top, you’ll see Primary Controls. Zoom is obviously already in this area, but you can drag another control up from the section beneath it. You are allowed two controls that will always display when you open Magnifier.
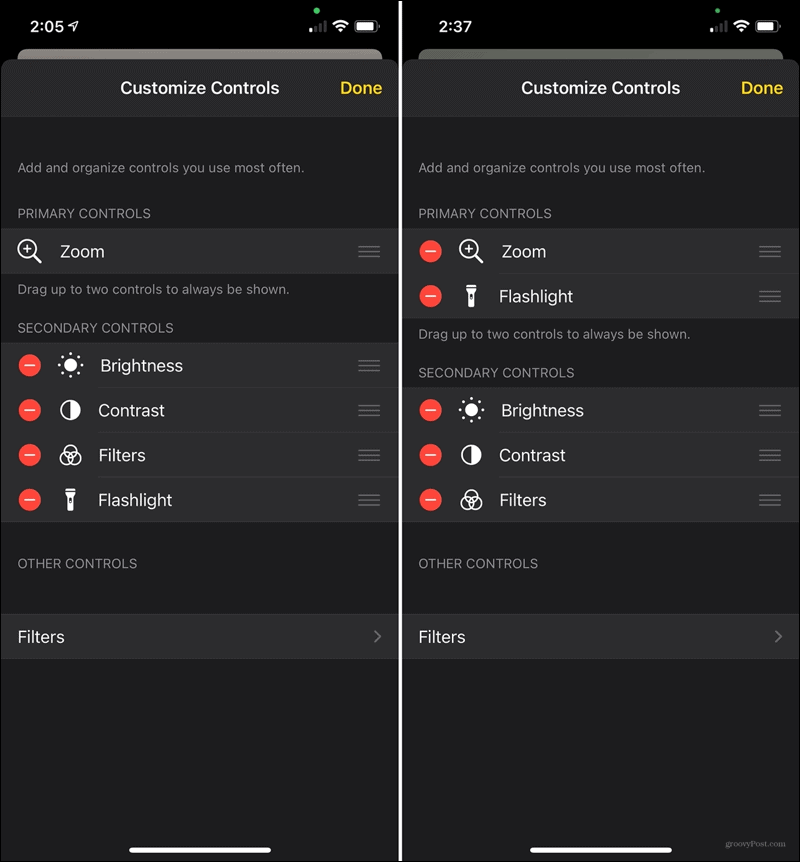

For those controls under Secondary Controls, you can drag them in the order you’d like. You can also tap the minus sign to remove one if you like. This will move it to the Other Controls section where you can add it back later if you wish.
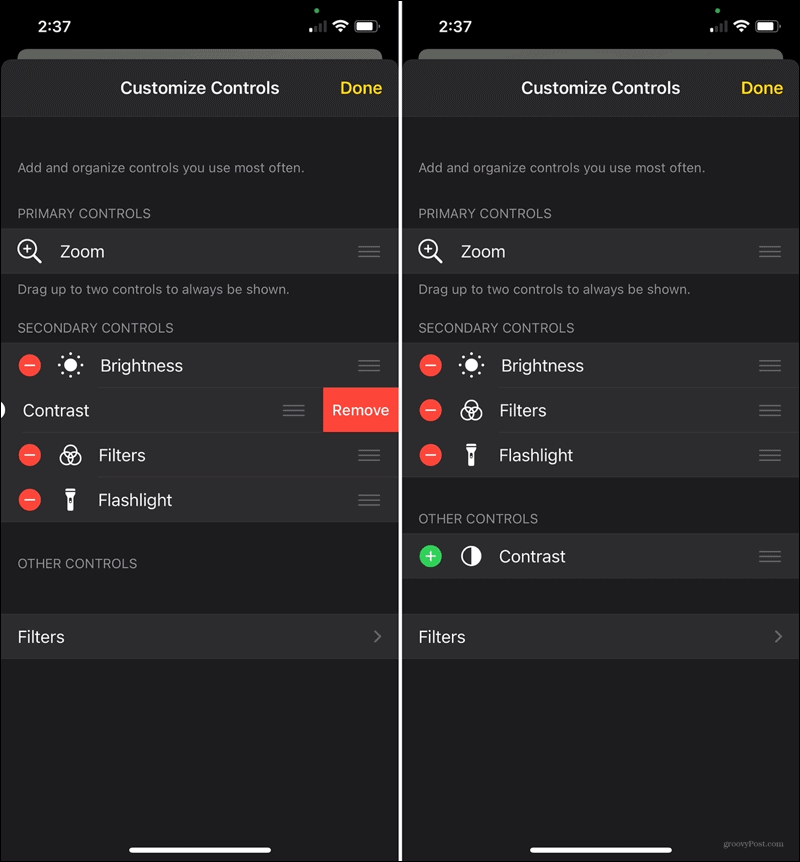

At the bottom, you have Filters. This lets you decide which filters should display when you use Magnifier. Tap Filters and then tap to check those you want available and uncheck those you do not.
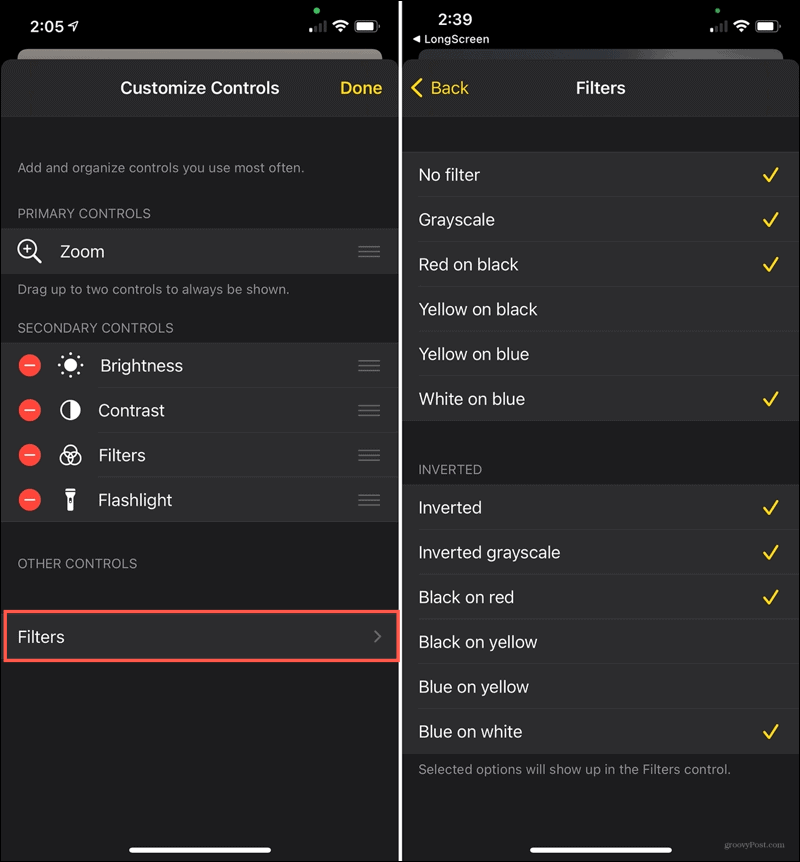

Tap Back when you finish and Done if you’re finished with all Magnifier settings.
Remember the iPhone Magnifier Feature
You don’t have to struggle, dig out your reading glasses, or even find a physical magnifying glass to see something tiny. Remember the Magnifier on your iPhone and add it to your list of wonderful features that make your device even better.
Considering a new iPhone? Take a look at the exclusive features available with the iPhone 12 Pro Max compared to the other iPhone 12 models.


