How to Create a Form With Google Forms

If you want to create a form for customer feedback, an event registration, or budget tracking, here are the Google Forms basics to get you started.
Along with its other applications like Google Docs, Google Sheets, and Google Drive, Google gives you a great form creator. With Google Forms, you can make forms for business, personal, and educational use.
Forms can be used for a variety of purposes including planning a party, surveying multiple people, and capturing data from various sources to build a spreadsheet for analysis. You can even use forms for tracking your budget or spending throughout the month.
Here, we’ll show you just how easy it is to create a basic form using Google Forms.
Start a New Form
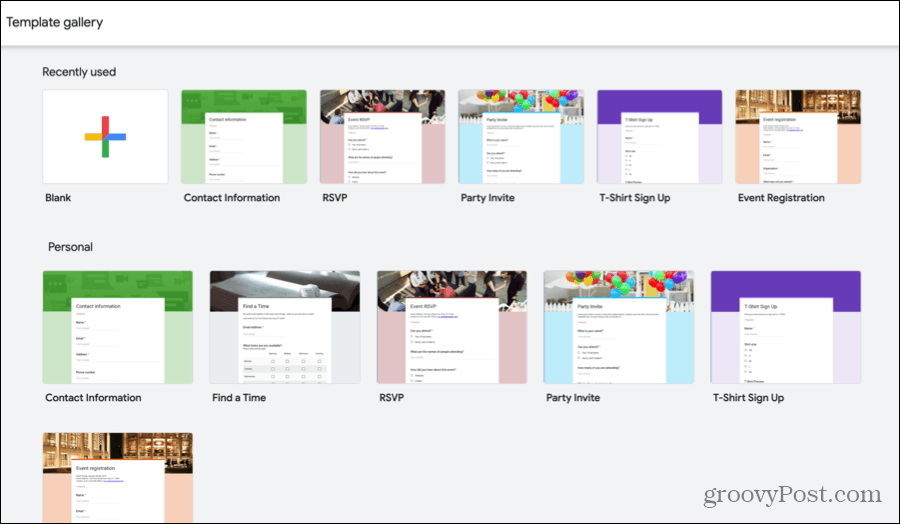
When you land on the Google Forms website, just sign in with the Google account you want to use. Then click Blank to create your own form or Template Gallery to browse themed templates.


If you see a template that’s close to the type of form you want to create, even if it’s not exact, that’s a terrific way to begin. Templates have premade questions customizable for your own data as well as attractive themes. Both can give you a jumpstart with your form and each can be changed per your needs.
For this tutorial, we’ll pick the Blank option so we can easily explain the elements you’ll use for your own form.
Create Your Form
From naming your form to adding the questions, here are the basics for your new Google Forms form.
Enter a Name and Title
The first thing you should do with your new form is to give it a name and title. Note that the title you display on the form itself can be different than the name you give it. This is convenient if you want to create different versions of the same form type.


The form name is on the top left of the screen and the title is at the top of the form. Click each area and enter the name and title you want to use.
Optionally, you can add a description to the form below the title.
Add Your Questions
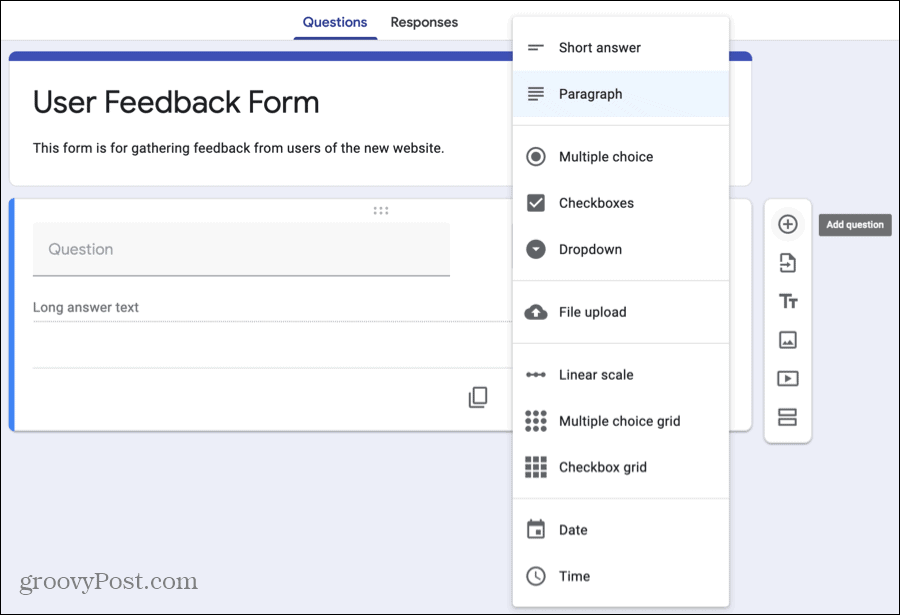
The crux of your form is its questions and Google Forms gives you flexibility with the types of questions you can use. Click the plus sign button in the small sidebar to add each question and use the drop-down box on the top right of the question to select the type.


Here are the question types you can choose from:
- Short Answer: Use this question type when your respondents only need to enter a few words. It’s ideal for a name or email address.
- Paragraph: Use this type when you seek longer answers from your respondents. This is good for opinions or explanations.
- Multiple Choice: Use this question type for your respondents to choose just one answer from a list of options. You can include “Other” as an option for the respondents to enter a Short Answer.
- Checkboxes: Use this type for your respondents to choose one or more answers from a list. You can include “Other” as an option for this type too.
- Dropdown: Similar to Multiple Choice, use this for your respondents to select just one answer from a list. This type is more compact and does not have the “Other” option.
- File Upload: While not technically a question type, this allows your respondents to upload a file such as a document or an image.
- Linear Scale: Use this question type for your respondents to rate your question on a scale from one (or zero) to 10. This is perfect for rating a service or product.
- Multiple Choice Grid: Use this type for respondents to choose one answer per row from multiple columns. This is a good alternative to the Linear Scale if you have many items to rate.
- Checkbox Grid: Similar to the Multiple Choice Grid, use this for your respondents to select one or more answers per row. This type works well for questions surrounding product attributes like color, size, and style.
- Date: Use this question type when you want a date from your respondents. You can include the year or time when you create the question.
- Time: Use this question type when you want a time from your respondents. You can choose from a specific time of day or duration.
Since each question type is unique, once you choose the type from the drop-down box, the details you add next will vary. For instance, if you select a Multiple Choice question, you’ll add the list of choices but for a Multiple Choice Grid, you’ll enter choices for the rows along with labels for the columns.
Customize Your Questions
Even though the question types above have their own elements, there are a few options you can apply to each question as you see fit.


- Duplicate: To easily replicate a question with minor adjustments, hit the Duplicate button to copy it and make your changes.
- Delete: If you want to remove a question, click the Delete button (trash can).
- Required: To make a question Required, turn on this toggle. If a respondent does not answer the question, they’ll be unable to submit your form. If you enable this, a red asterisk will appear next to the question.
- More Options: To the right of Required for each question is a button for More Options (three dots). These items also vary per question type but can allow you to stir the direction of subsequent questions, shuffle the order of the answers, or validate answers. Be sure to check these out for your question types.
Give Your Form a Theme or Color
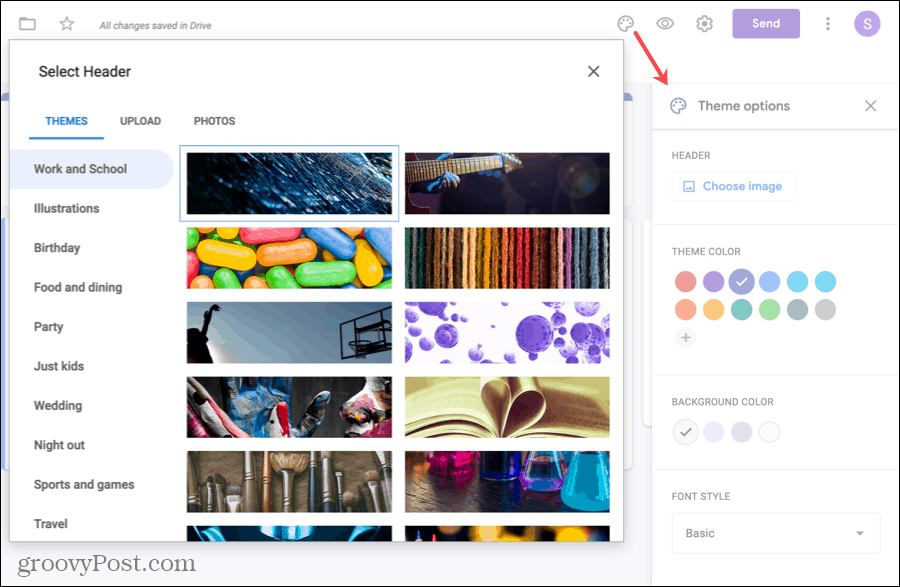
If you use a template, your form will have a theme in place that you can adjust if you like. And if you start with the Blank option, you may want to spruce up your form. Luckily, you can add an image, pick a color, and choose a font style.
At the top of your form, click the Customize Theme button (palette icon).


To select from additional themes like sports, wedding, or travel, or add a photo of your own, click Choose Image. Pick one of the tabs at the top for Themes, Upload, or Photos.
To change the color scheme, start by picking a Theme Color or click the plus sign for a custom color. After you choose the Theme Color, the Background Color options will adjust to match.
To use a different font, pick an option from the Font Style drop-down box. There are currently only four options, but have you covered from casual to formal.
Complete and Share Your Form
As you work on your form, changes are saved to Drive automatically, and you’ll see a note of this at the top of the form.
When you are ready to share it, click Send on the top right. You can send your form via email, obtain a link to it, or get the code to embed it. Just follow the prompts for the option you select and your form is set to accept answers!


View Your Responses
Revisit your form anytime and click the Responses tab at the top to view your answers. You can check out a summary, answers to specific questions, or individual responses, all in one handy spot.
Form Creation is Easy With Google Forms
Hopefully, these Google Forms basics will get you off to an excellent start with your first form. And if so, please share this how-to using the buttons below!


