AirPods Not Connecting to Mac: How to Fix
If your AirPods aren’t connecting to your Mac, you’ll need to troubleshoot the issue. Here’s how.
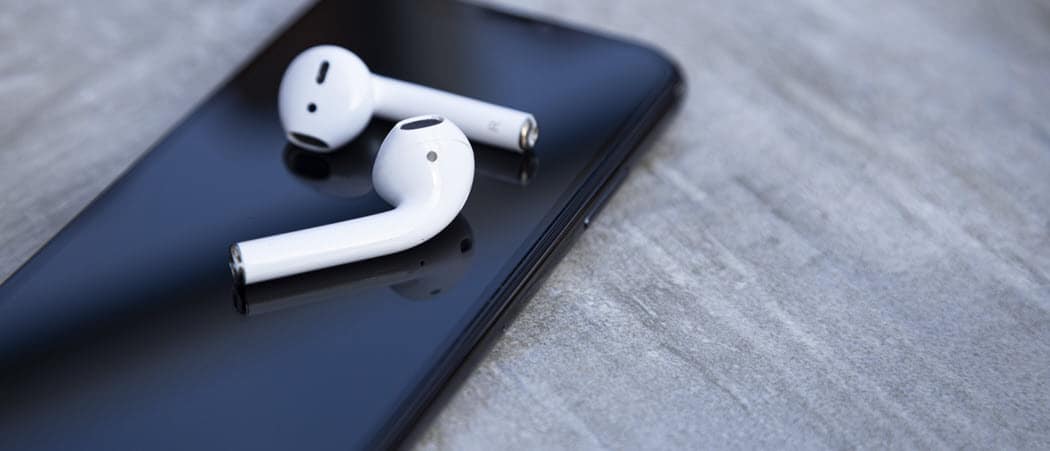
AirPods and Macs go together like mac and cheese, or at least they should. While Apple products are known for their quality and ease of use, that doesn’t mean that they’re perfect. For instance, there are sometimes issues that prevent you from connecting AirPods to other Apple devices, such as your Mac.
This can happen for a number of reasons, from an empty case battery to missing system updates. If your AirPods are not connecting to a Mac, you’ll need to troubleshoot the problem by following these steps.
Check Battery Levels
If you’re having trouble connecting your AirPods to a Mac, the first thing to consider is the case (and your AirPods) battery levels. If the charge in your AirPods is empty, you won’t be able to use them.
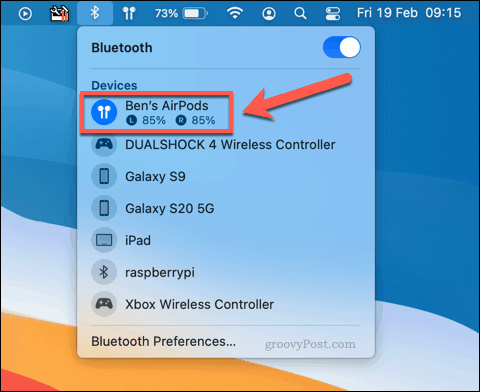
You can usually check this by opening your AirPods close to an iPhone or iPad device, where a pop-up battery alert will appear. On a Mac, you can usually see the available charge for AirPods in the Bluetooth menu on the menu bar.
This doesn’t work for Mac users without connecting them first, however. Without a connection, you can’t check your battery levels. The only option is to place your AirPods inside your charging case, then charge your case itself (with AirPods inside) for an hour or two.
AirPods charge pretty quickly, so after an hour of charging both the case and the AirPods, you should be able to connect them to your Mac as normal. If this doesn’t work, however, then another issue is probably behind the connection fault.
Check For Mac System Updates
While new macOS updates introduce new features and bug fixes, they can cause other issues. For instance, with the initial release of macOS Catalina in 2019, some users reported unusual Bluetooth issues that causes AirPods to disconnect at random.
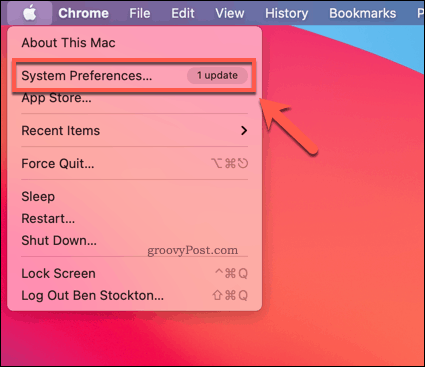
Before you try other methods, you should check to see if there are any available updates for your Mac. To do this, you’ll need to open the System Preferences menu by pressing the Apple menu > System Preferences.
If you have an update, the System Preferences option in the Apple menu will tell you.
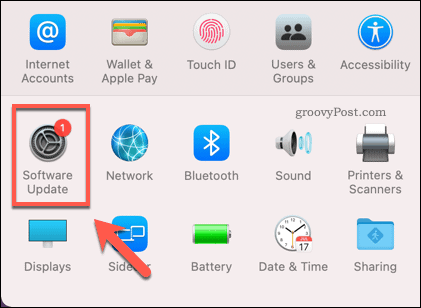
If you want to check for updates manually, press Software Update in the System Preferences menu.
macOS will check for any available updates in the Software Update menu. If an update is available, your Mac will download and and ready it for installation.
If an update is ready to install, press the Restart Now option.

Your Mac will take some time to complete the update, depending on the size and scope. Once the update is complete, test your AirPods by reconnecting them.
If the issue is system related and the bug is fixed, this should allow you to connect and use them.
Set AirPods as the Correct Output and Input Device
When you connect your AirPods to your Mac, macOS should automatically switch to using the AirPods as your sound output device (or input device for the AirPods microphone). If this doesn’t happen, however, the AirPods could remain connected, but unusable.
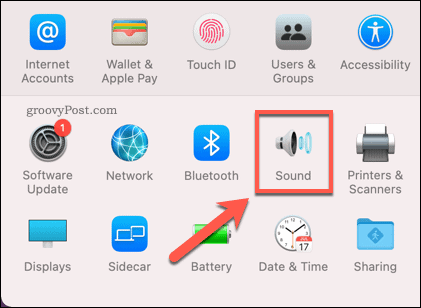
To change this, you’ll need to change your Mac’s sound output and input device settings. To do this, open the System Preferences menu by pressing the Apple menu > System Preferences.
In the System Preferences menu, press the Sound option.
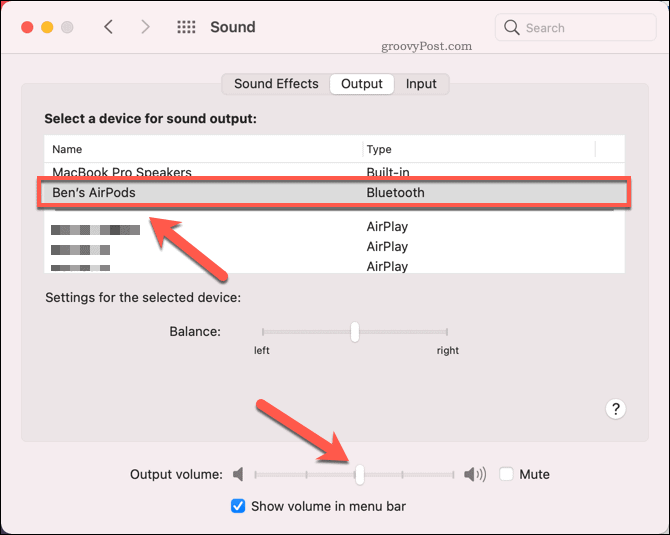
In the Sound menu, press the Output tab.
To use your AirPods for sound output, select the AirPods option from the device list provided. This is only possible if your AirPods are currently connected to your Mac via Bluetooth, however.
You should also ensure that the Output volume slider at the bottom is at a suitable level to allow you to hear sounds through your AirPods.
To use your AirPods as a microphone, switch to the Input tab, then select the AirPods option from the device list.
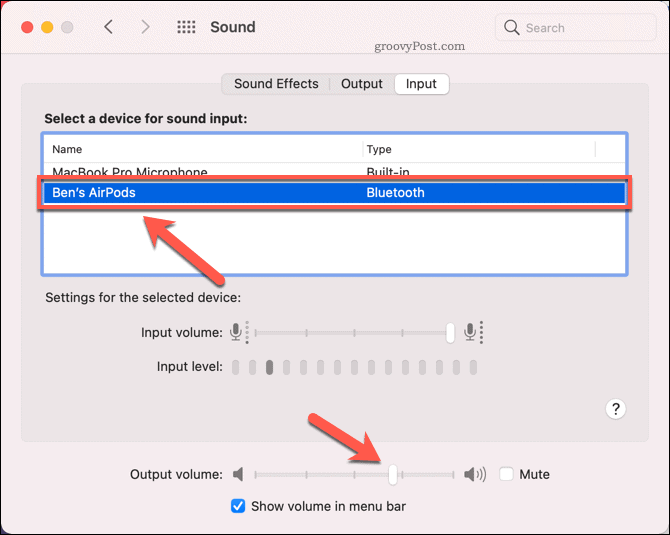
If the change is successful, you should be able to hear sound output through your AirPods or use your AirPods microphone for recording and voice communication.
However, if you switch to using your AirPods for both sound input and output, you may find that your sound output quality decreases significantly. This is because macOS switches the audio codec to Bluetooth Synchronous Connection Oriented Link (SCO) in this scenario, which is better for video calling, but reduces the sound output quality in the process.
Unfortunately, there isn’t a way to stop this from happening at present. If the quality of your sound output is reduced using your AirPods, make sure to switch back to using your built-in mic for sound input or use another third-party, plug-in mic instead.
Reset Your AirPods and Re-Pair Them
A persistent AirPod connection issue could point to a problem with your Bluetooth configuration. One fix for this issue is to remove your AirPods from your Bluetooth pairing list, then reset your AirPods.
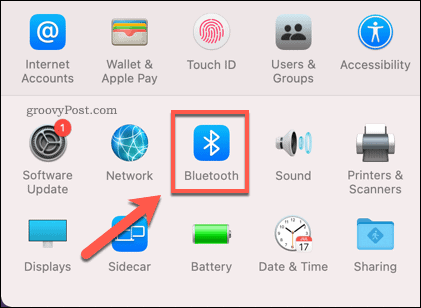
This will wipe the slate clean, allowing you to reconnect the AirPods to your Mac as if they were new. To start, open the System Preferences menu by pressing the Apple menu > System Preferences.
In System Preferences, press the Bluetooth option.
In the Bluetooth settings menu, right-click your AirPods, then press the Remove option.
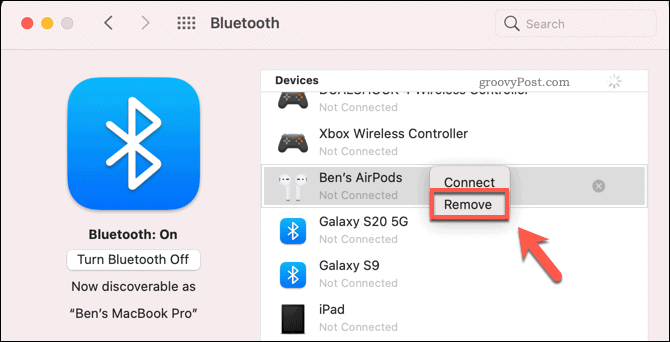
Press Forget Device to remove the device from your settings.

This will remove the pairing between your AirPods and your Mac. The next step is to reset your AirPods.
To do this, place your AirPods in the charging case. With the case lid open, press and hold the button on the back of the case for approximately 15 seconds. The LED inside the case will flash amber once this is complete.
Once your AirPods are reset, return to the Bluetooth settings menu and hold the case button for a few seconds until the case LED begins to flash white. Your AirPods should become listed in the Device list—press Connect to connect them to your Mac.

If the steps above are successful, your AirPods should connect to your Mac, allowing you to resume using them.
Next Steps for Your Mac
The steps above should help you to resolve common issues with AirPods not connecting to a Mac. If you’re having other issues with your Mac or AirPods, it might be time to check your warranty and consider a replacement or repair.
Apple products aren’t the only option, however. If you’re considering jumping to Windows, you’ll need to think about how to migrate from Mac to Windows without losing your core files and settings.
If you decide to upgrade to a new Mac, however, you’ll need to remember some important steps, such as backing up your files and logging out of core services. You can also use your Apple products with other devices, so if you’ve got AirPods going spare, you can always connect them to Android instead.


