How-To Use HDR Toning To Simulate a HDR Image Effect with Photoshop CS5
In our previous Photoshop tutorial, I guided you through the world of HDR photography using Photoshop CS5 and Bridge CS5. As groovy as HDR photos look, one serious problem for most groovyReaders is you probably don’t have 3 photographs of the same image at 3 different levels of exposure. The problem is you need 3 pictures of the same image at different exposures to create a standard HDR image. So with that in mind, is there a way to create HDR images out of your old image collection? Good news! Today we’ll show you how to simulate an HDR effect with only 1 image using HDR Toning in Photoshop CS5.
Below is the step-by-step instructions however, feel free to watch my video if you prefer video over steps.
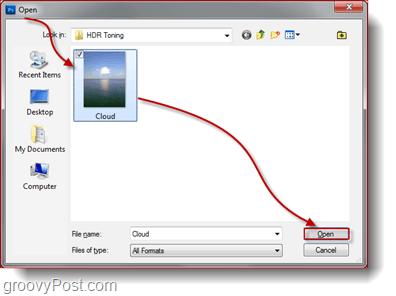
Step 1 – Opening Your Image
Open up Photoshop CS5 and press Ctrl+O to evoke the Open dialog. From there you can browse to the image that you want to make the HDR Toning to.
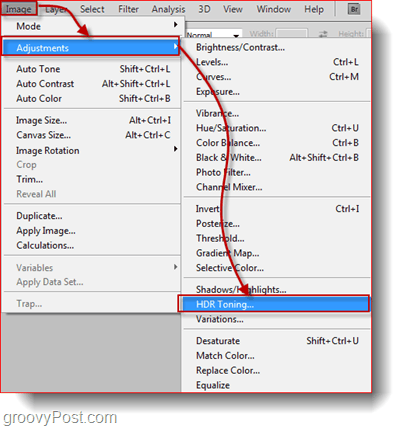
Step 2 – Opening The HDR Toning Dialog Box
Once your image is open, go to Image, Adjustments, HDR Toning to open the HDR Toning dialog.
Step 3 – Adjusting the HDR Toning
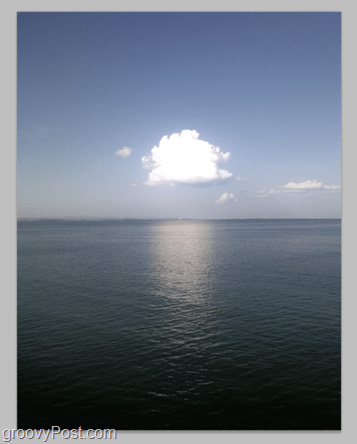
Now you’ll notice that the dialog that appears has exactly the same settings as the Merge To HDR Pro dialog that we saw when we were working with actual HDR Photography. In the HDR Toning dialog you can do the exact same things as in the Merge to HDR Pro dialog, so go ahead and begin by choosing a preset, just like you did last time. This time I think I’m start off with Monochromatic Low Contrast…
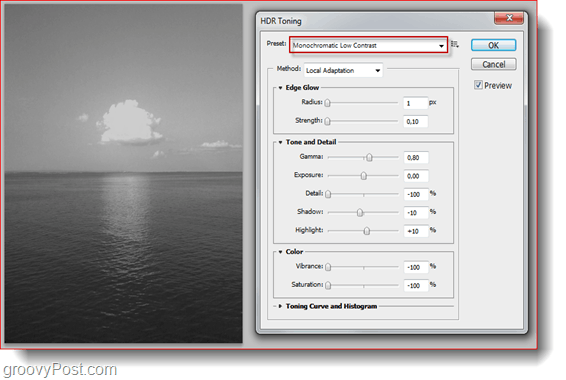
…and additionally adjust the sliders to give the image some more brightness and a little bit of color.
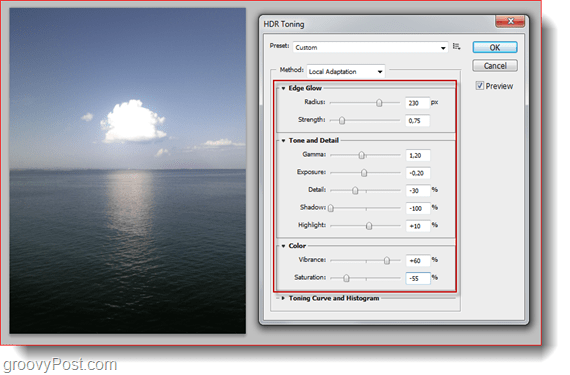
Now let’s hit OK and all image adjustments that we made will take effect on the image.
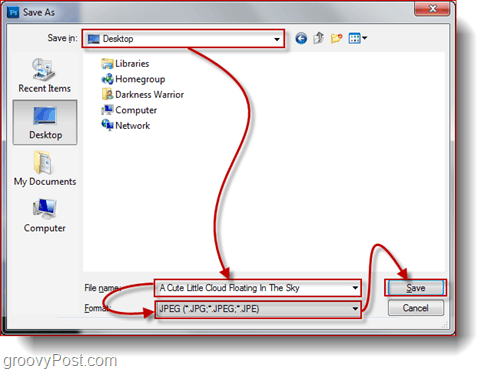
Step 4 – Saving
Time to save. You can press Ctrl+S to save the image by replacing the original, but most people prefer to keep the original just in case, so to save a new copy, press Ctrl+Shift+S. Pick a directory, choose the file format, give your new image a name and you’re good to go!
Now I know what you are thinking…“If Photoshop can simulate an HDR image, then why should I bother making three separate images to merge?”.
My answer, Photoshop’s HDR Toning still lacks the ability to make images fully resemble HDR. So if you’re a person who pays a lot of attention even to the smallest details and likes everything to be as perfect and as groovy as possible, you should leave this method and go back to The Classic Way To Make HDR Photographs. Personally, I only use this method when I have a great photo but didn’t manage to get 3 shots of it.


chewbie
August 31, 2010 at 4:58 am
I see no point to keeping your windows status bar on the bottom – drag it to one side if you have a widescreen monitor!
more good, usable desktop real estate imo
Jordan Austin
August 31, 2010 at 9:31 am
Haha, it’s funny cause I agree with you – but I’m hardwired with I taskbar on the bottom. So it almost throws me off if I move mine. :(
MrGroove
August 31, 2010 at 3:58 pm
I moved my taskbar to the left side about 3 months ago. Never looking back!
Jordan Austin
August 31, 2010 at 4:17 pm
I’ve tried a few times, just not working for me.
Brickmonkey
September 1, 2010 at 8:58 am
I put mine at the top to be more like a Mac to keep me sane between home and work. It took about a month on the Windows box to get accustomed.
Please no flame wars here… ;)