
Last time we showed you how to setup Ubuntu on your Windows computer as a dual-boot option with Wubi. This time we’ll look at how you can run Ubuntu simultaneously as a virtual machine (VM) in VirtualBox. The great thing about VirtualBox is that it doesn’t require you to create any boot media. Also, both VirtualBox and Ubuntu are free. But, the catch is that you’ll need a PC with enough extra RAM and CPU to run a computer within your computer.
Before we get started:
You’ll need VirtualBox installed on your computer in order to follow this guide.
Article Map:
Because this is a rather long guide, it’s broken into two sections. Click a jumplink to jump to that part of the article.
Let’s get started, shall we?
Install Ubuntu in VirtualBox as a VM
Step 1

Step 2
Now, switch over to VirtualBox and Click the New button.

Step 3
Name your OS something Ubuntu related, the name doesn’t affect anything though. Then choose Linux as the operating system and Ubuntu as the version.

Step 4
See this guide for setting up the remaining Virtualbox Virtual Machine and Virtual Disk settings.*
*It just explains the further process of setting up the virtual hard disk and a few other things.
Step 5
Once you’ve finished creating the Virtual Machine it should show up in your VirtualBox manager. From here Select your new Ubuntu VM and Click Start.

Step 6
A few seconds after you load the virtual machine, it should prompt you with a First Run Wizard. On the 2nd page of this you’ll be asked for installation media. Click the Browse button.

Step 7
Browse through your computer to the location you downloaded the Ubuntu ISO file from Step 1. Select it and Click Open.

Step 8
A summary page will display, double check that you are running the Ubuntu ISO file as your source, then Click Finish.

Step 9
The Ubuntu installer should boot up, and you’ll have an option to choose your language. You’ll also be asked whether to just boot Ubuntu using the disk (Try Ubuntu) or if you want to Install it. Since we’re using VirtualBox, I can’t imagine why you wouldn’t want to install it, so let’s do that.

Step 10
On the next page Check both of the available boxes:
- Download updates while installing
- Install this third-party software
It will make things a lot easier on you, even though the installation will take slightly longer.

Step 11
On the next page Click the bullet labled Erase and use the entire disk.

Step 12
Click the Install Now button.

Step 13
Now we’ll play the waiting game for a little bit. The world map loading screen will let you select your Time Zone, once it finishes loading Click Forward.

Step 14
Select your keyboard layout and language.

Step 15
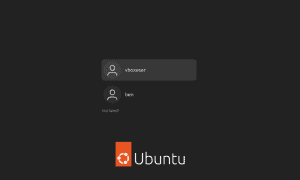
Now we need to make an account that you will use to login to Ubuntu. Don’t forget your password, if you do you might have to redo this whole thing!

Step 16
Now we’ll play the waiting game again, but after this it will be fully installed.

Step 17
Once installation finishes, Ubuntu will prompt you to restart the virtual computer.

Done!
When the machine boots back up, Ubuntu should be installed, updated, and ready to use. Note that you might be prompted with the installation again if the Ubuntu ISO file is still loaded into VirtualBox. To keep this from happening follow the instructions below for setting up Virtual Guest Additions.

Install VirtualBox Guest Additions
VirtualBox Guest Additions allow Ubuntu to automatically change it’s resolution when you resize the virtual machine window. It also integrates keyboard and mouse functionality so that your mouse doesn’t get trapped in the VM all the time. There are a few other benefits as well, but those two alone should be reason enough to want to install the additions, which you should do immediately!
Step 1
With the Ubuntu virtual machine running, Click the Devices menu from VirtualBox and Select CD/DVD Devices > VBoxGuestAdditions.iso.

Step 2
The disk should appear on the Ubuntu desktop, Right-Click the disk icon and Select Open with Autorun Prompt.

Step 3
A window will appear asking if you really do want to run this software, Click Run.

Step 4
Type in your Ubuntu account password (the one we made in Step 15 above), this is the same password you use to log into Ubuntu.

Step 5
Now, one last time, you just have to wait. The installation should take 1-2 minutes. Once it finishes, Press Return (or Enter) on your keyboard.

Step 6
All that is left to do now is Restart the virtual computer. Click the Power icon at the top-right of the screen and Select Restart…

Done!
Ubuntu should now have VirtualBox Guest Additions installed. Congrats, you are done!


Simon
April 23, 2011 at 2:47 pm
Its way easier to just get a VM image or virtualbox image.
VMWare images can be found here:
http://www.thoughtpolice.co.uk/vmware/
And here’s a huge range of different VirtualBox images:
http://virtualboxes.org/
grooveDexter
April 23, 2011 at 3:04 pm
@Simon, great point. Downloading a VHD (virtual hard disk) or the VMWare/VBox equivalent will accomplish the same thing without the installation time.
However, make sure that you trust the source, it would be pretty easy for someone to maliciously manipulate an install on a virtual drive.